Creating a Securechat App using BGE-large Embedding and base Llama2-7b Summarisation Models
This example will take you through the procedure of deploying a LLM chatbot that can answer questions based on specific dataset(s) provided by you.
Prerequisites
You need to create a folder in your workspace. This folder will contain all the documents you are going to use for data ingestion.
You can directly put your document-containing folder in the workspace from your local system by using the filebrowser application on the workspace tab in DKubeX UI, or you can create a folder from the CLI to download the files from their URL.
Note
If you are going to use Skypilot for the ingestion process, make sure to keep the folder inside the
/home/data/directory on your DKubeX setup. As this directory can be accessed only from the CLI, you will need to first place it on your workspace, and then move it to the/home/data/directory using the CLI. Also, if this folder is not available on your workspace, you can create it by using the following command.sudo mkdir /home/data
Open the terminal application and export the following variables to your workspace by running the following commands on your terminal.
Replace the
your DKubeX URLwith the URL of your setup,<your DKubeX API key>part with your DKubeX API key,<your huggingface token>part with your Huggingface token to access the Llama2-7B model, and<username>with your DKubeX workspace name.Hint
Use the following steps to find your DKubeX API key:
Open the DKubeX UI and click on your username on upper-right corner of the UI.
Click on the API Key option from the dropdown menu. A pop-up dialog box containing your DKubeX API key will open. Copy and note down this key.
export PYTHONWARNINGS="ignore"
export OPENAI_API_KEY="dummy"
export DKUBEX_URL="<your DKubeX URL>"
export DKUBEX_APIKEY="<your DKubeX API key>"
export HF_TOKEN="<your huggingface token>"
export NAMESPACE="<username>"
export HOMEDIR=/home/${NAMESPACE}
The Llama2-7b model needs to be deployed on DKubeX.
Note
For detailed information regarding this section, please refer to Deploying LLMs in DKubeX.
Here we will deploy the base Llama2-7B model, which is already pre-registered with DKubeX.
Note
This workflow requires an a10 GPU node. Make sure your cluster is equipped with such. Also, in case you are using any other type of GPU node, make sure to use the label for that node which you have put during DKubeX installation process.
Deploy the base Llama2-7B model using the following command.
d3x llms deploy --name=llama27bbase --model=meta-llama--Llama-2-7b-chat-hf --type=a10 --token ${HF_TOKEN} --publishNote
In case you are using a EKS setup, please change the value of the flag --type from a10 to g5.4xlarge in the following command. Also, in case you are using any other type of GPU node, make sure to use the label for that node which you have put during DKubeX installation process.
You can check the status of the deployment from the Deployments page in DKubeX or by running the following command.
d3x serve listWait until the deployment is in running state.
Data ingestion and creating dataset
Note
This example uses the BAAI/bge-large-en-v1.5 embeddings model for data ingestion.
Data ingestion process can be done with or without using Skypilot. The procedures for both are given below.
A few .yaml files are required to be used in the ingestion process.
On the Terminal application in DKubeX UI, run the following commands. Replace the
<username>part with your DKubeX workspace name.cd && git clone -b v0.8.1 https://github.com/dkubeio/dkubex-examples.git cp ${HOMEDIR}/dkubex-examples/rag/ingestion/ingest.yaml ${HOMEDIR}/ingest.yaml && cp ${HOMEDIR}/dkubex-examples/rag/ingestion/custom-pyloaders/custom_sdr.py ${HOMEDIR}/custom_sdr.py
You need to provide proper details on the ingest.yaml file. Run
vim ${HOMEDIR}/ingest.yamland make the following changes.On the
reader:inputs:loader_args:input_dir:section, provide the absolute path to your dataset folder, i.e. in this case,"/home/<your username>/contract-nli/"(Provide your DKubeX username in place of<your username>).On the
reader:pyloader:section, provide the absolute path to thecustom_sdr.pyfile, i.e. in this case,/home/<your username>/custom_sdr.py(Provide your DKubeX username in place of<your username>).
You can also modify and customize several other options in the ingest.yaml file according to your needs, including the splitter class, chunk size, embedding model to be used, etc.
Attention
The
readersection in the ingest.yaml file denotes the type of dataloader to be used for the ingestion process. If you are going to use any other source of data for ingestion as compared to local directory data shown in this example, you need to provide the appropriate details for that type of dataloader.For more information about dataloaders please visit How to use different Data Loaders (Data Readers).
You can use multiple type of data sources by providing the reader details simultaneously under the
readersection in the ingest.yaml file.
Some of the dataloaders require separate pyloader files. Make sure to provide them, if needed.
Use the following command to trigger the ingestion process.
d3x dataset ingest -d <dataset name> --config <absolute path to the ingest.yaml file>d3x dataset ingest -d contracts --config /home/ocdlgit/ingest.yamlNote
The time taken for the ingestion process to complete depends on the size of the dataset. Please wait patiently for the process to complete.
In case the terminal shows a timed-out error, that means the ingestion is still in progress, and you will need to run the command provided on the CLI after the error message to continue to get the ingestion logs.
The record of the ingestion and related artifacts are also stored in the MLFlow application on DKubeX UI.
To check if the dataset has been created, stored and are ready to use, use the following command:
d3x dataset listTo check the list of documents that has been ingested in the dataset, use the following command:
d3x dataset show -d <dataset name>d3x dataset show -d contracts
Note
Make sure that the dataset folder is placed inside the /home/data/ directory on your DKubeX setup.
A few .yaml files are required to be used in the ingestion process. These files needs to be placed in the
/home/data/directory.On the Terminal application in DKubeX UI, run the following commands:
cd && git clone -b v0.8.1 https://github.com/dkubeio/dkubex-examples.git
sudo cp ${HOMEDIR}/dkubex-examples/rag/ingestion/ingest.yaml /home/data/ingest.yaml && sudo cp ${HOMEDIR}/dkubex-examples/rag/ingestion/custom-pyloaders/custom_sdr.py /home/data/custom_sdr.py
You need to provide proper details on the ingest.yaml file. Run
sudo vim /home.data/ingest.yamland make the following changes.On the
reader:inputs:loader_args:input_dir:section, provide the absolute path to your dataset folder, i.e. in this case,"/home/<your username>/contract-nli/"(Provide your DKubeX username in place of<your username>).On the
reader:pyloader:section, provide the absolute path to thecustom_sdr.pyfile, i.e. in this case,/home/<your username>/custom_sdr.py(Provide your DKubeX username in place of<your username>).
You can also modify and customize several other options in the ingest.yaml file according to your needs, including the splitter class, chunk size, embedding model to be used, etc.
Attention
The
readersection in the ingest.yaml file denotes the type of dataloader to be used for the ingestion process. If you are going to use any other source of data for ingestion as compared to local directory data shown in this example, you need to provide the appropriate details for that type of dataloader.For more information about dataloaders please visit How to use different Data Loaders (Data Readers).
You can use multiple type of data sources by providing the reader details simultaneously under the
readersection in the ingest.yaml file.
Some of the dataloaders require separate pyloader files. Make sure to provide them, if needed.
Use the following command to trigger the ingestion process.
d3x dataset ingest -d <dataset name> --remote-sky --sky-cluster=<name of sky cluster to be created> --sky-accelerator="<accelerator type>:<number of accelerators>" --dkubex-apikey ${DKUBEX_APIKEY} --dkubex-url ${DKUBEX_URL} --config /home/data/ingest.yamld3x dataset ingest -d contracts --remote-sky --sky-cluster=skyingest --sky-accelerator="A10G:1" --dkubex-apikey ${DKUBEX_APIKEY} --dkubex-url ${DKUBEX_URL} --config /home/data/ingest.yamlNote
The time taken for the ingestion process to complete depends on the size of the dataset. Please wait patiently for the process to complete.
In case the terminal shows a timed-out error, that means the ingestion is still in progress, and you will need to run the command provided on the CLI after the error message to continue to get the ingestion logs.
The record of the ingestion and related artifacts are also stored in the MLFlow application on DKubeX UI.
To check if the dataset has been created, stored and are ready to use, use the following command:
d3x dataset listTo check the list of documents that has been ingested in the dataset, use the following command:
d3x dataset show -d <dataset name>d3x dataset show -d contracts
Creating and accessing the chatbot application
From the DKubeX UI, open and log into the SecureLLM application. Once open, click on the Admin Login button and log in using the admin credentials provided during installation.
Hint
In case you do not have the credentials for logging in to SecureLLM, please contact your administrator.
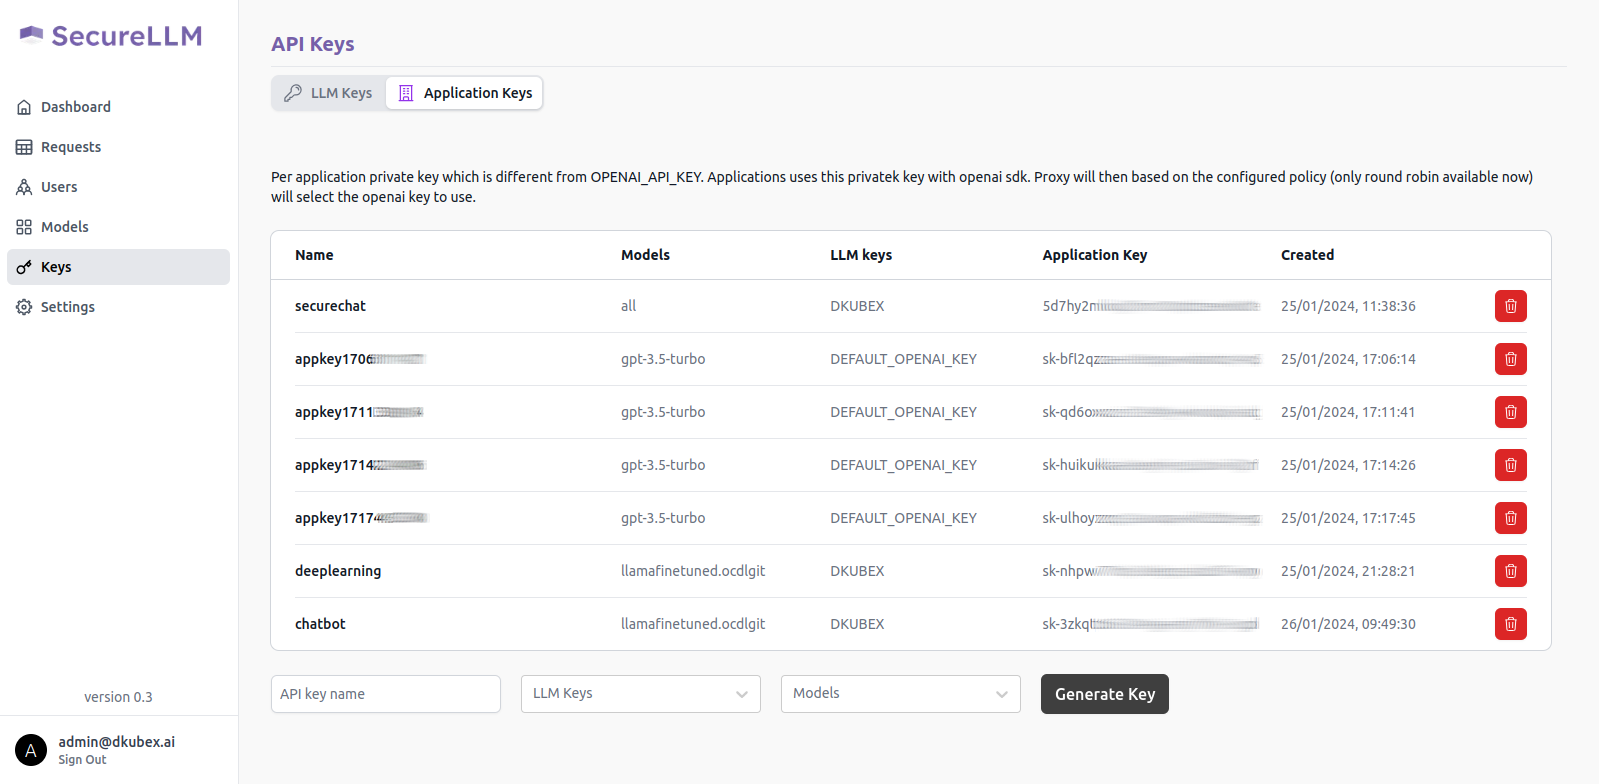
On the left sidebar, click on the Keys menu and go to the Application Keys tab on that page.
To create a new key for your application, use the following steps:
On the API key name field, provide a unique name for the key to be created.
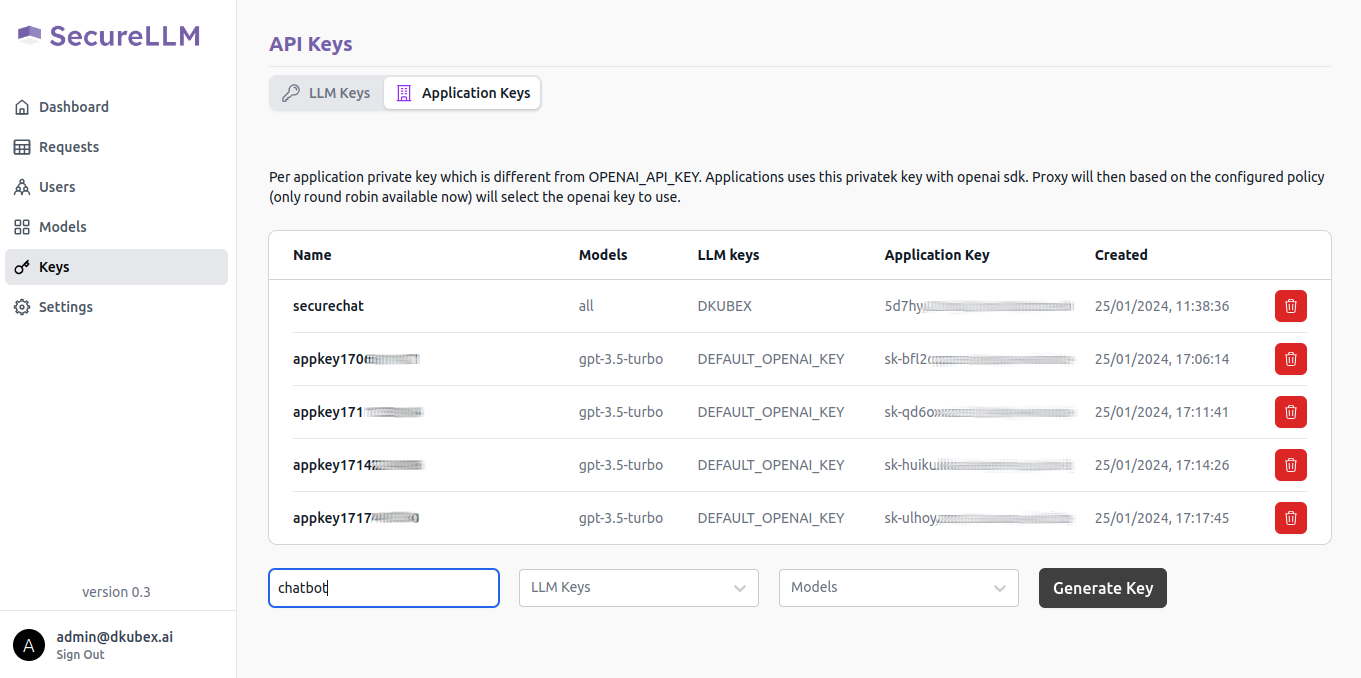
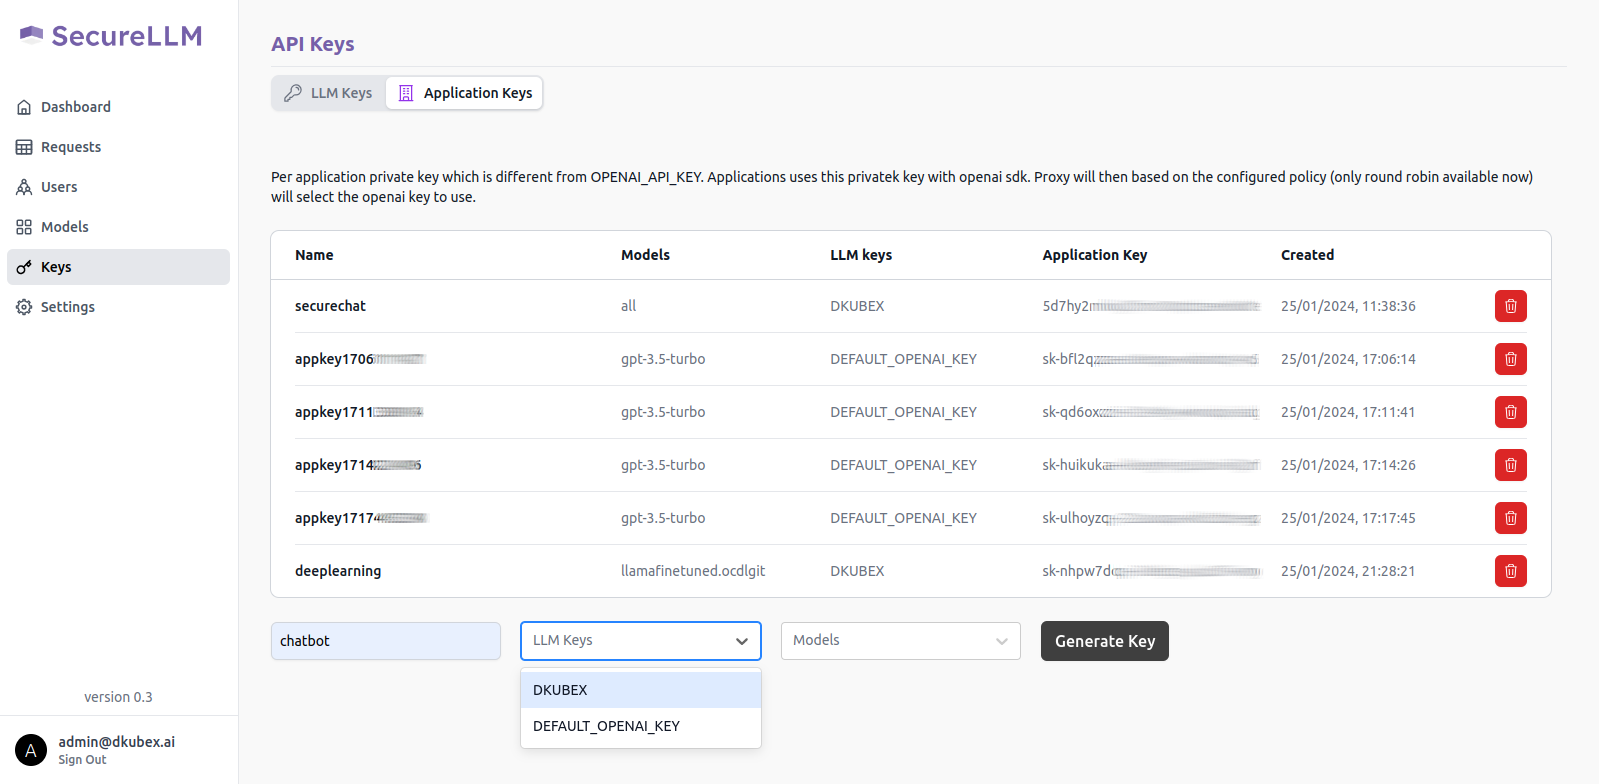
From the LLM Keys dropdown list, select DKUBEX.
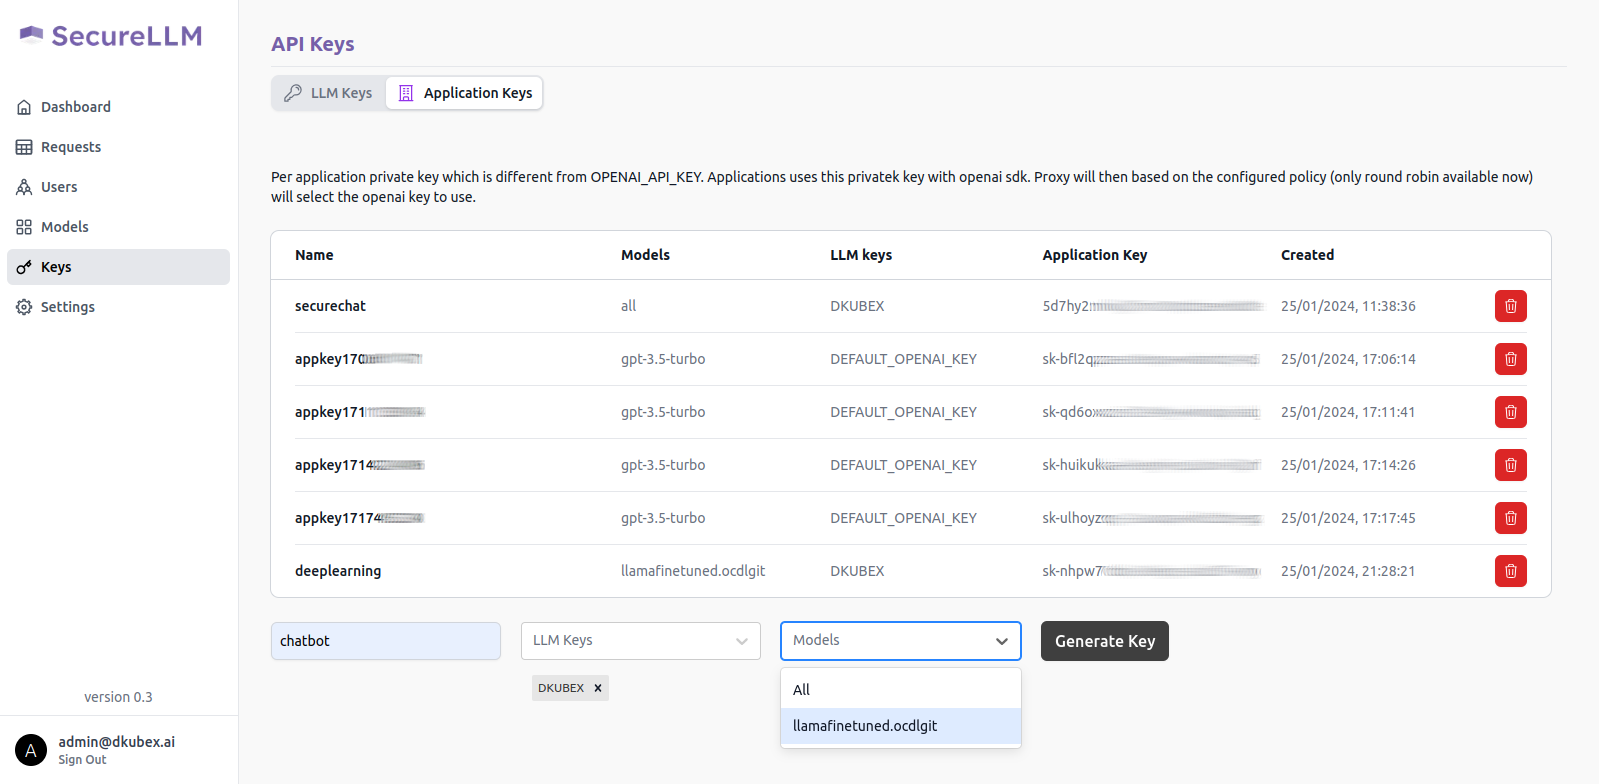
From the Models dropdown list, select your deployed base model.
Click on the Generate Key button.
A pop-up window will show up on your screen containing the application key for your new application. Alternatively, you can also access your application key from the list of keys in the Application Key tab.
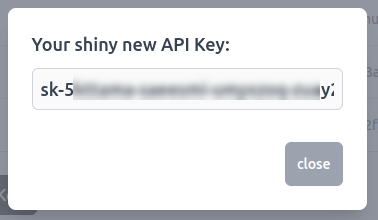
Copy this application key for further use, as it will be required to create the chatbot application. Also make sure that you are copying the entire key including the sk- part.
From the DKubeX UI, go to the Terminal application.
You will need to configure and use the
query.yamlfile from the dkubex-examples repo to be used in the query process in the Securechat application.Run the following command to put the
query.yamlfile on your workspace.cd && cp dkubex-examples/rag/query/query.yaml ${HOMEDIR}/query.yamlRun
vim ${HOMEDIR}/query.yamland provide the following details on thequery.yamlfile. Once provided, save the file.On the
chat_engine:url:section, provide the endpoint URL of the deployed model to be used. The syntax for the URL is provided below. Replace<your username>part with your username."http://llama27bbase-serve-svc.<your username>:8000/v1/"Note
You are providing your own username here because the
llama27bbasedeployment was done from your workspace earlier. If you are going to use a model deployed by any other user, you will need to provide the proper deployment name in place ofllama27bbaseand the username of that user.On the
chat_engine:llmkey:section, provide the serving token for the deployed model to be used. To find the serving token, go to the Deployments page of DKubeX UI and click on the deployed model name. The serving token will be available on the model details page.On the
securellm:appkey:section, provide the application key that you created earlier on the SecureLLM application.On the
securellm:dkubex_url:section, provide the URL to access DKubeX.On the
tracking:experiment:section, provide a name for the experiment under which the query records and artifacts will be stored in MLFlow.
You will need to configure and use the
securechat.yamlfile from the dkubex-examples repo to configure and create the chatbot application.Run the following command to put the
securechat.yamlfile on your workspace.cd && cp dkubex-examples/rag/securechat/securechat.yaml ${HOMEDIR}/securechat.yamlRun
vim ${HOMEDIR}/securechat.yamland provide the following details on thesecurechat.yamlfile. Once provided, save the file.On the
name:field, provide a unique name to be used for the chatbot application. In this example, we will use the namendabase.On the
env:SECUREAPP_ACCESS_KEY:field, provide a password which will be used to access the chatbot application.On the
env:FMQUERY_ARGS:field, provide the following details:Use the argument
llmto specify that the chatbot application will use the LLM model deployment (llama27bbase) in DKubeX.Provide the name of the dataset, i.e.
contractsafter the--datasetflag.After the
-eflag, provide the endpoint URL of the deployed model to be used. The syntax for the URL is provided below. Replace<your username>part with your username."http://llama27bbase-serve-svc.<your username>:8000/v1/"Note
You are providing your own username here because the
llama27bbasedeployment was done from your workspace earlier. If you are going to use a model deployed by any other user, you will need to provide the proper deployment name in place ofllama27bbaseand the username of that user.Provide the absolute path of the
query.yamlfile that you created earlier after the--configflag. It should be/home/<your username>/query.yamlfor this example. Replace the<your username>part with your DKubeX username.
On the
ingressprefix:field, provide a unique prefix to be used for the chatbot application. In this example, we will use the prefix/ndabase. This will be used in the application URL. e.g.https://123.45.67.890:32443/ndabase
Launch the app deployment with the following command:
d3x apps create -c ${HOMEDIR}/securechat.yamlTo check the status of the app deployment, use the following command:
d3x apps listOnce the app deployment status becomes running, you can access the application from the Apps page of DKubeX UI. Provide the application key that you set in the
SECUREAPP_ACCESS_KEYfield earlier to start using the chat application.