Data Science Tutorial
This section takes the first time user through the DKube workflow using a sample program and dataset. The MNIST model is used to provide a simple, successful initial experience. The details of the full workflow and the definition of all of the fields is available at Data Science Dashboard & Workflow
More examples are available at DKube Examples
General Workflow
This section uses a simple workflow with a limited number of fields and options. A more detailed explanation of the entire workflow and all of the fields is available in the table below.
Workflow Action |
Detailed Explanation |
|---|---|
Load the program code, dataset, and model folders |
|
Create and open a DKube JupyterLab Notebook |
|
Create a Training Run |
|
Create a model from the Training Run |
|
Publish & deploy the model |
Create Code Repo
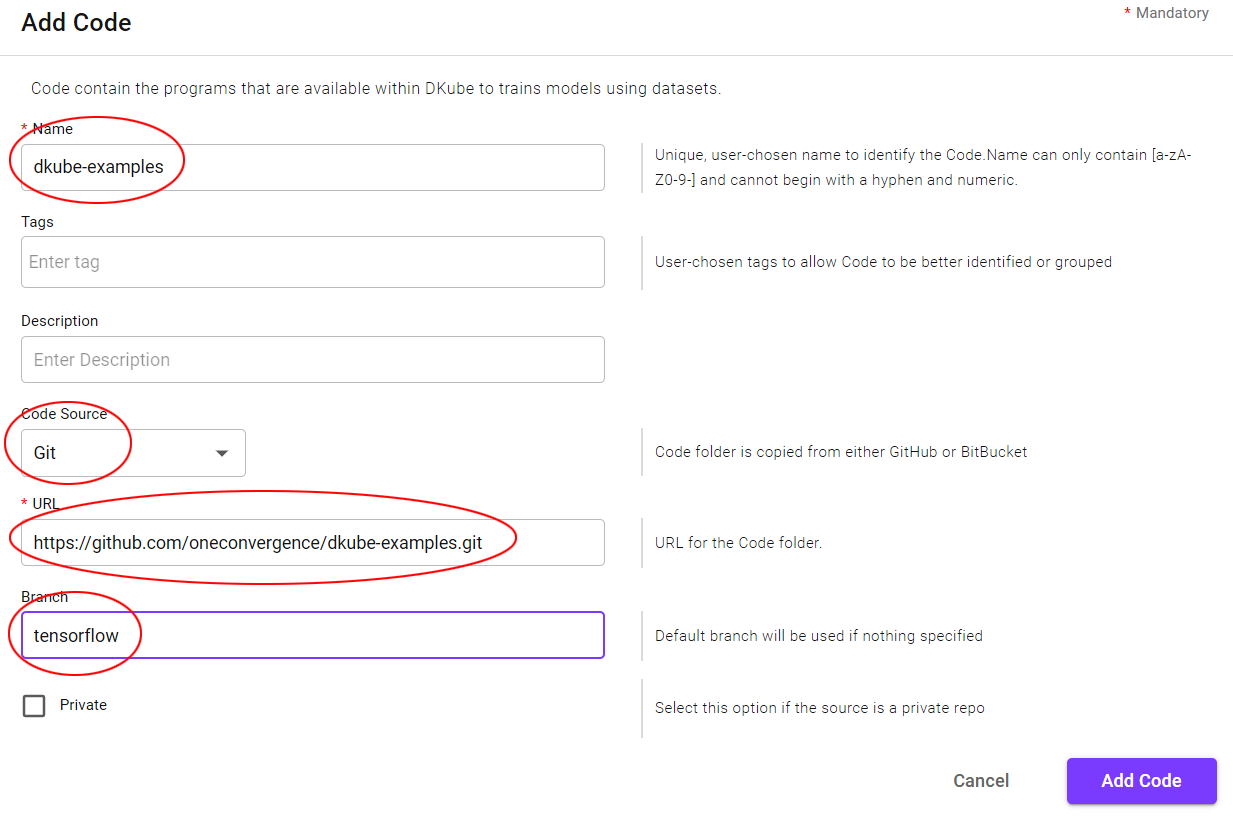
Load the MNIST code folder from a GitHub repository into DKube from the Repo menu by selecting “+ Code”.

The fields should be filled in as follows, then select “Add Code”.
Field |
Value |
|---|---|
Name |
dkube-examples |
Code Source |
Git |
url |
https://github.com/oneconvergence/dkube-examples.git |
Branch |
tensorflow |
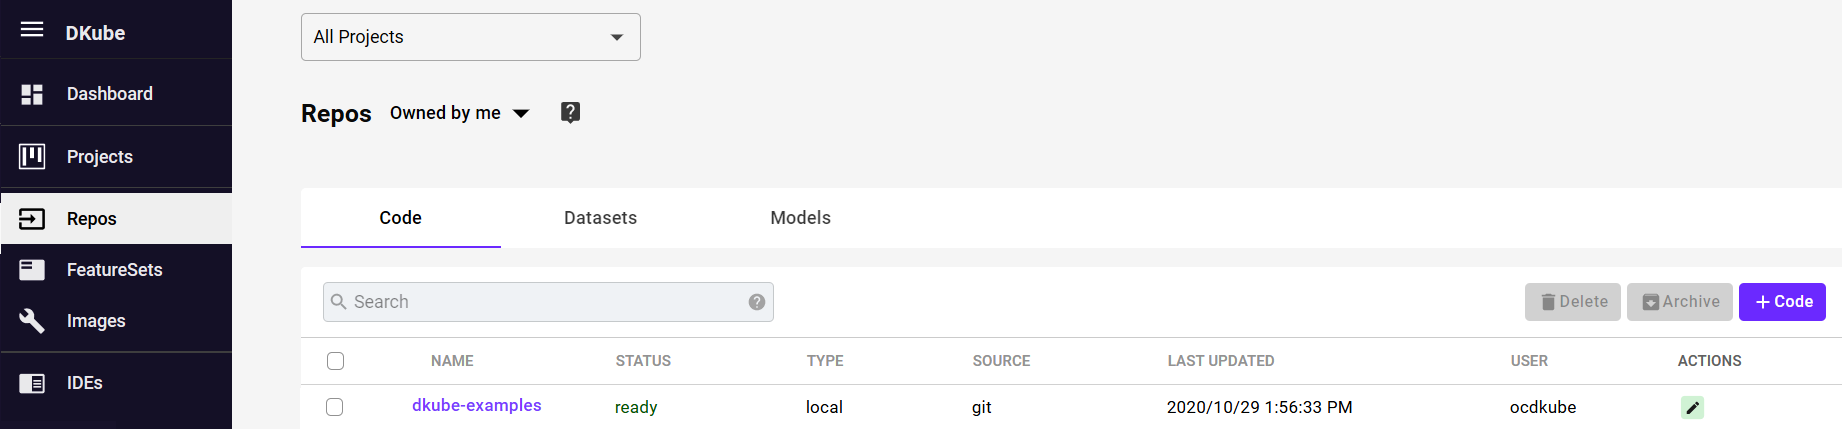
This will create the mnist Code repo within DKube.
Create Dataset Repo
Load the MNIST dataset folder from the Datasets menu by selecting “+ Dataset”.

The fields should be filled in as follows, then select “Add Dataset”.
Field |
Value |
|---|---|
Name |
mnist |
Versioning |
DVS |
Dataset Source |
Other |
url |
https://s3.amazonaws.com/img-datasets/mnist.pkl.gz |

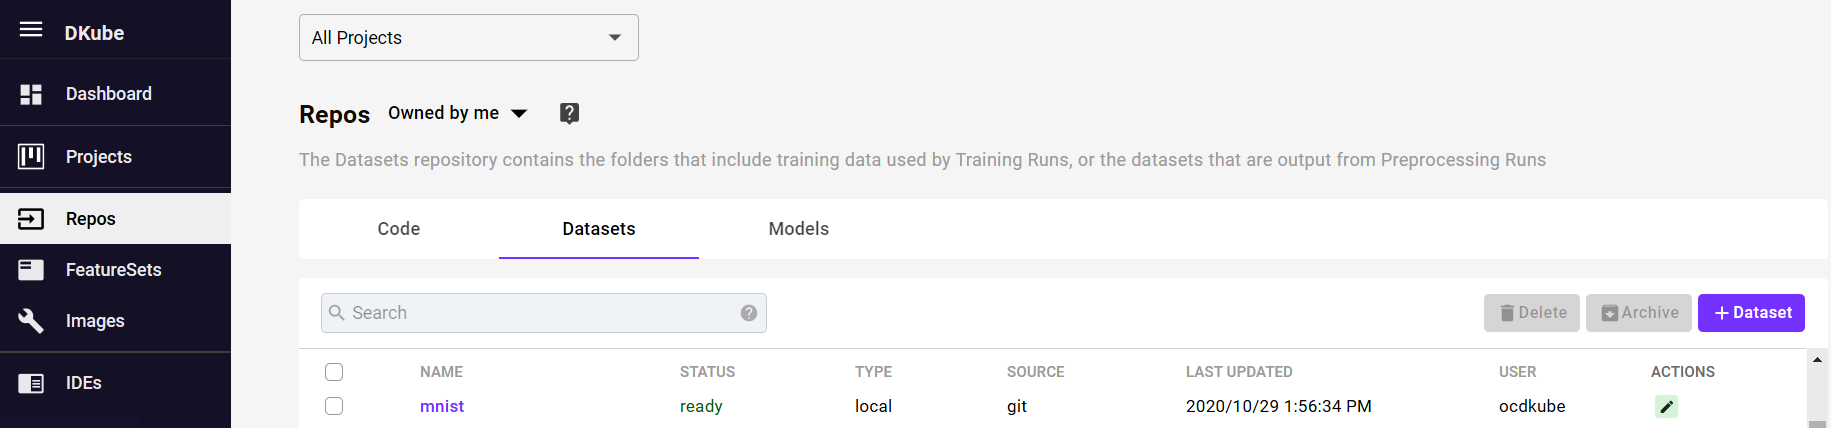
This will create the mnist Dataset.
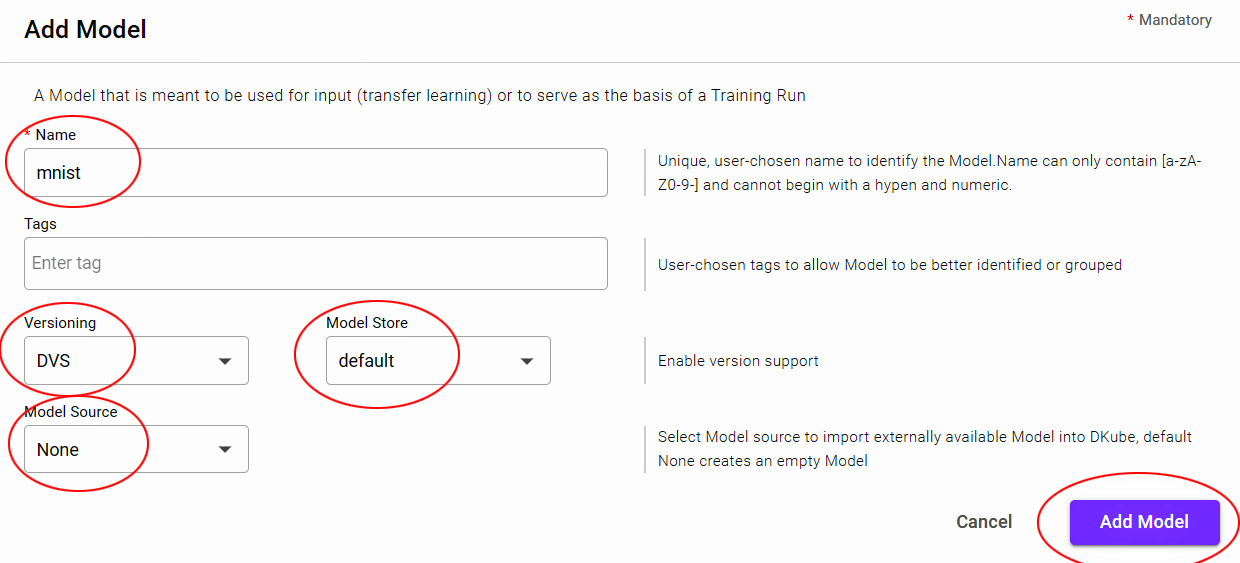
Create Model Repo
A Model needs to be created that will become the basis for the output of the Training Run later in the process.

The fields should be filled in as follows, then select “Add Model”.
Field |
Value |
|---|---|
Name |
mnist |
Versioning |
DVS |
Model Store |
default |
Model Source |
None |
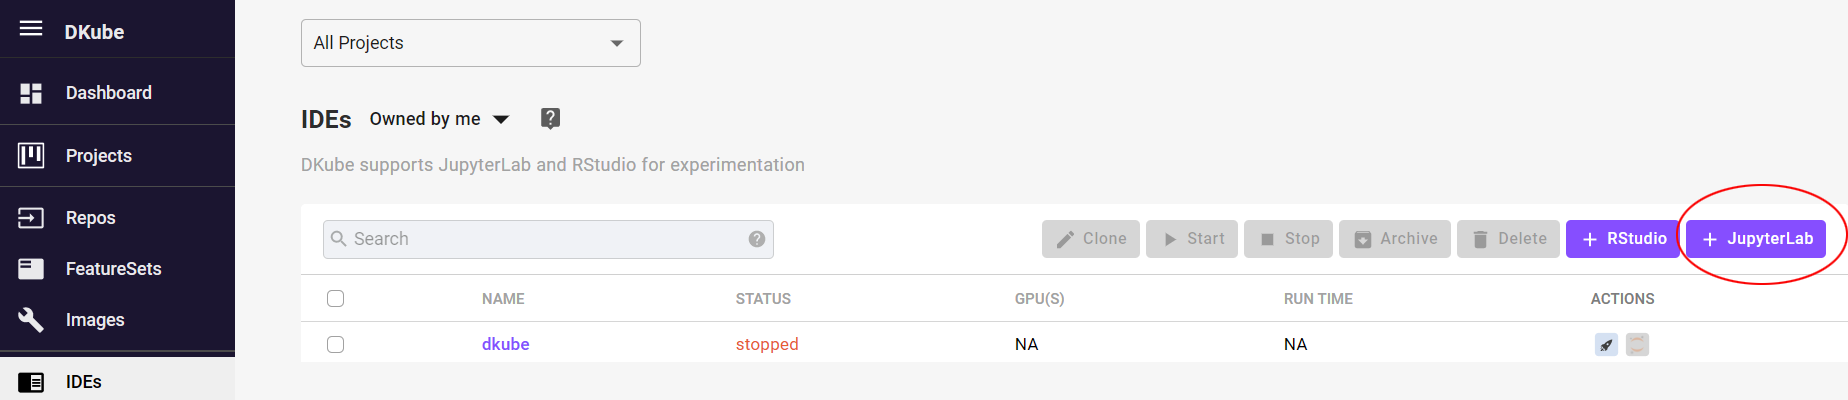
Create Notebook
Create a JupyterLab Notebook from the IDE menu to experiment with the program by selecting “+ JupyterLab”.
Fill in the fields as shown.
Basic Submission Screen
Field |
Value |
|---|---|
Name |
mnist |
Code |
dkube-examples |
Framework |
Tensorflow |
Framework Version |
2.0.0 |
Image |
Will be filled by default - do not change |

All the other fields should be left in their default state. No not submit at this point. Select the “Repos” tab.
Repo Submission Screen
Field |
Value |
|---|---|
Dataset |
mnist |
Version |
Select ver 1 |
Mount Path |
/mnist |
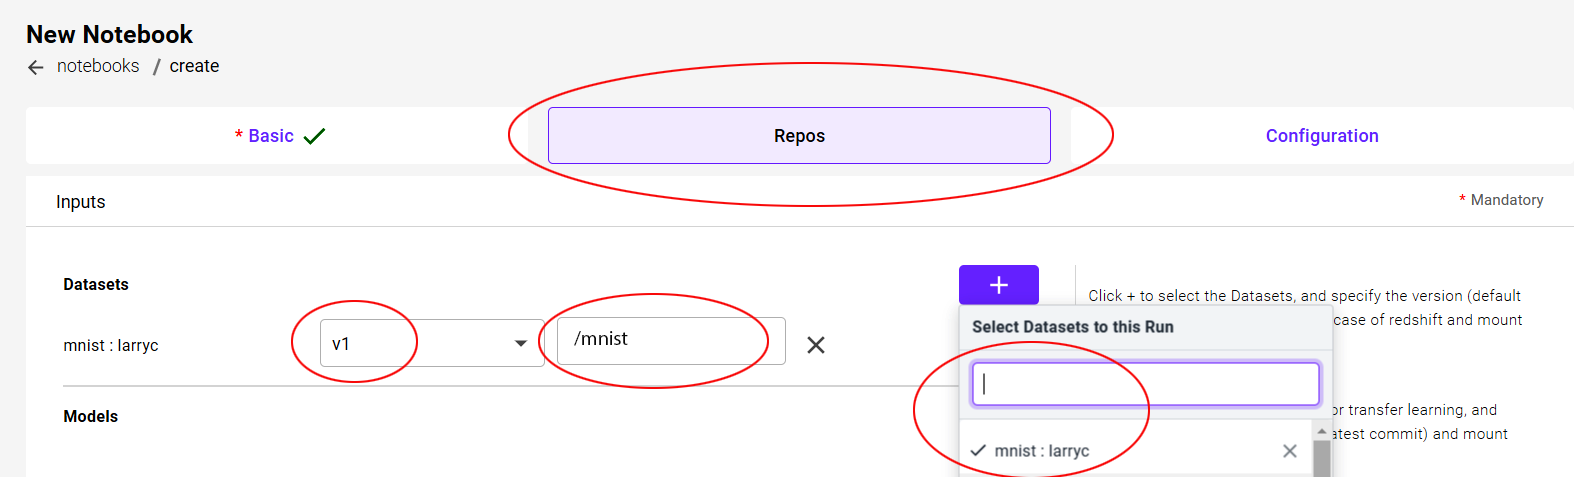
The mount path is the path that is used within the program code to access the input dataset. This is described in more detail at Mount Path
All the other fields should be left in their default state. Select “Submit” to start the Notebook.
Note
The initial Notebook will take a few minutes to start. Follow-on Notebooks with the same framework version will start more quickly.
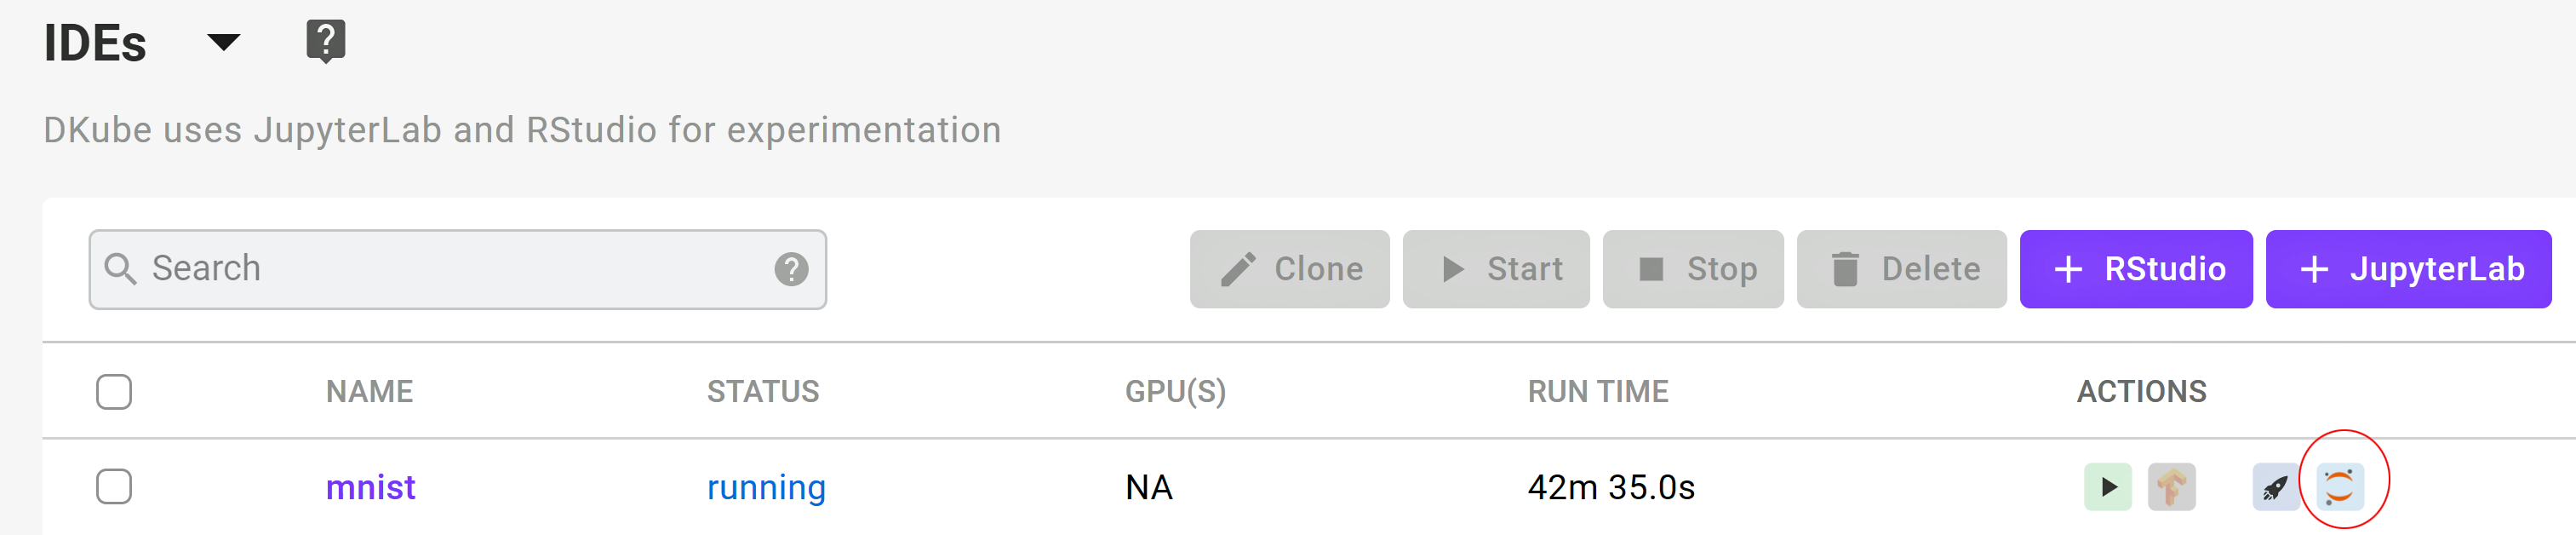
Open JupyterLab Notebook
Open a JupyterLab notebook by selecting the Jupyter icon under “Actions” on the far right.
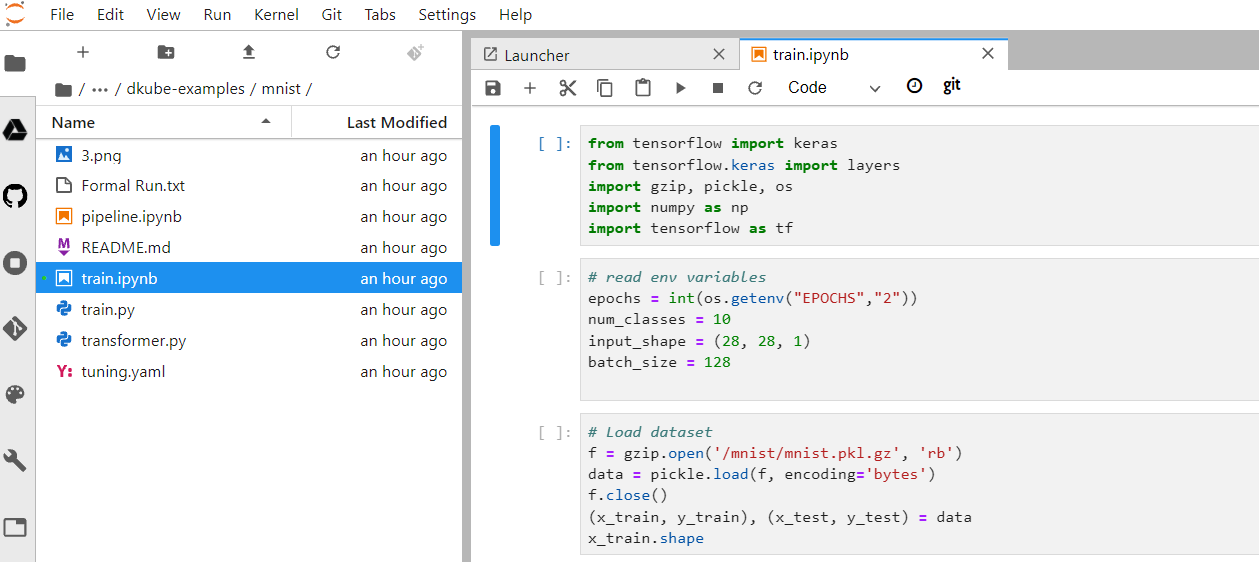
The code is located at workspace/dkube-examples/mnist
There is no need to change any code in this tutorial. The instructions are meant to provide the details on how to use DKube to experiment with your program code. Your programs will have a different folder structure.
The next step creates a training run.
Note
The Training Run can be created directly from the Notebook, as described in Create Training Run . This will fill in most of the fields for the Run with the information that was provided during the IDE creation. This tutorial provides the more general Run creation.
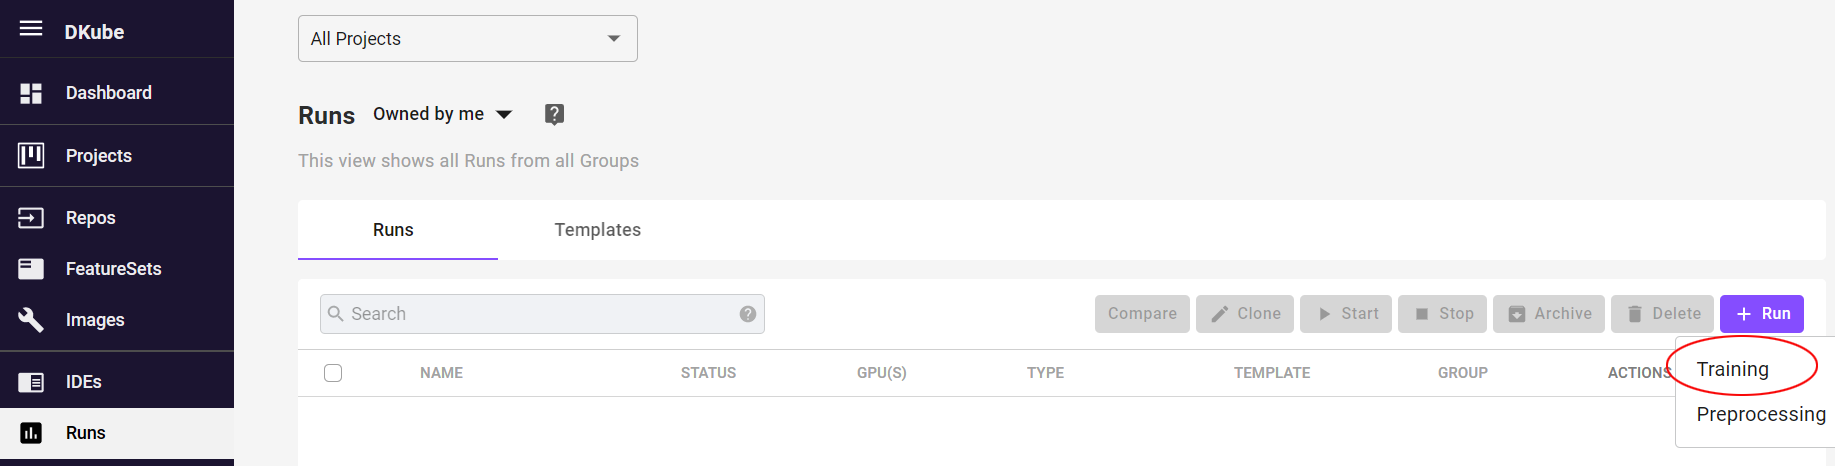
Create Training Run
Create a Training Run from the Runs menu to train the mnist model on the dataset and create a trained model.
Fill in the fields as shown.
Basic Submission Screen
Field |
Value |
|---|---|
Name |
mnist |
Code |
dkube-examples |
Framework |
tensorflow |
Framework Version |
2.0.0 |
Start-up script |
python mnist/train.py |
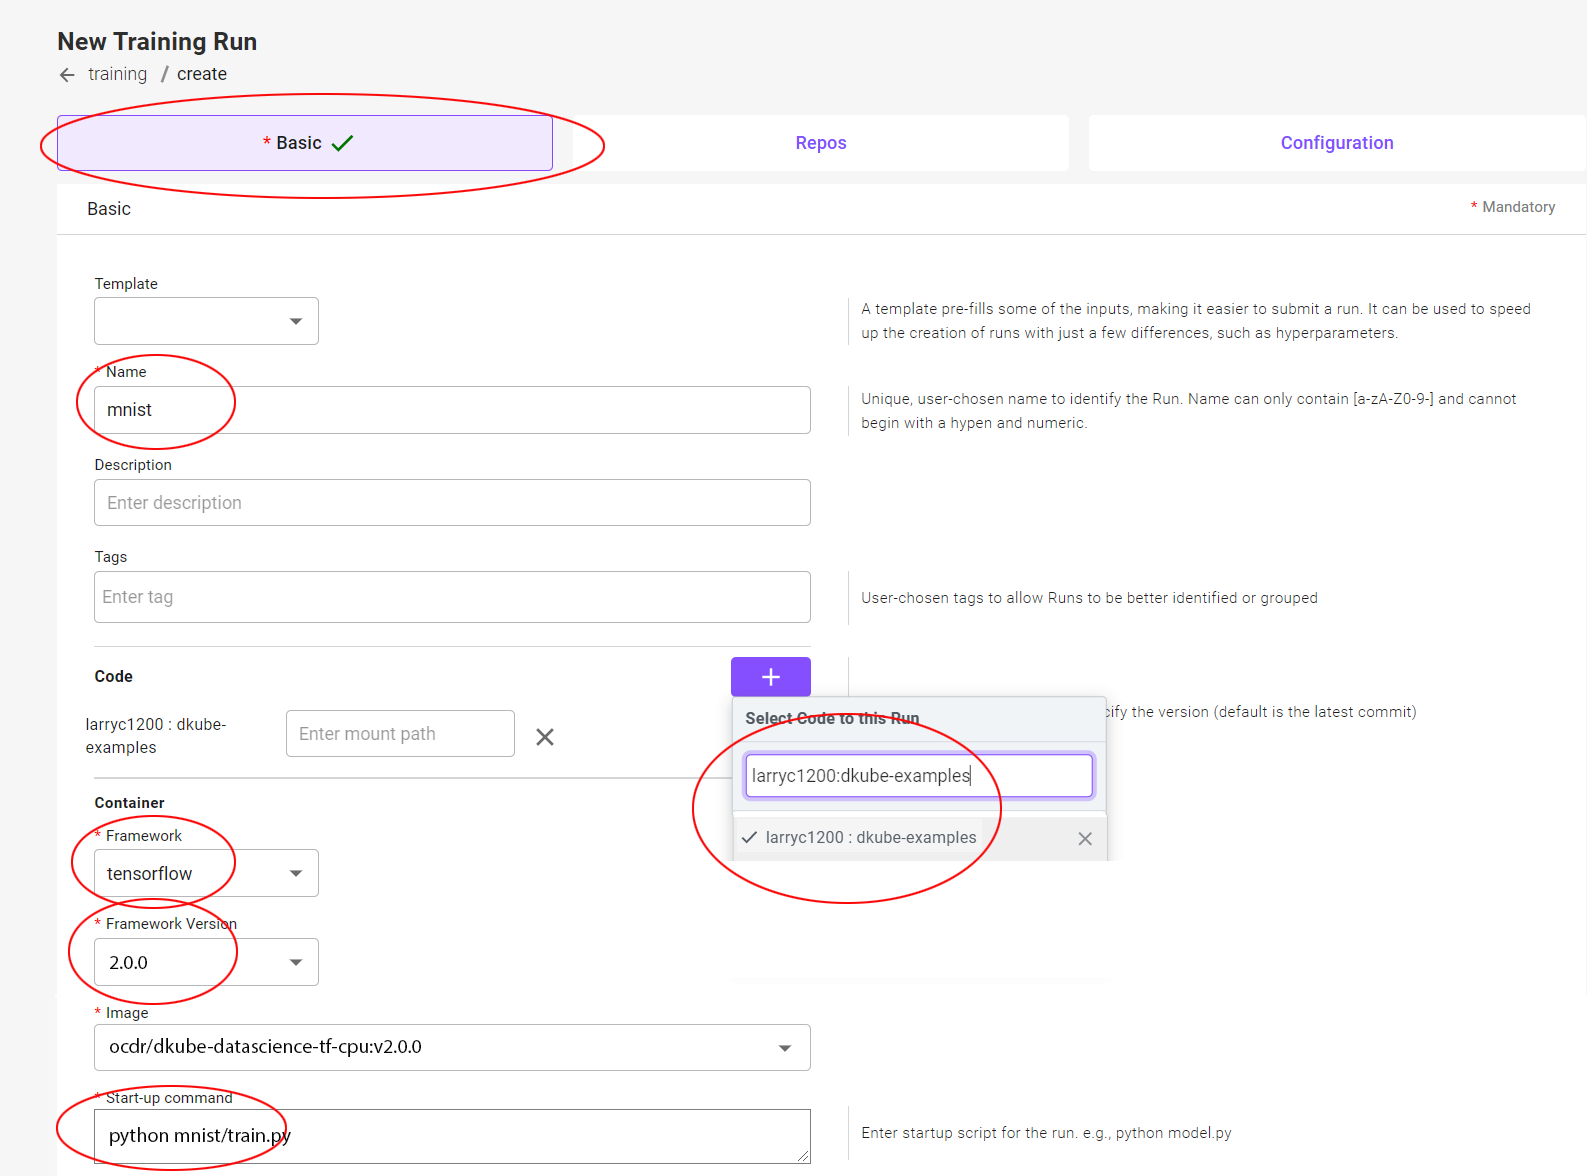
All the other fields should be left in their default state. Select the “Repos” tab.
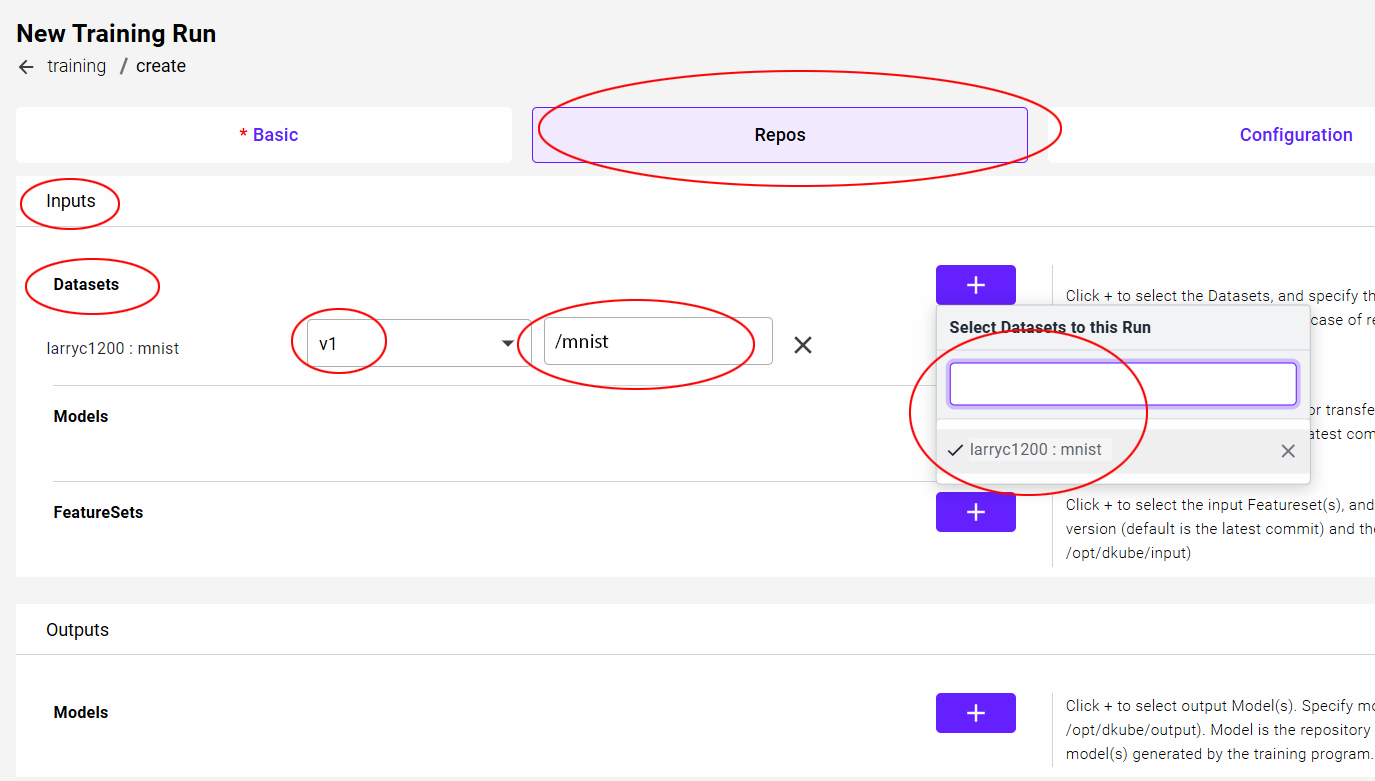
Repos Submission Screen
In order to submit a Training Run:
A Dataset needs to be selected for input
A Model needs to be selected for output
Input Selections
Field |
Value |
|---|---|
Dataset |
mnist |
Version |
Select ver 1 |
Mount Path |
/mnist |
The mount path is the path that is used within the program code to access the input dataset. This is described in more detail at Mount Path
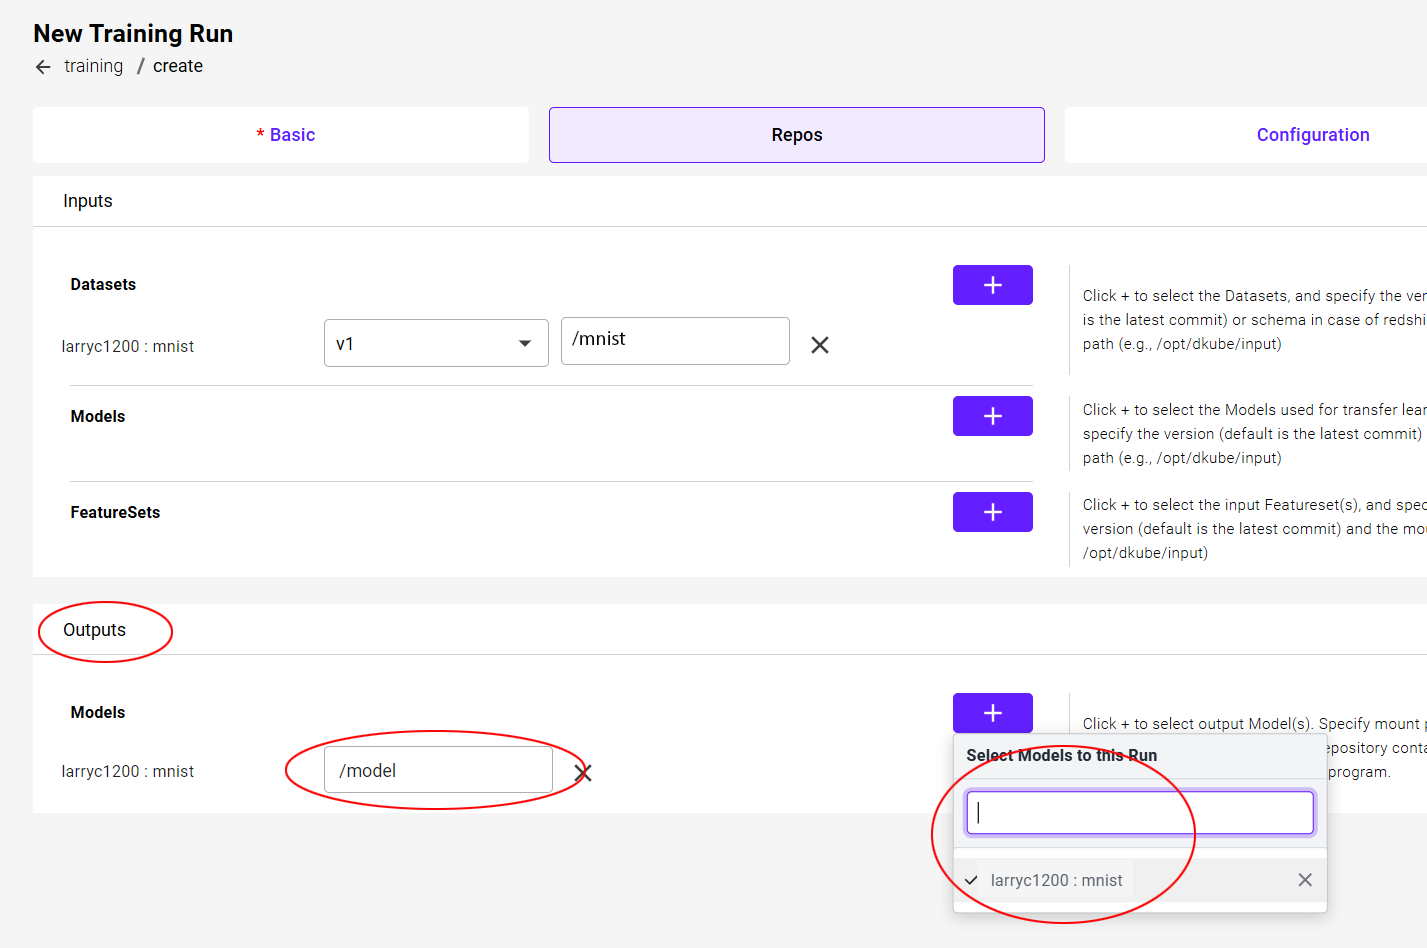
Output Selection
A Model needs to be selected for the Training Run output.
Field |
Value |
|---|---|
Model |
mnist |
Mount Path |
/model |
After the fields have been completed, select “Submit”.
Note
The initial Run will take a few minutes to start. Follow-on Runs with the same framework version will start more quickly.
The Training Run will appear in the Runs menu.
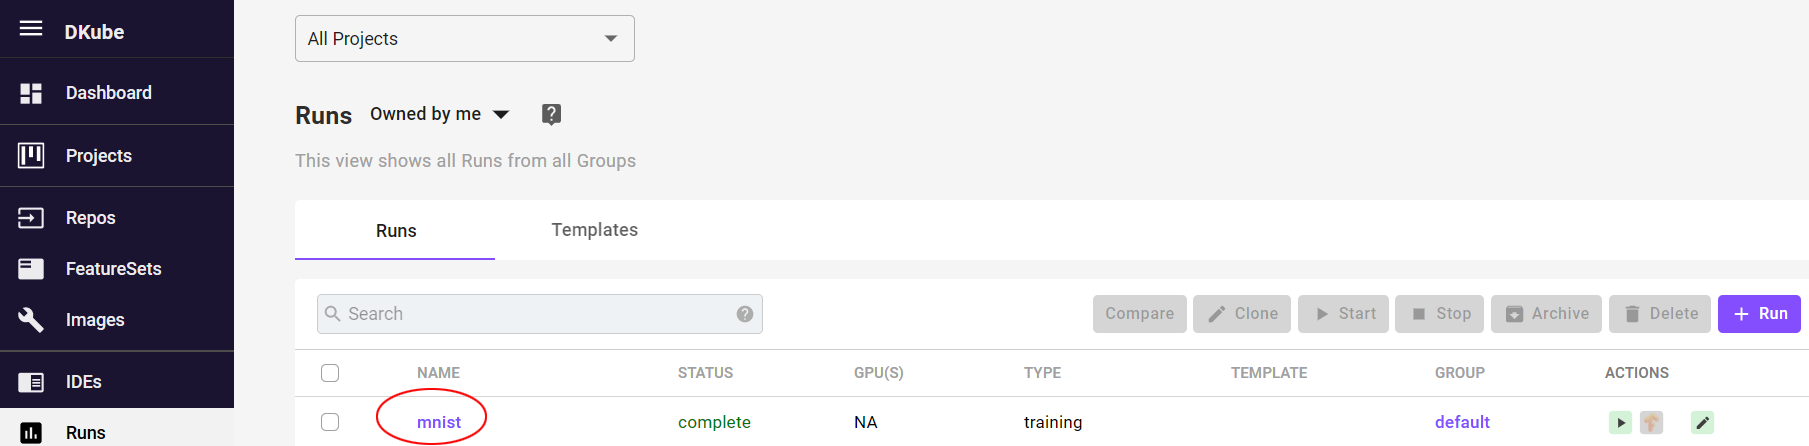
View Trained Model
Once the Run status shows “Complete”, it indicates that a trained Model has been created. The trained Model will appear in the Models Repo.
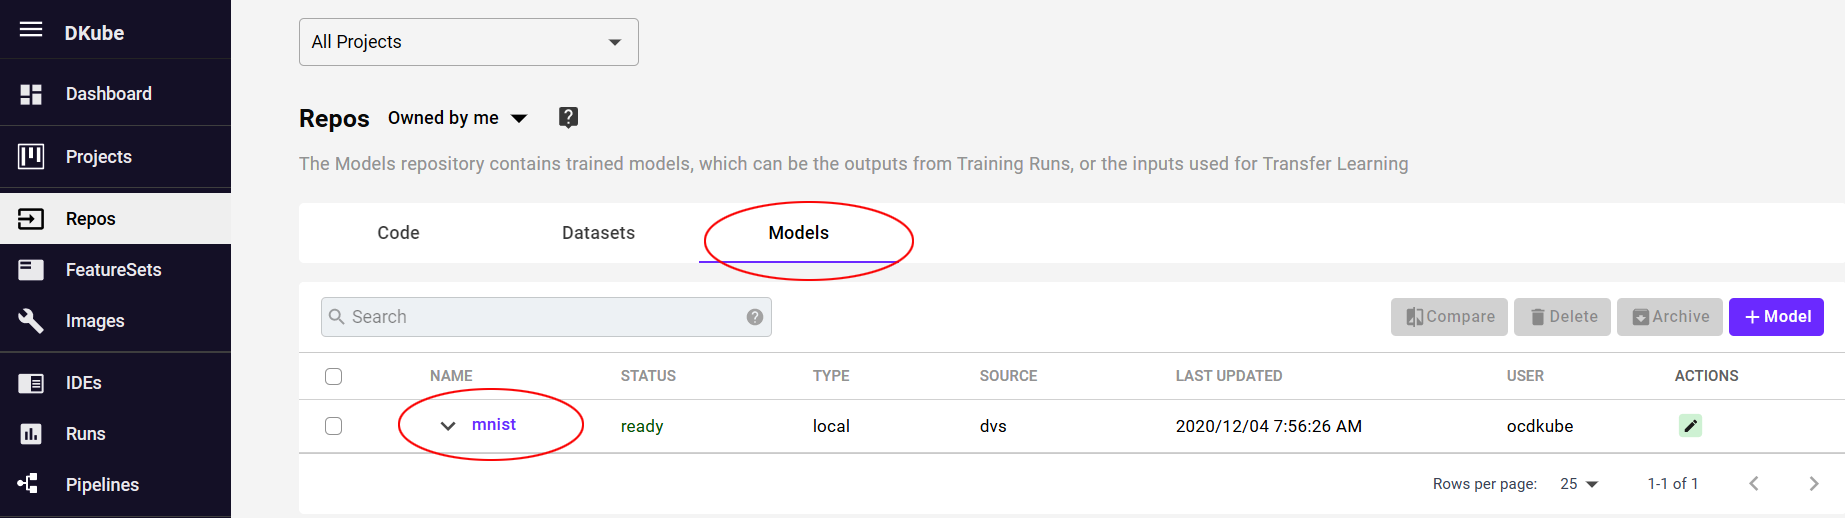
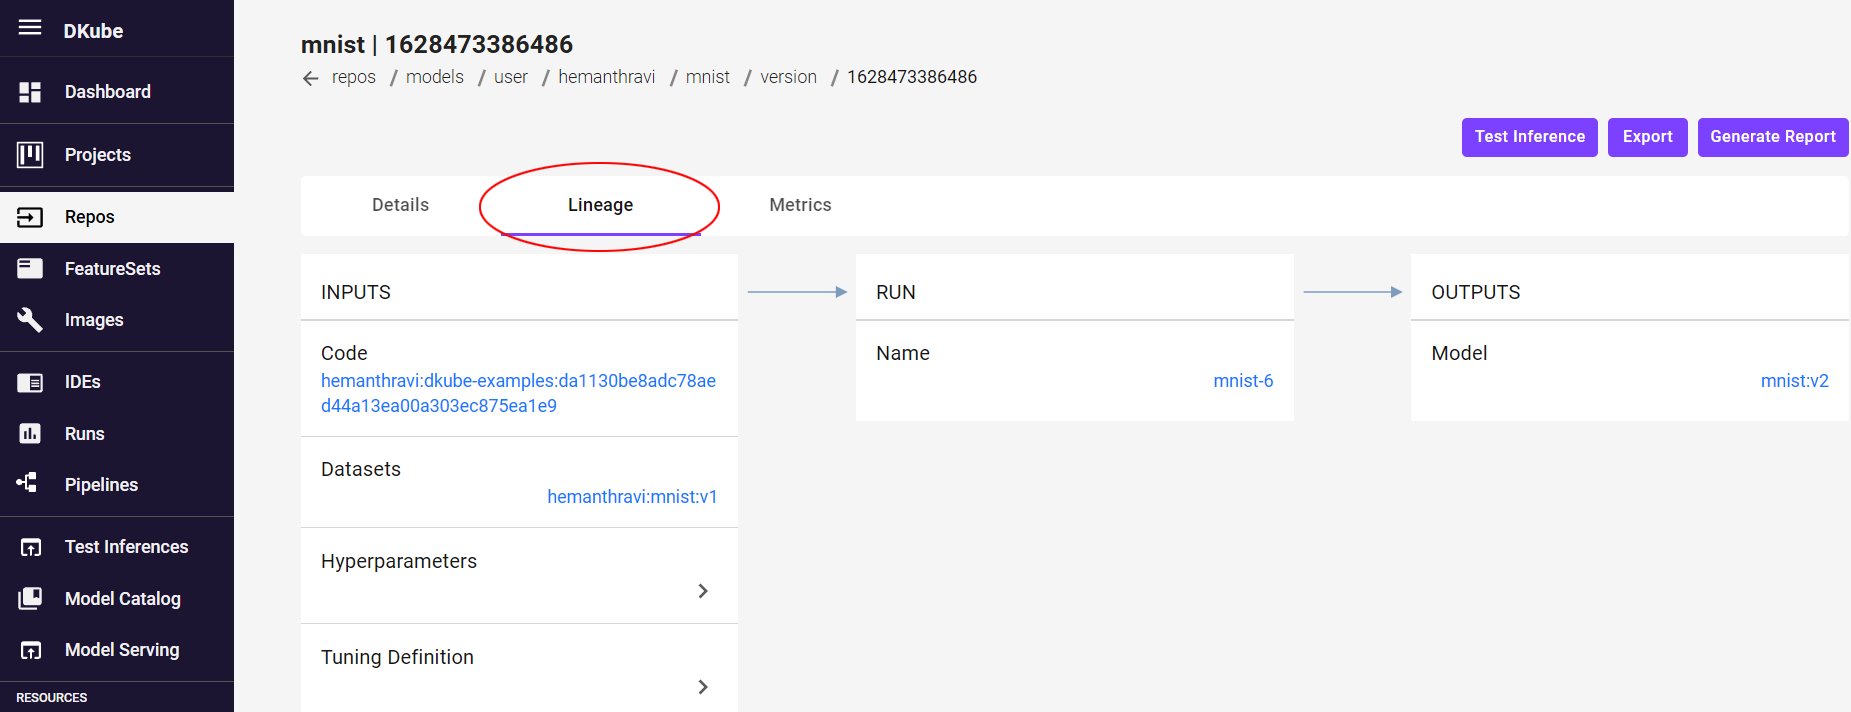
Selecting the trained Model will provide the details on the model, including the versions.
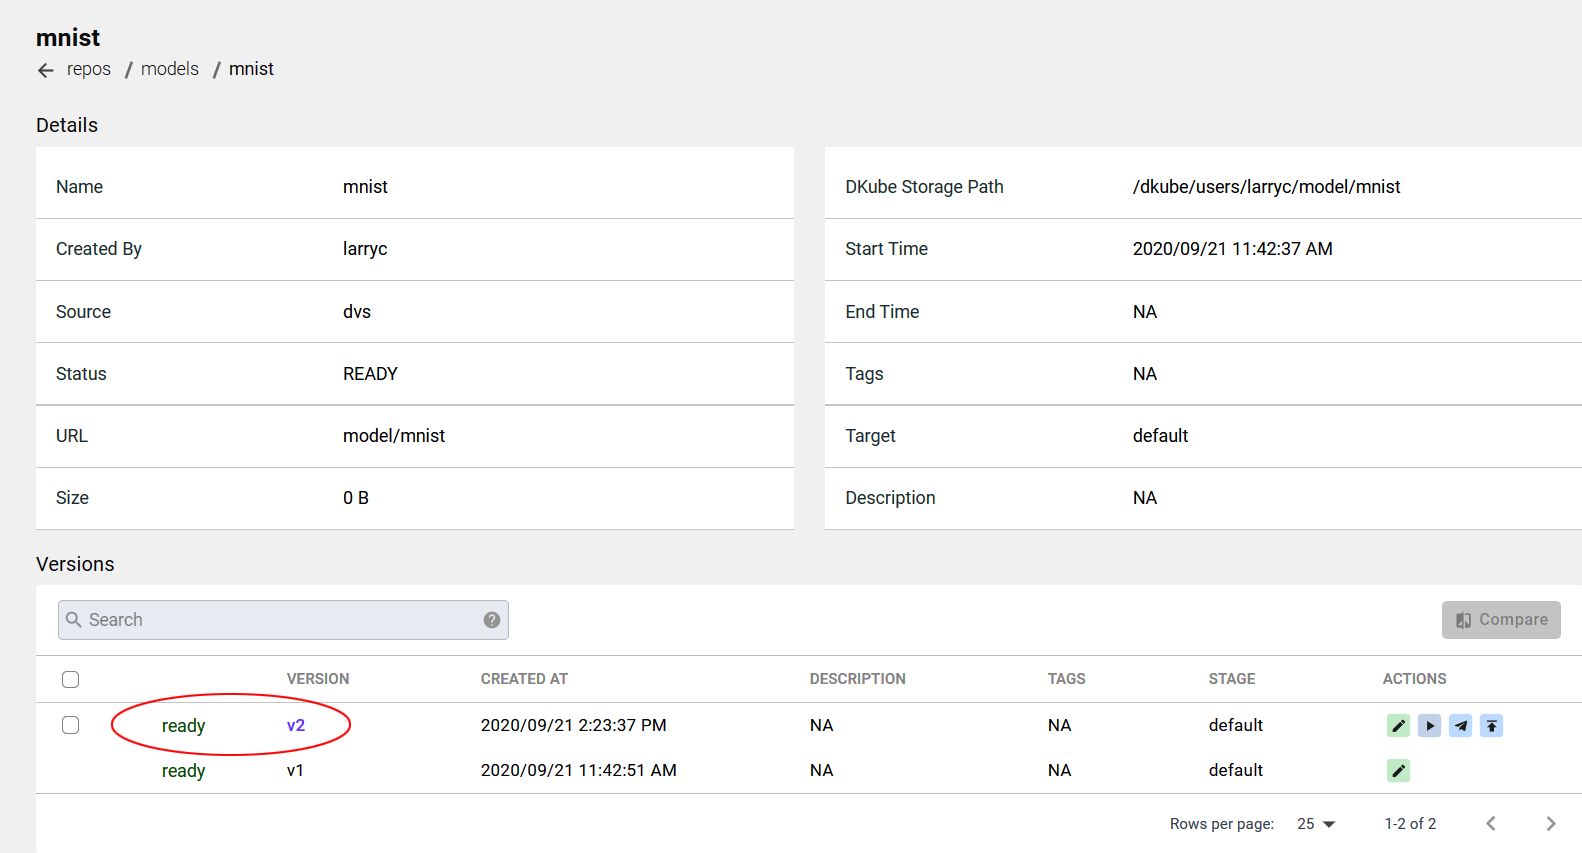
Ver 1 of the model is the initial blank version that was created earlier in the tutorial in order to set up the versioning capability
Ver 2 is the new model that was created by the training run
Selecting a version will show more details on the model version, including the lineage. The lineage provides all of the inputs required to create this model.
Publish Model
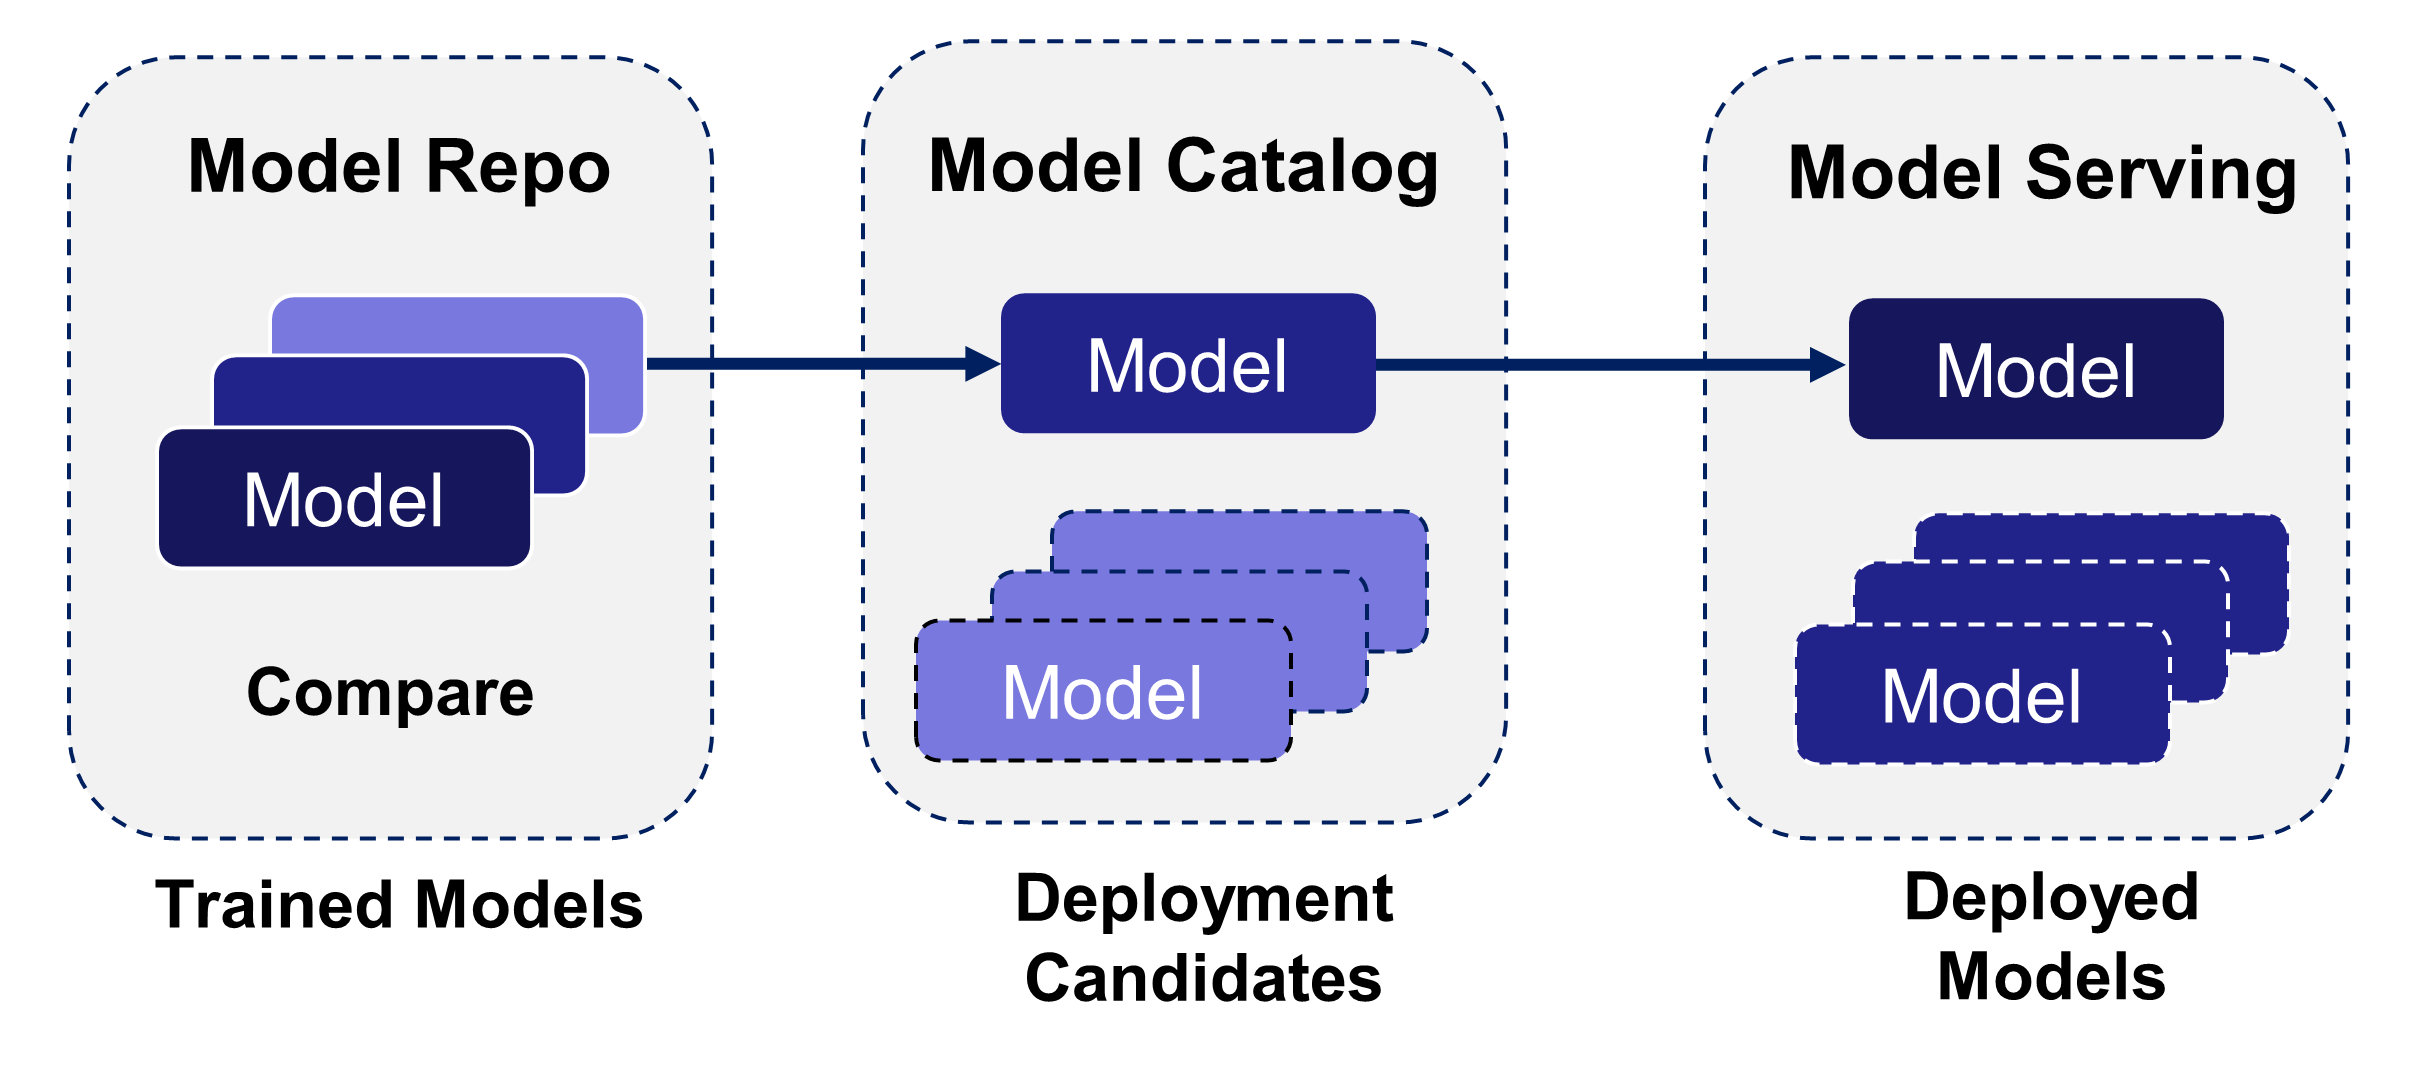
Publishing a Model identifies it as a deployment candidate for possible Production Serving by the Production Engineer. The Published Model appears in the Model Catalog, where the Production Engineer will do additional testing, and may deploy the Model.
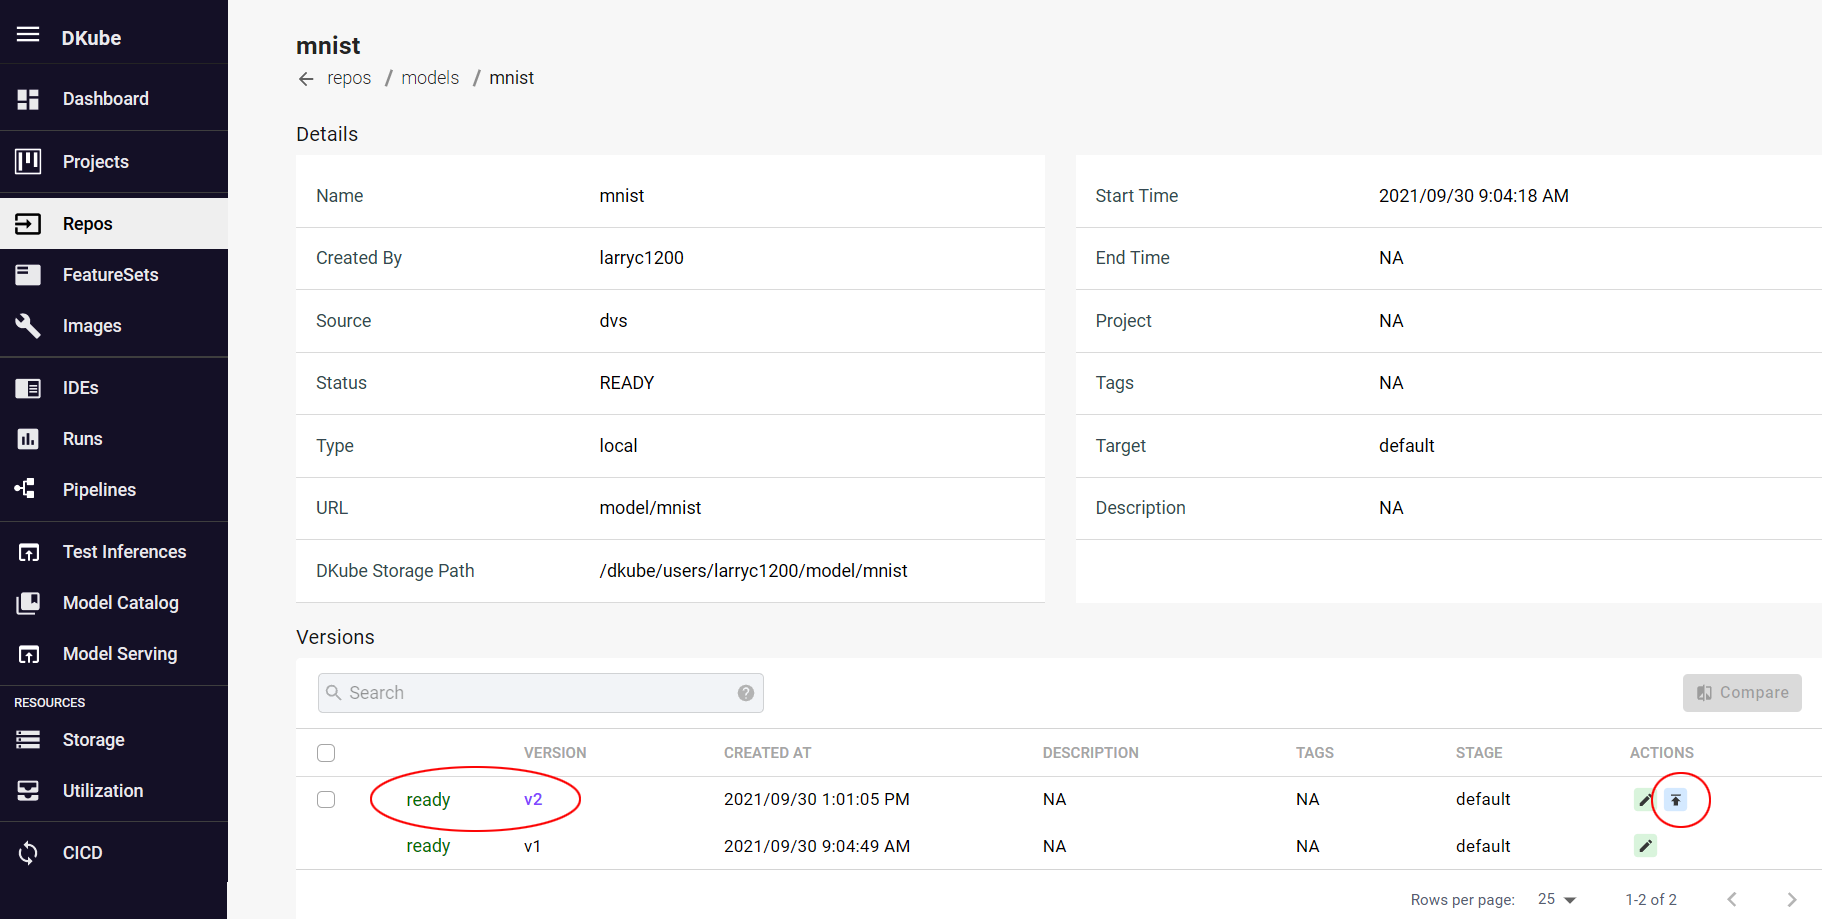
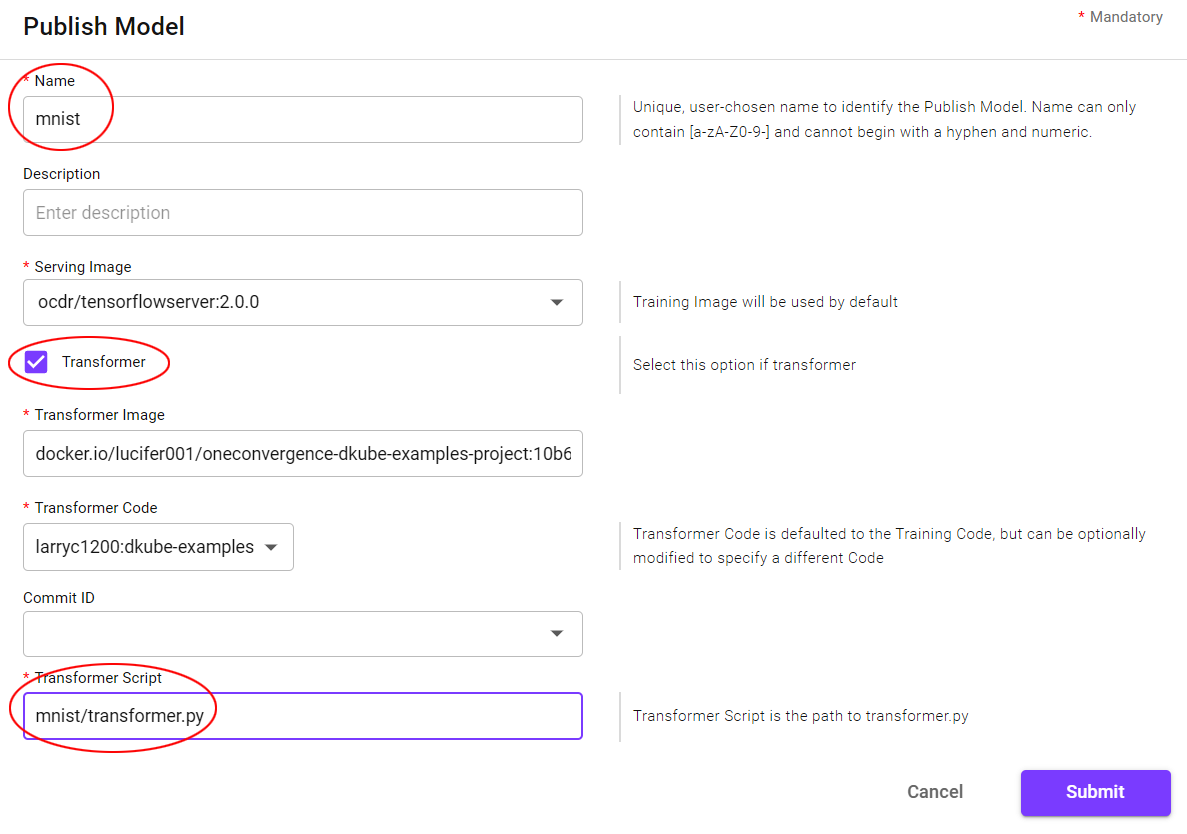
A Model is published from the Model details page, by a button on the far right of the line that contains the Model version to be published. Selecting the button causes a popup to appear to provide more details. Use the following inputs for the fields.
All of the fields should be left in their default state except for the following:
Field |
Value |
|---|---|
Name |
mnist |
Transformer |
Select |
Transformer Script |
mnist/transformer.py |
Once published, the Model appears in the Model Catalog, where it is available for possible Deployment.
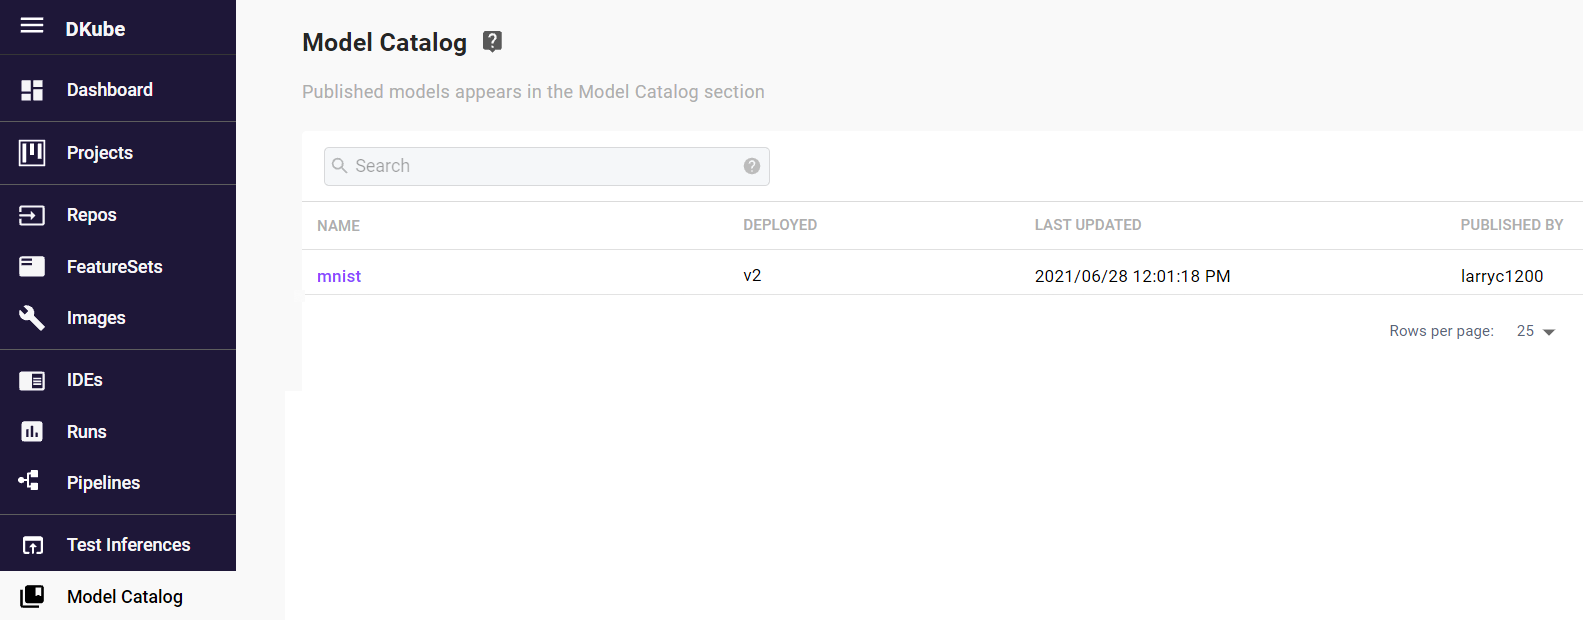
Deploy Model
A Deployed Model runs on the serving cluster, and exposes the APIs for live inference.
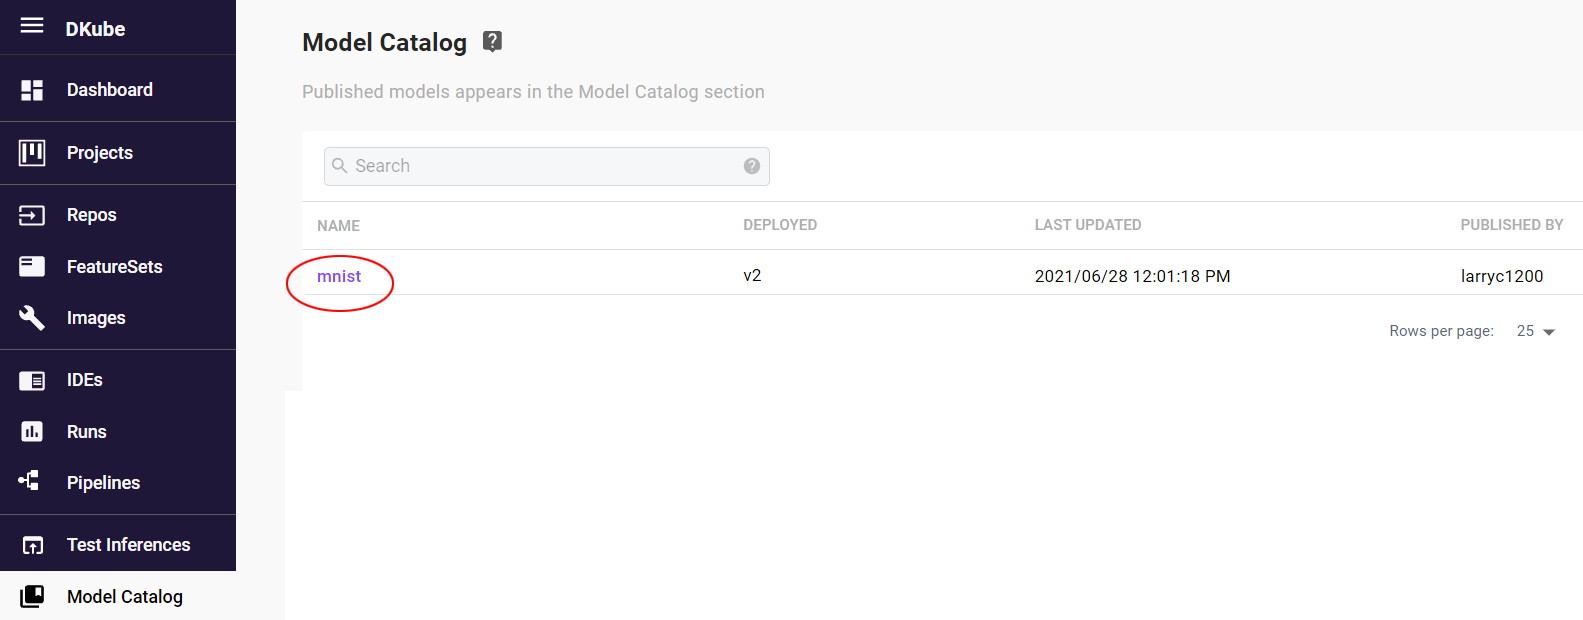
The Production Engineer deploys a model from the Model Catalog after testing the Model to ensure that it meets the project goals. In this tutorial, we will deploy the Model that we just Published. Selecting the published Model name will bring up the versions of the model for Deployment.
The Model is deployed by selecting the Deploy button on the far right of the line.
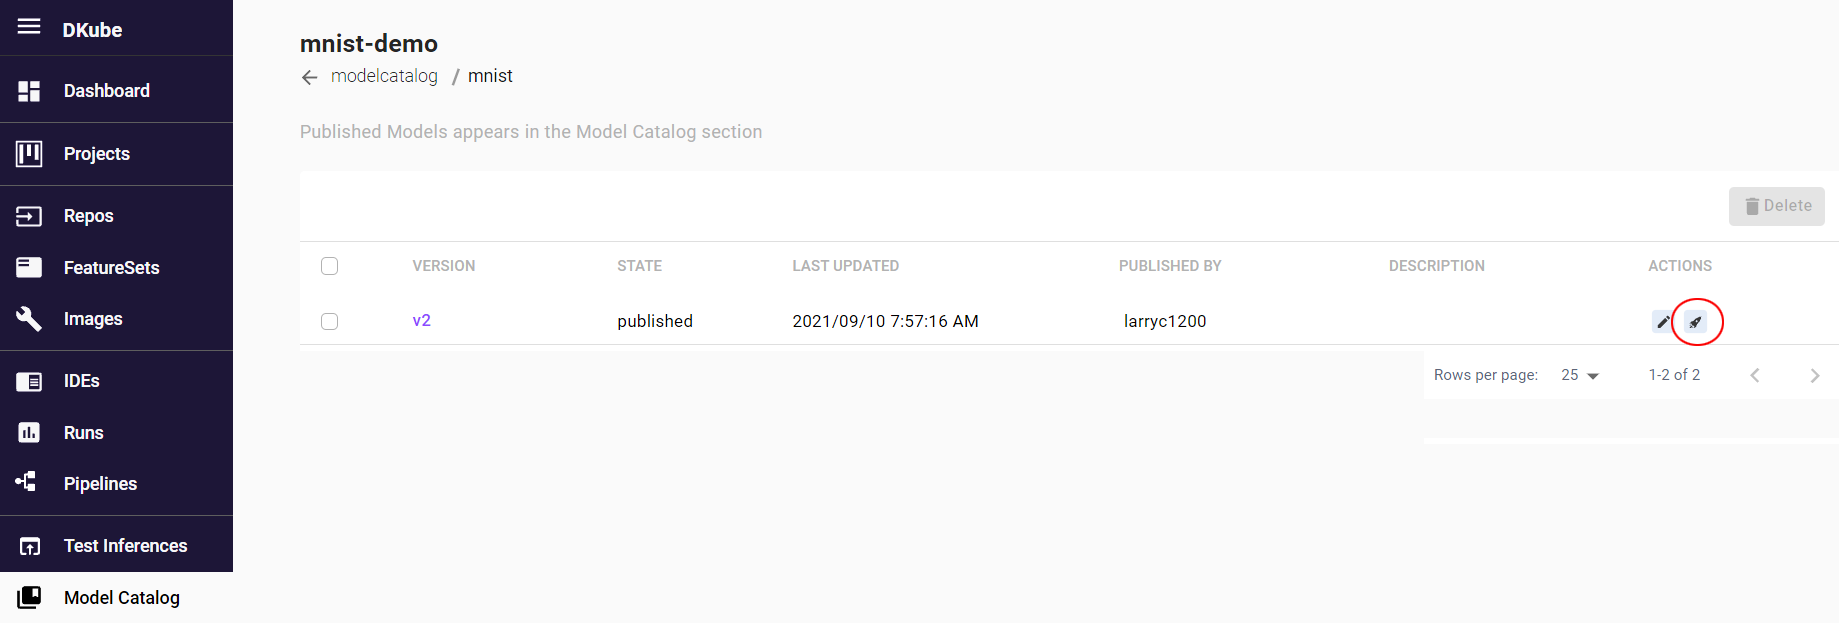
This will bring up a menu to provide the deployment details. All the fields should be left in their default state except for the following.
Field |
Value |
|---|---|
Name |
mnist |
CPU/GPU |
CPU |
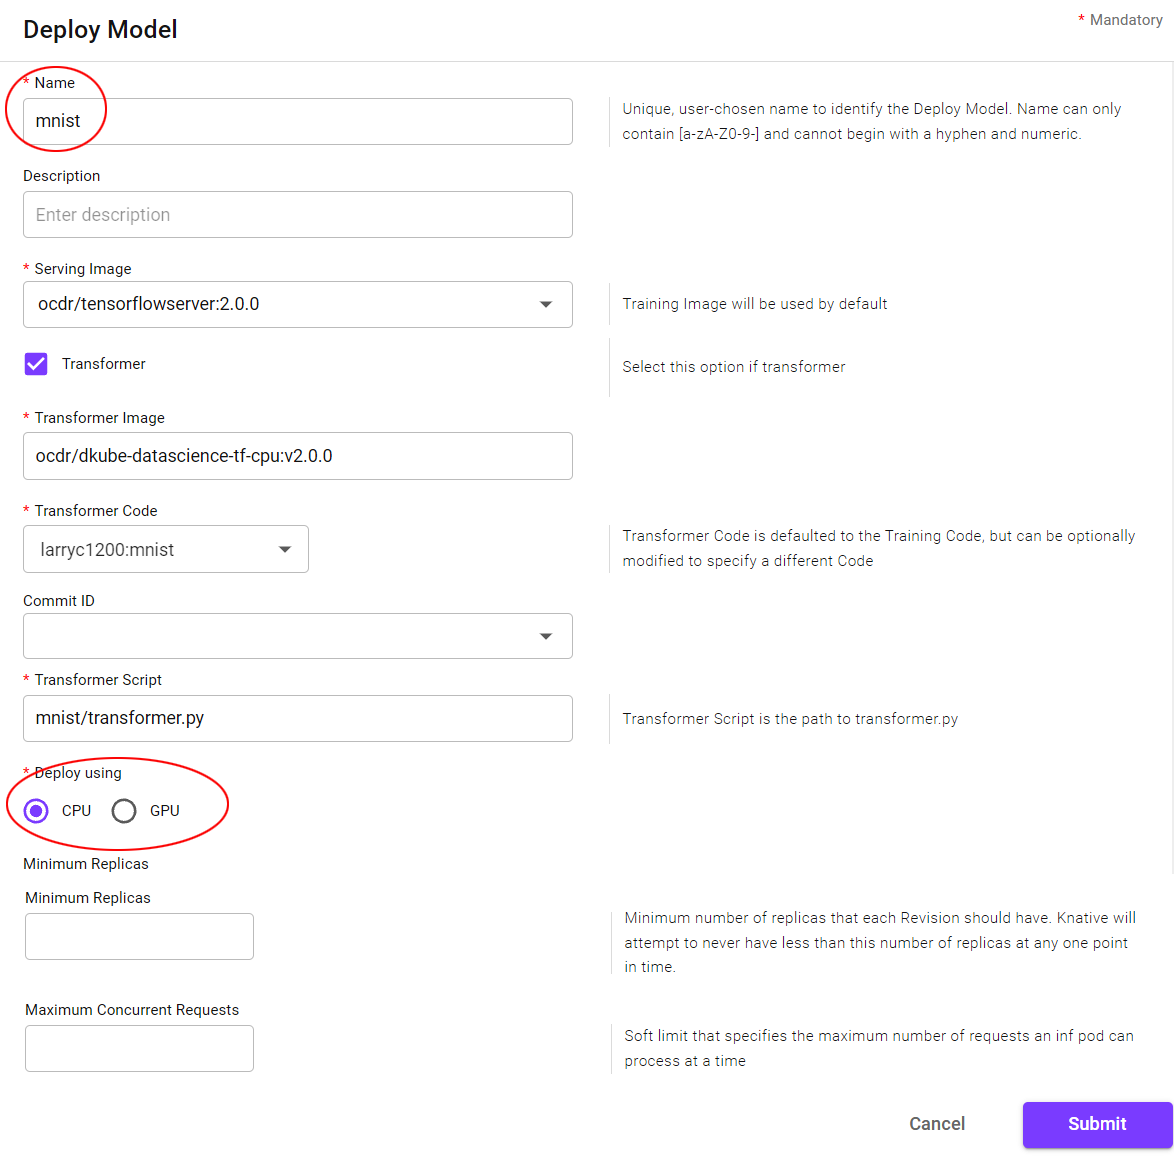
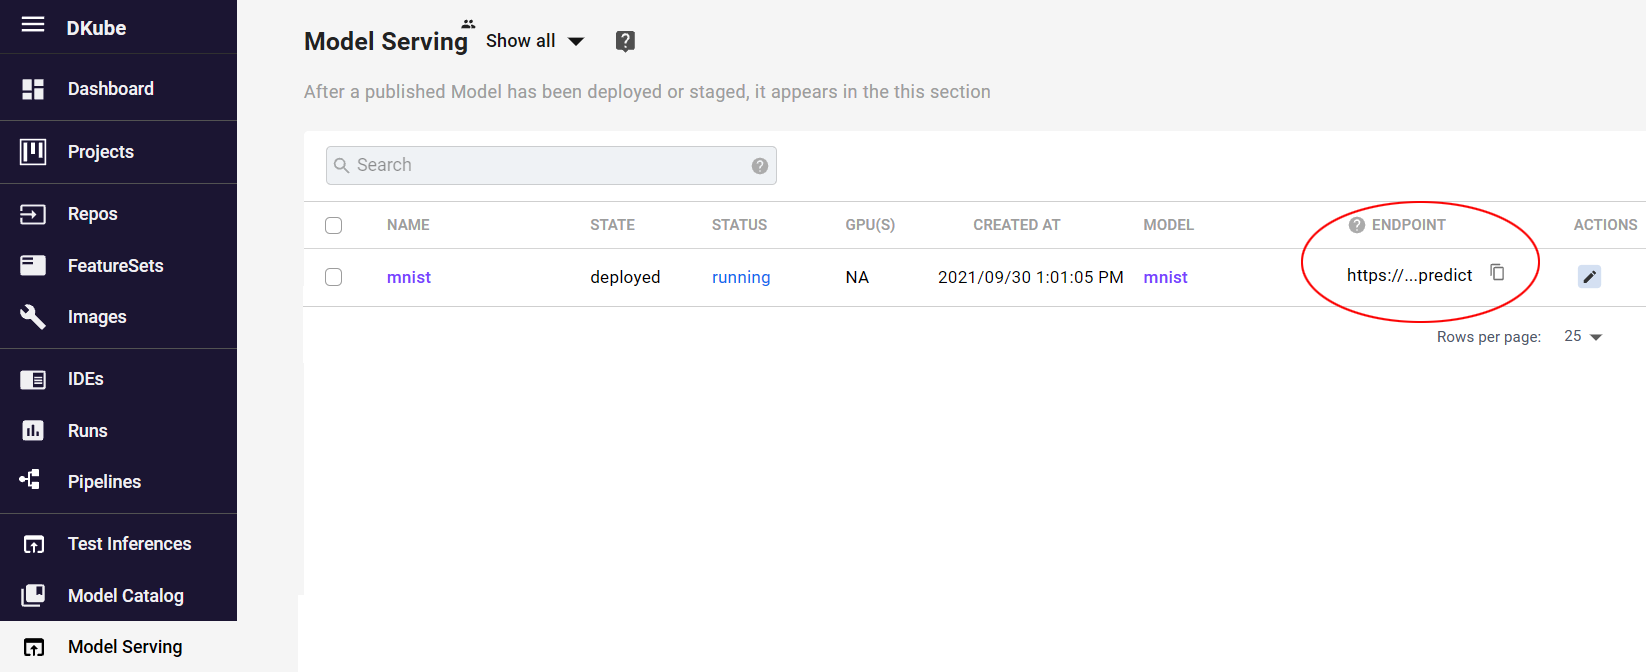
The deployed Model will appear in the Model Serving screen. The serving endpoint is exposed for live inference.