Operator Dashboard & Workflow
The Operator is responsible for:
Managing the DKube cluster
Managing Pools, Groups, & Users
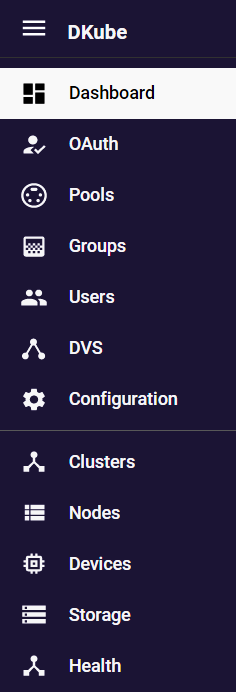
Operator Menu
The Operator screen provides a GUI-based mechanism to navigate through the workflow.
Menu Item |
Function |
|---|---|
Dashboard |
Overview of the current status of the cluster |
OAuth |
Activate/update backend authorization |
Pools |
Create, view, modify, & delete device Pools |
Groups |
Create, view, modify, & delete User Groups |
Users |
On-board, view, and delete Users |
DVS |
Maintain version control system |
Configuration |
Configure Storage |
Clusters |
Create and manage remote clusters |
Nodes |
View status of local Kubernetes cluster nodes |
Devices |
View status of local Kubernetes cluster devices |
Storage |
View storage statistics for local Kubernetes cluster |
Health |
View services and pods on cluster |
Operator Dashboard
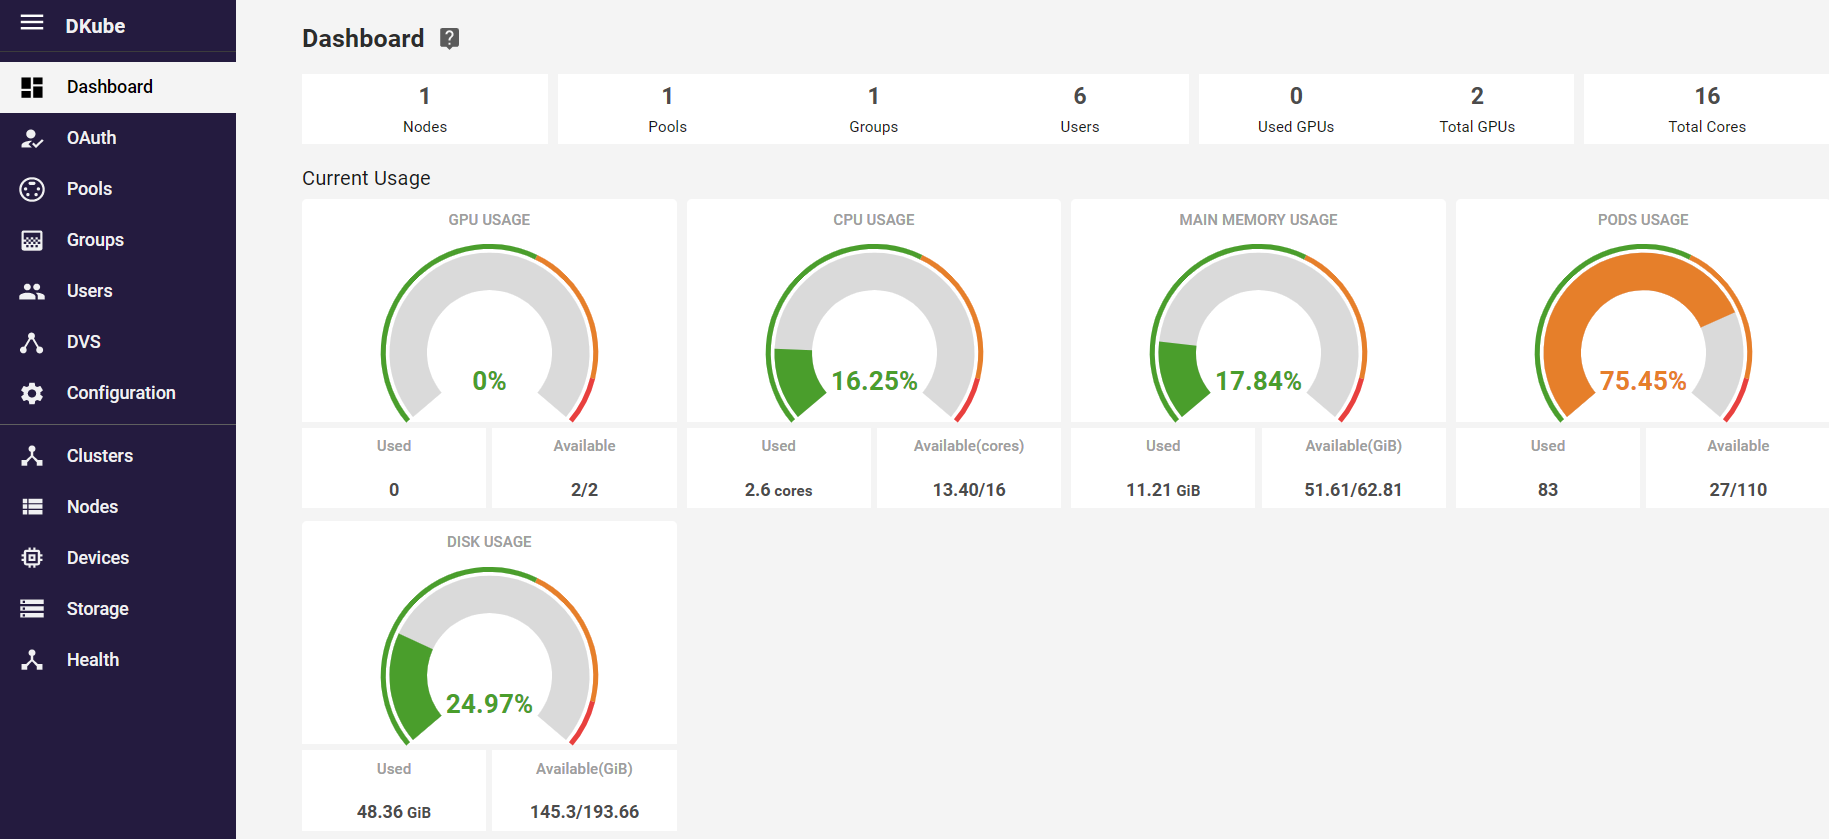
The Operator dashboard provides a snapshot of the cluster. This enables the Operator to see the status and health of the cluster, and provides the information needed for proper load balancing.
Operator Workflow
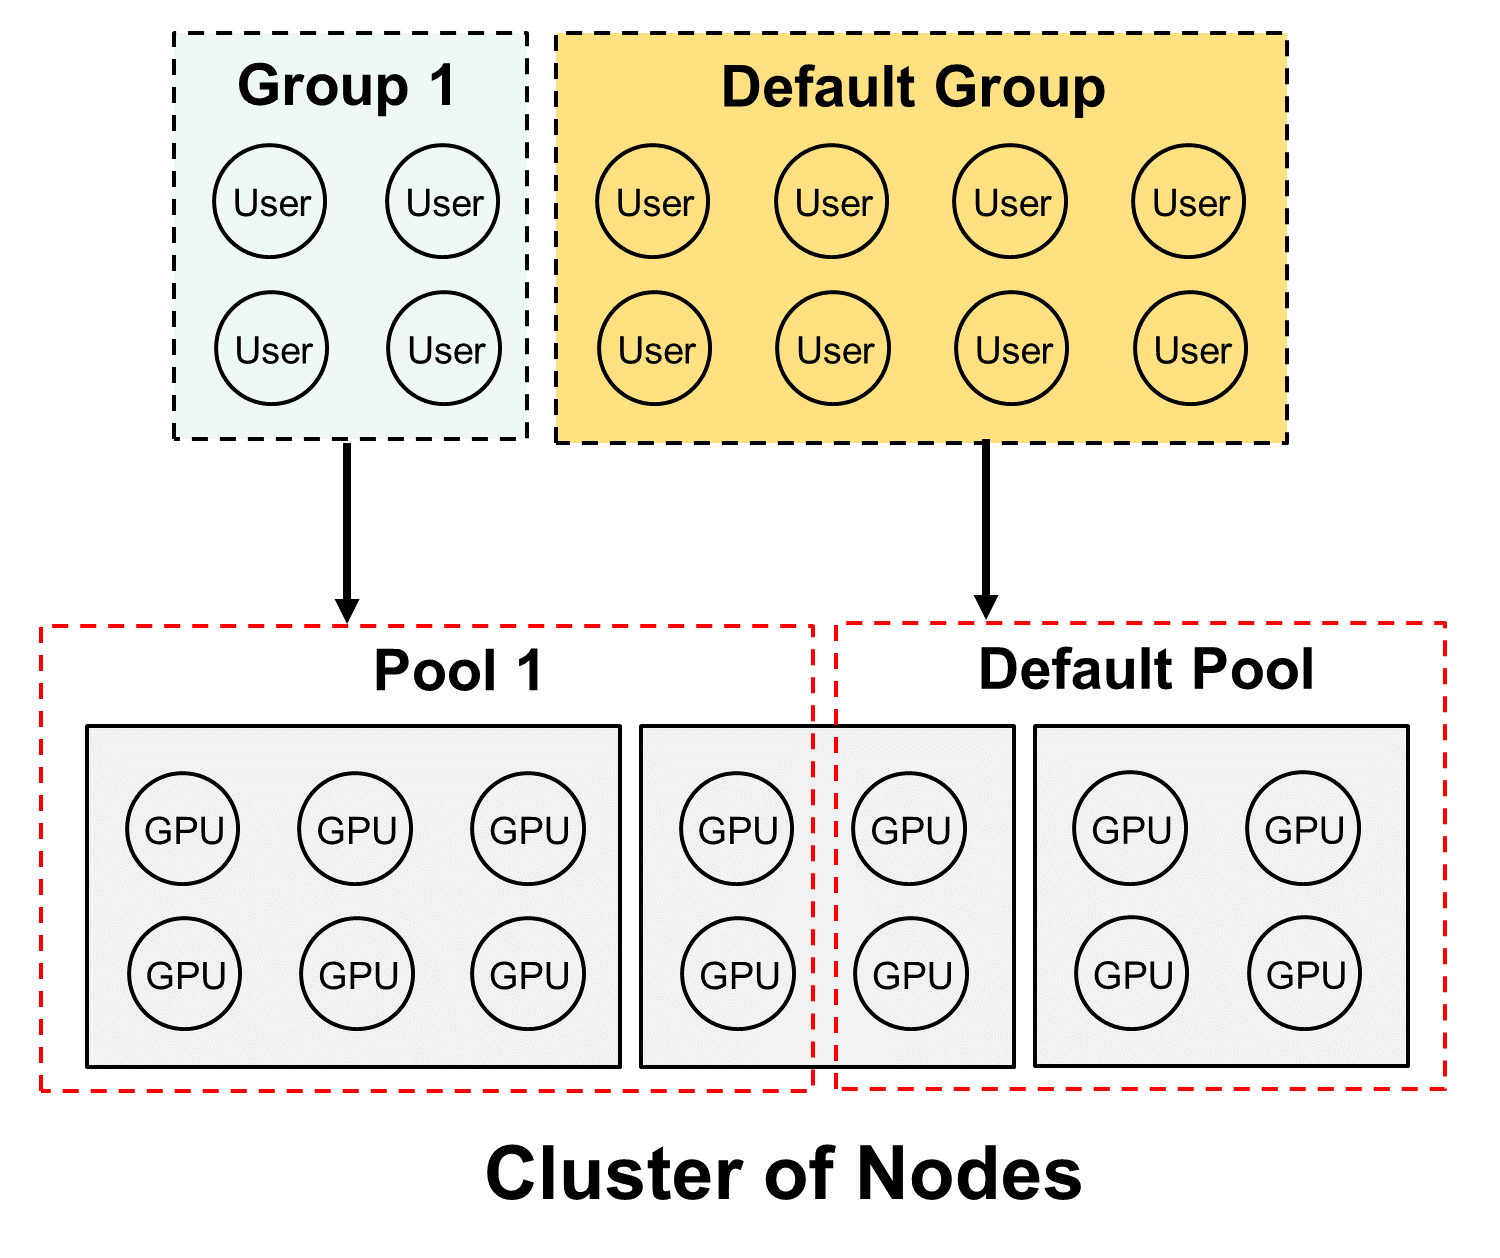
Pools, Groups, & Users are managed from their respective menu selections on the left.
There is no requirement for the Operator to allocate Pools, Groups, and Users for single User operation. At installation time, the Operator User is specified, and that User is authenticated and assigned to the Default Group, which is assigned the Default Pool. The Default Pool contains all of the Devices recognized in the cluster. As such, the single Operator/Data Scientist User has access to all of the GPUs while logged in as a Data Scientist.
If this scenario is true in your situation, you can skip ahead to Data Science Dashboard & Workflow
If more than one User, Group, or Pool is required, then the following sections apply. It is recommended that the following flow is used to add a Pool, Group, or User.
Create a new Pool and assign Devices to the Pool
Create a new Group and assign a Pool to the new Group
On-board new Users, and assign them to a Group
Pool Management
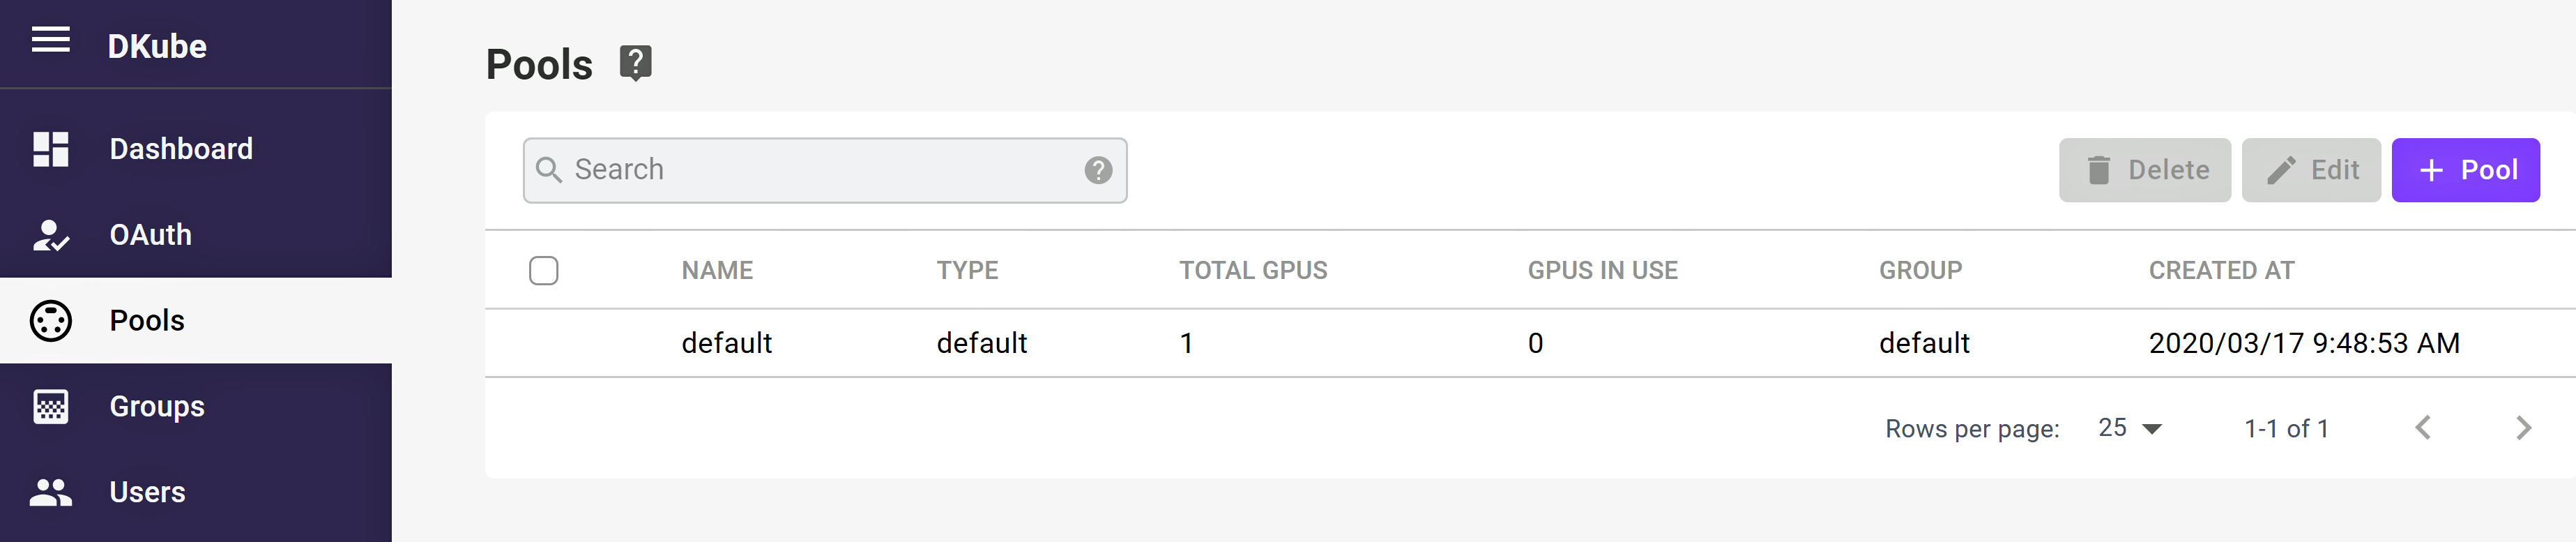
The Pool Management screen allows the Operator to view and manage Pools. Initially, all of the GPUs on the system are assigned to the Default Pool. The GPUs in the Pool Management screen are shown for the entire cluster.
Create Pool
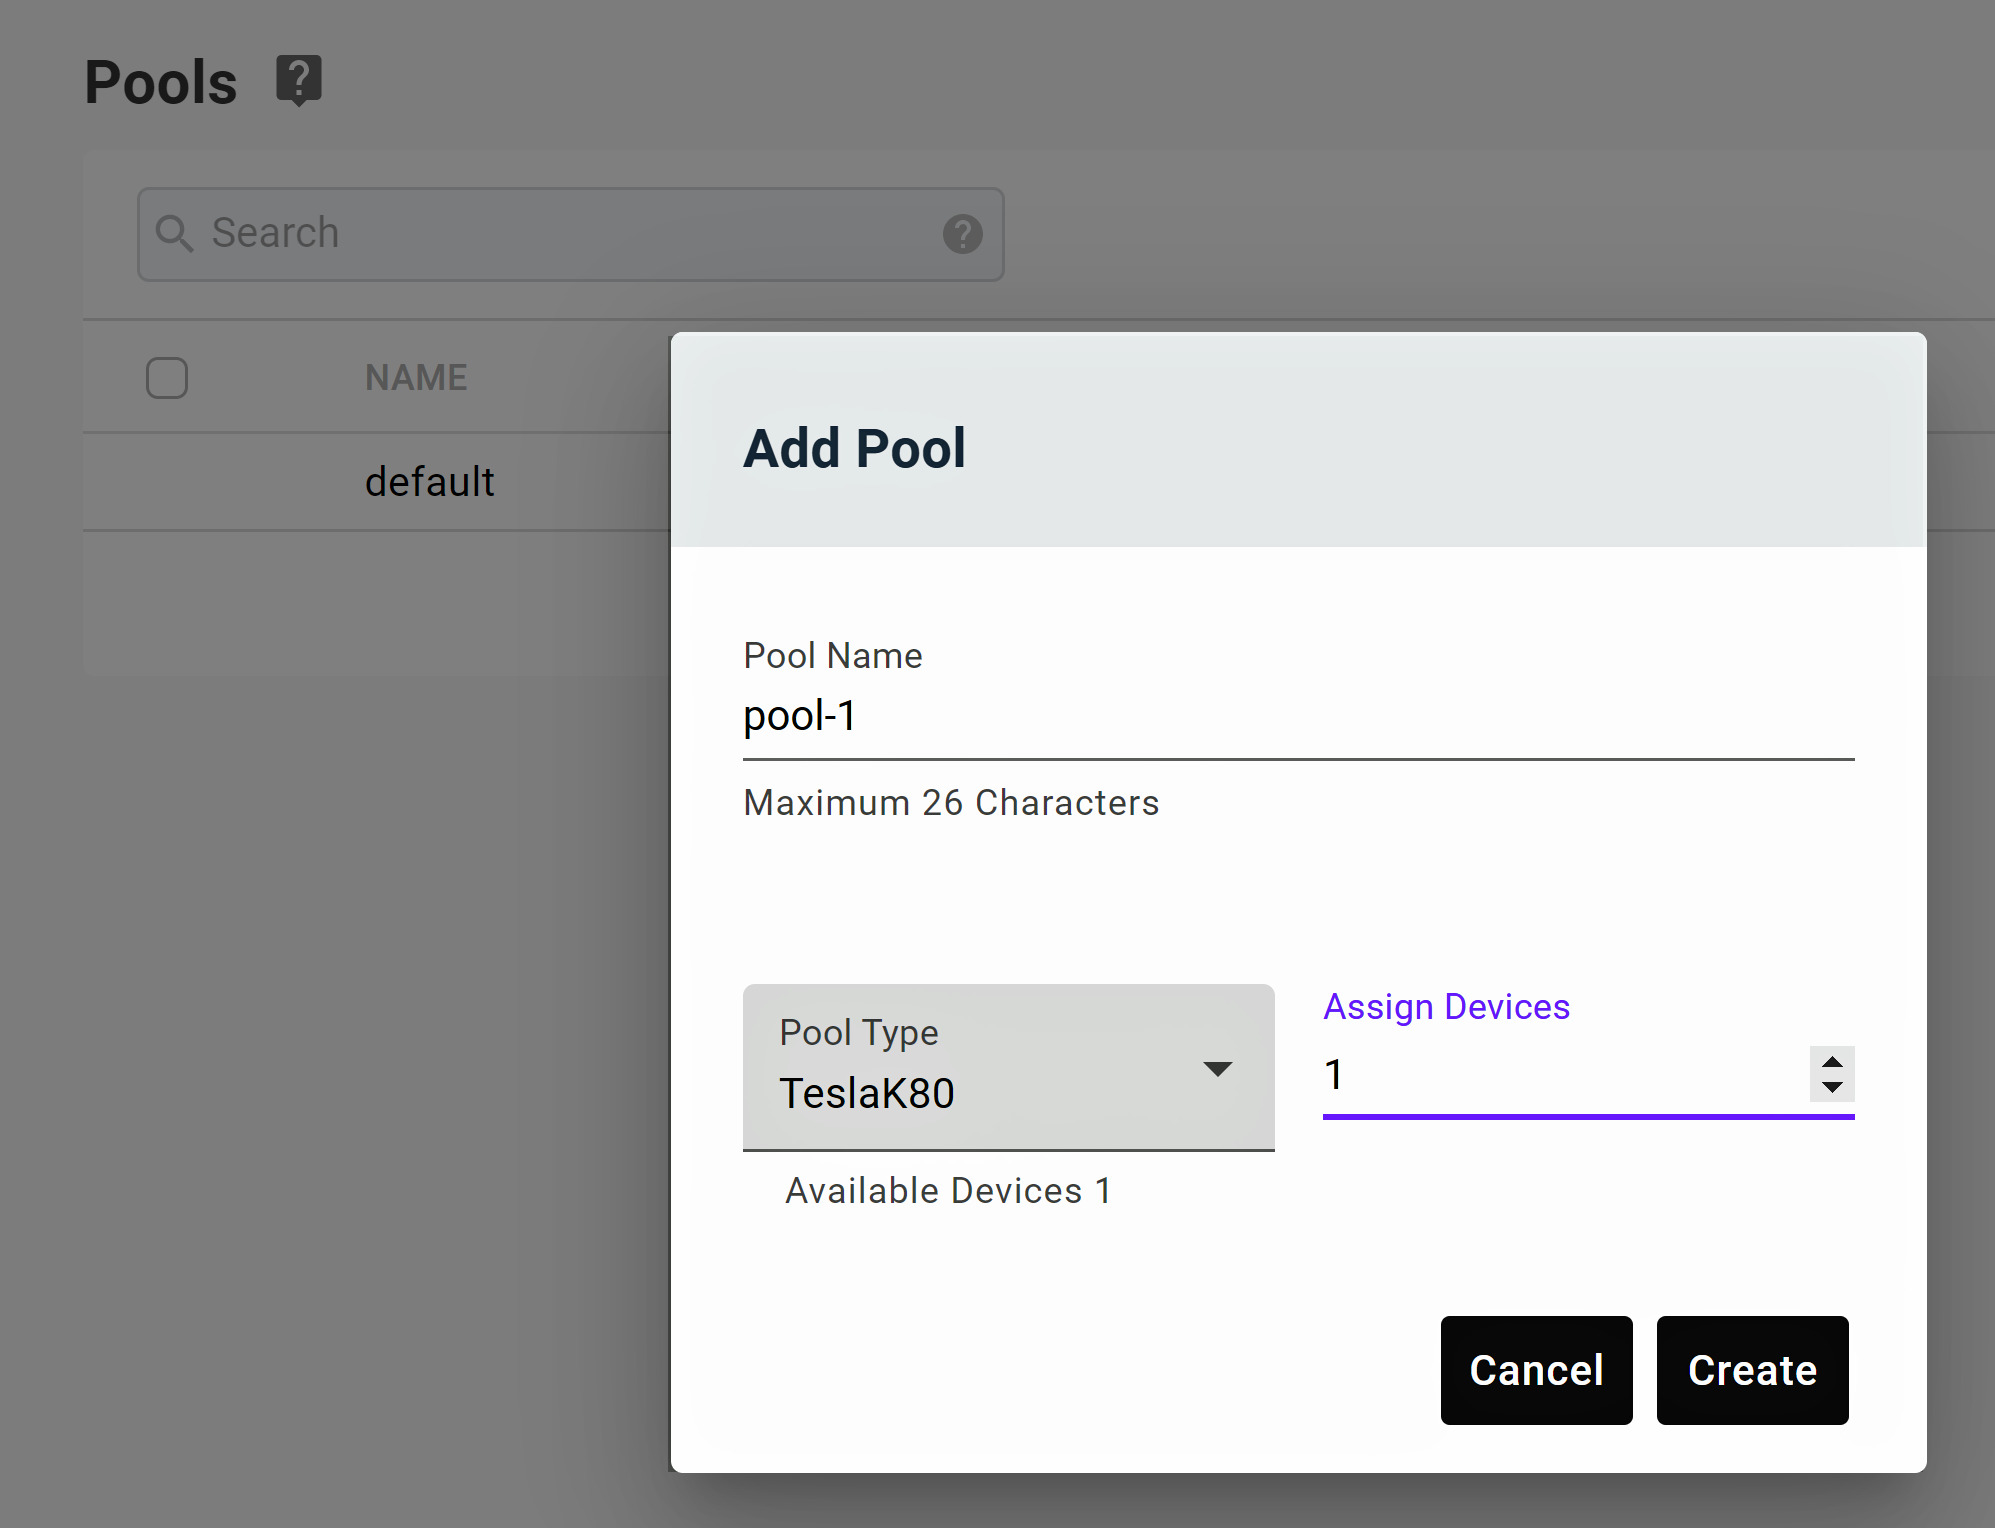
Select the “+ Pool” icon in the top right-hand part of the Pools screen
The Create Pool popup will appear
Input the name of the Pool
Assign the Devices to the Pool
Select the Create button
Note
Assigning a Device to a Pool will remove it from the Default Pool
Note
Only a single type of GPU can be assigned to a Pool
Edit Pool
Select the Pool to be edited
The Edit Pool popup will appear
The GPUs assigned to the Pool can be modified
When complete, select the Save button
Delete Pool
Select the Pool to be deleted from the left-hand checkbox
Select the delete icon from the top right-hand side of the section
A confirmation box will pop up
Accept the confirmation, and the Pool will be deleted
GPUs assigned to the deleted Pool will be available for selection by other Pools
Note
If any GPU in the Pool has an active job running, it cannot be deleted
Group Management
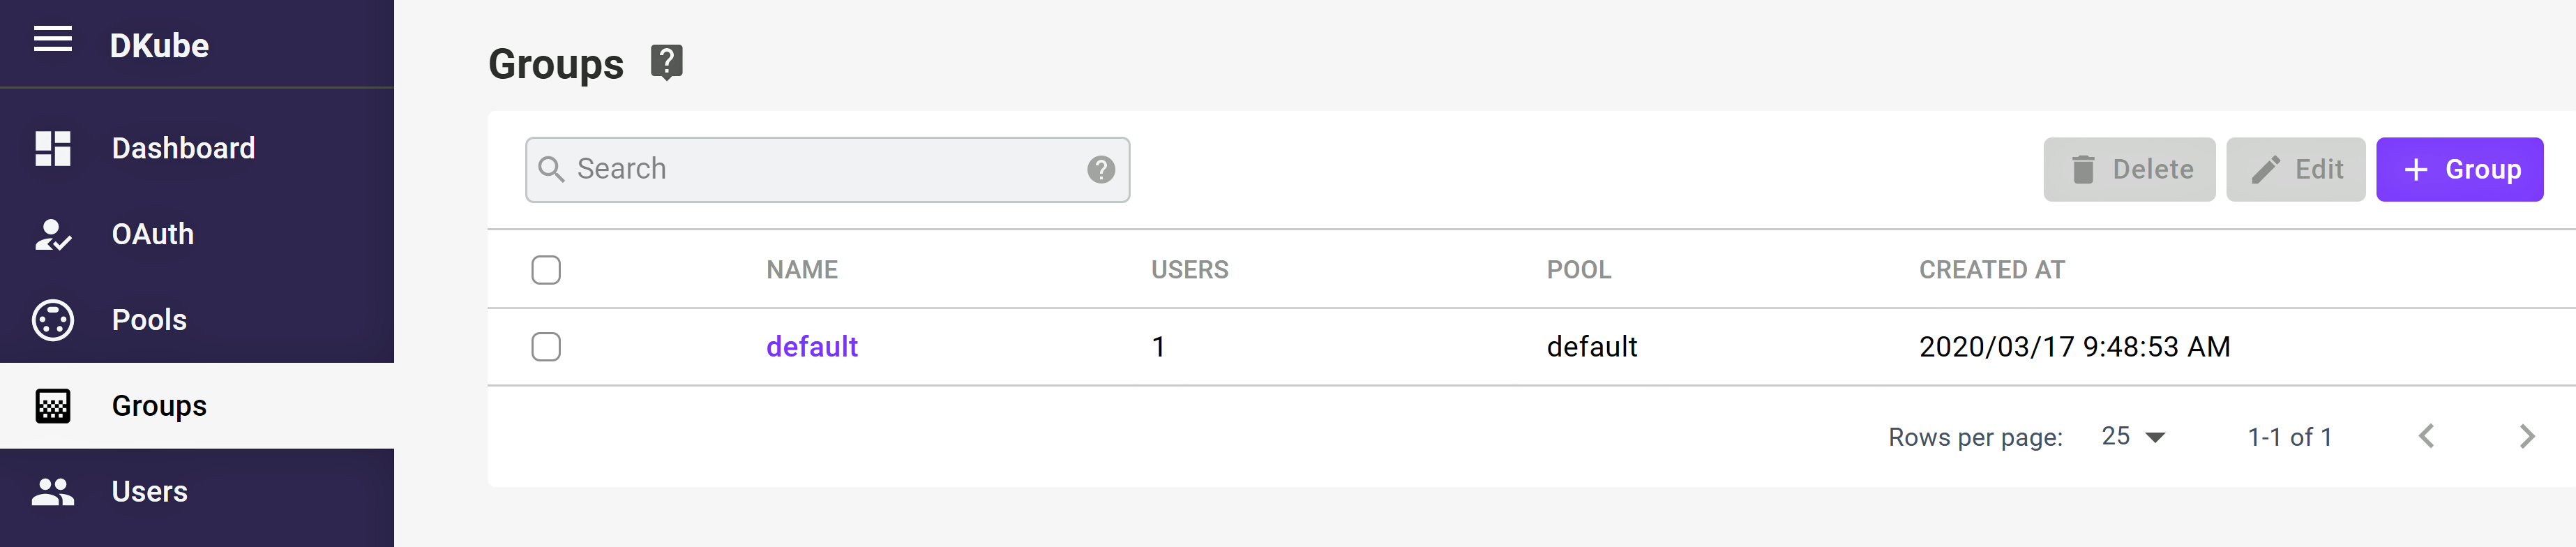
The Group management screen shows information about the current Groups, and allows Groups to be created, modified, and deleted.
Create Group
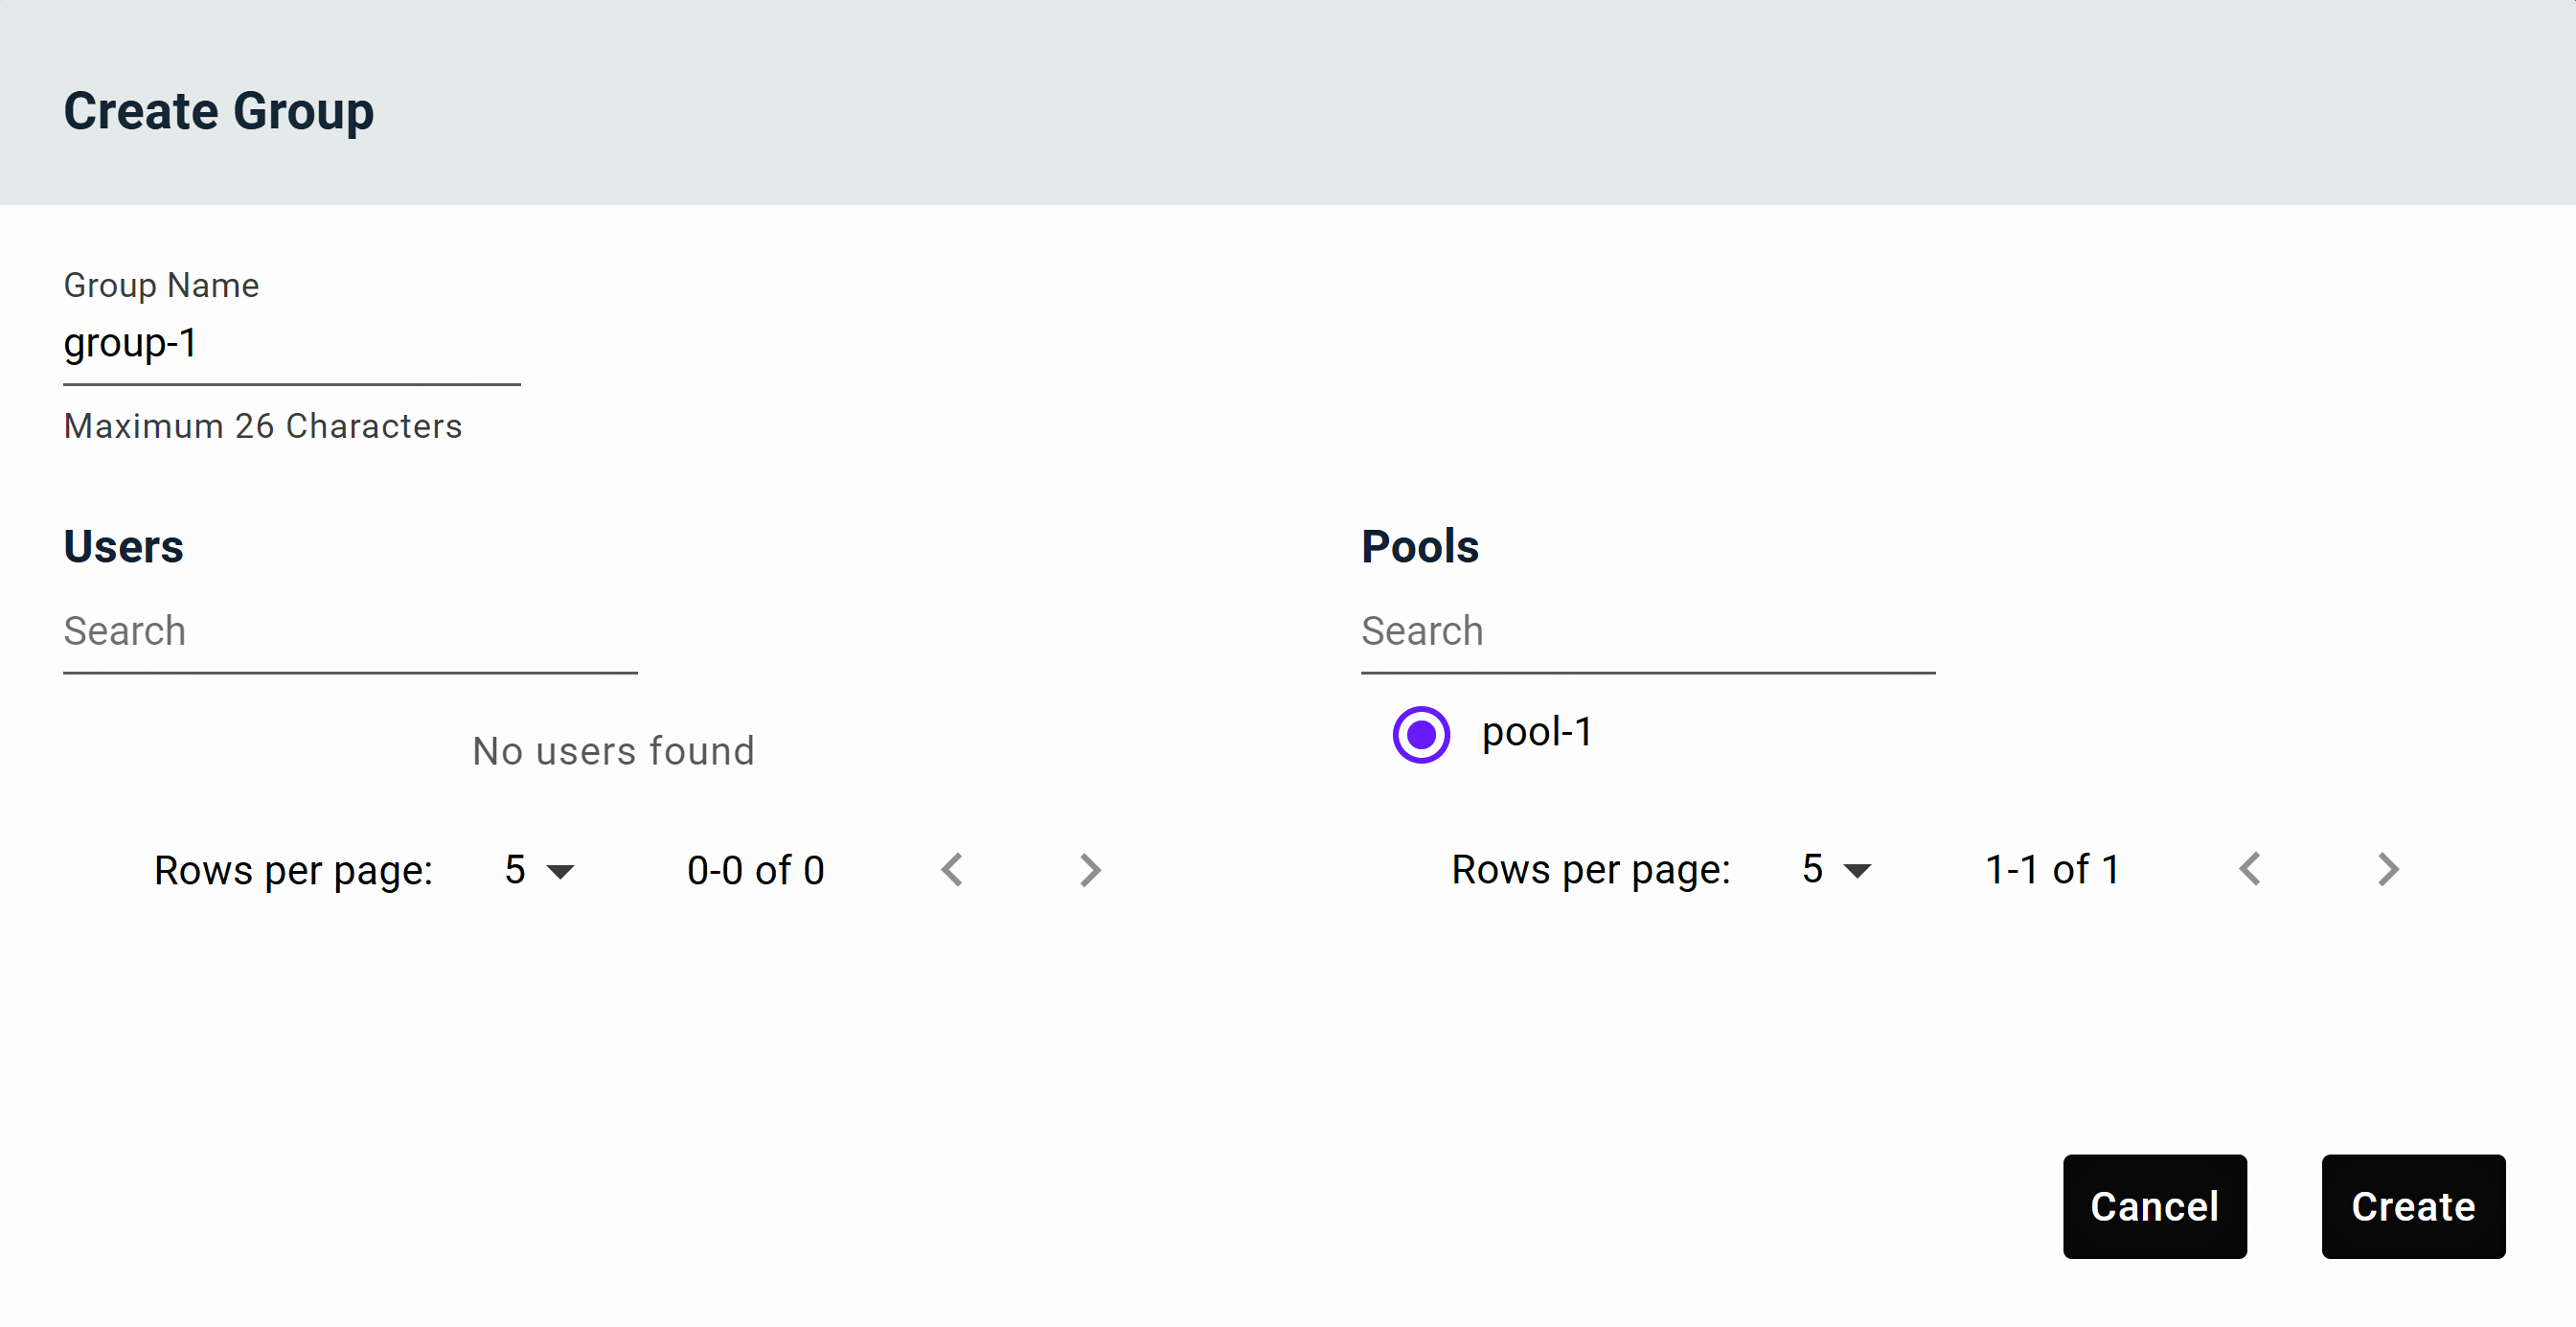
Select “+ Group” icon from the top right-hand side of the Groups screen
The Group creation popup will appear
Input the name of the Group
Select the Users that will be part of the Group, and the Pool that the Group will be associated with
Only Users & Pools that are not part of another Group will appear at this time
Multiple Users can be assigned, but only a single Pool
Select the Create button
Note
Only free Users (Users not already assigned to another Group) can be assigned to a Group. If Users are already assigned to another Group, including the Default Group, they must first be deassigned from that Group, then assigned to the new Group as described above.
Edit Group

Select the Group to be edited from the left-hand checkbox
Only a single Group can be edited at one time
Select the Edit icon at the top right
The Edit Group popup will appear
Users and Pools can be assigned or removed
Only available Pools and Users will be shown in the edit box
To move a User between Groups, the User must first be removed from its current Group, then assigned to the new Group
Select the Save button
Delete Group
Remove all Users & Pools from the Group
Select the Group to be deleted from the left-hand checkbox
Select the delete icon from the top right-hand side of the section
A confirmation box will pop up
Accept the confirmation, and the Group will be deleted
Users assigned to the Group will be available for selection by other Groups
Note
If the Group has Users or Pools assigned, it cannot be deleted
User Management
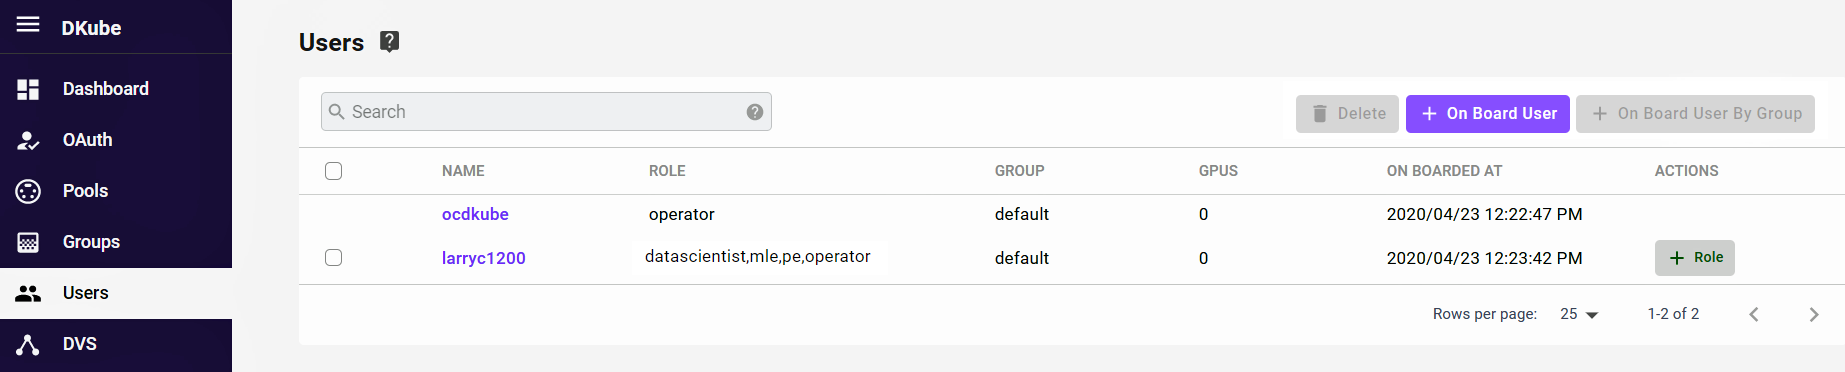
The User Management screen allows Users to be brought on board and assigned to a Group, as well as deleted from DKube.
Add (On-Board) User
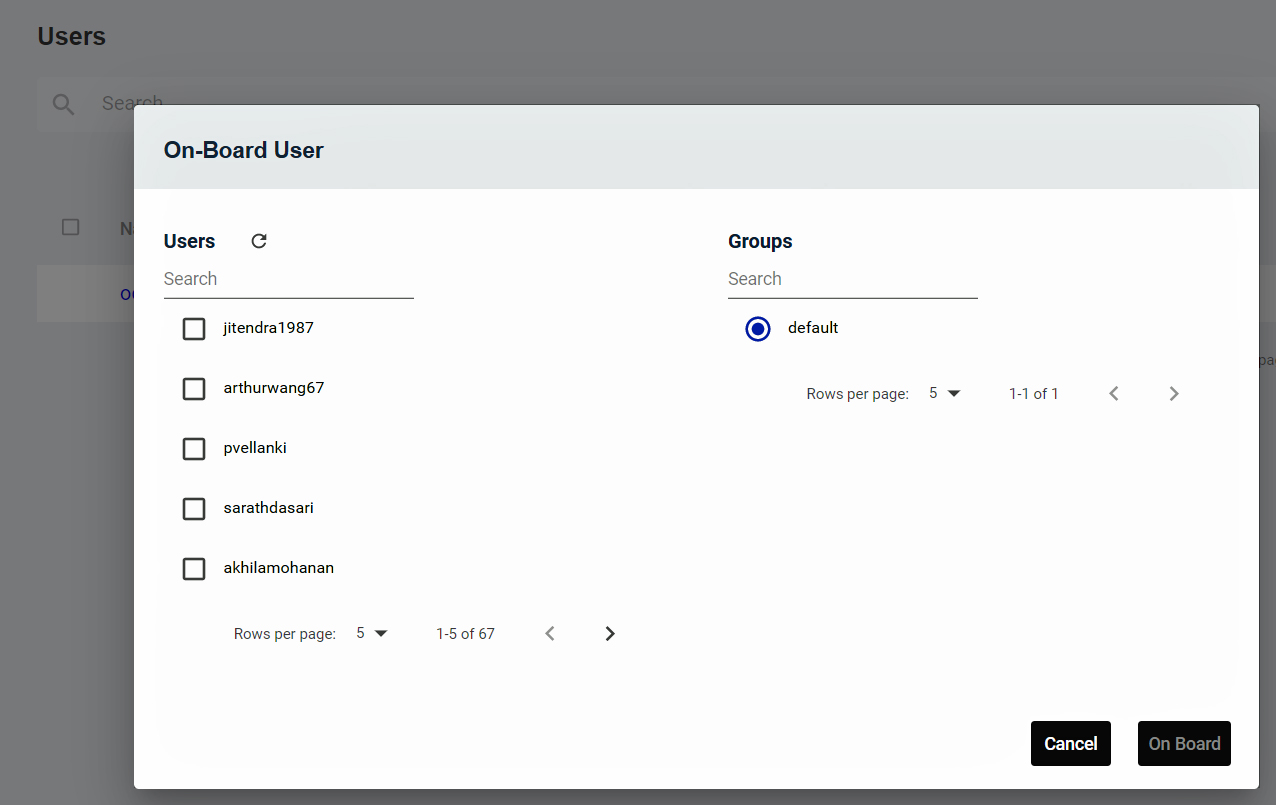
Select the “+ Onboard User” icon in the top right-hand part of the User screen
The On-Board User popup will appear
The Users that need to be added are selected by the checkboxes, and they can be added to a group by the selection boxes on the right
When the selection has been made, select “On Board”
To change which Group a User belongs to, add or remove them from the Group menu as described at Edit Group
Note
If the list of Users does not appear, refresh the User list at the top of the On-Board User popup. This can happen when the GitHub authorization has been activated or changed.
Add Users from an LDAP Group
If the authentication mechanism is through LDAP, it is possible to add users through their LDAP Group. If this is enabled, the top right button labeled ” + On Board User By Group” button is active.

Selecting the button brings up a popup that shows the LDAP groups and the users within each group. All of the users can be added at once, or specific users from that group can be added manually.
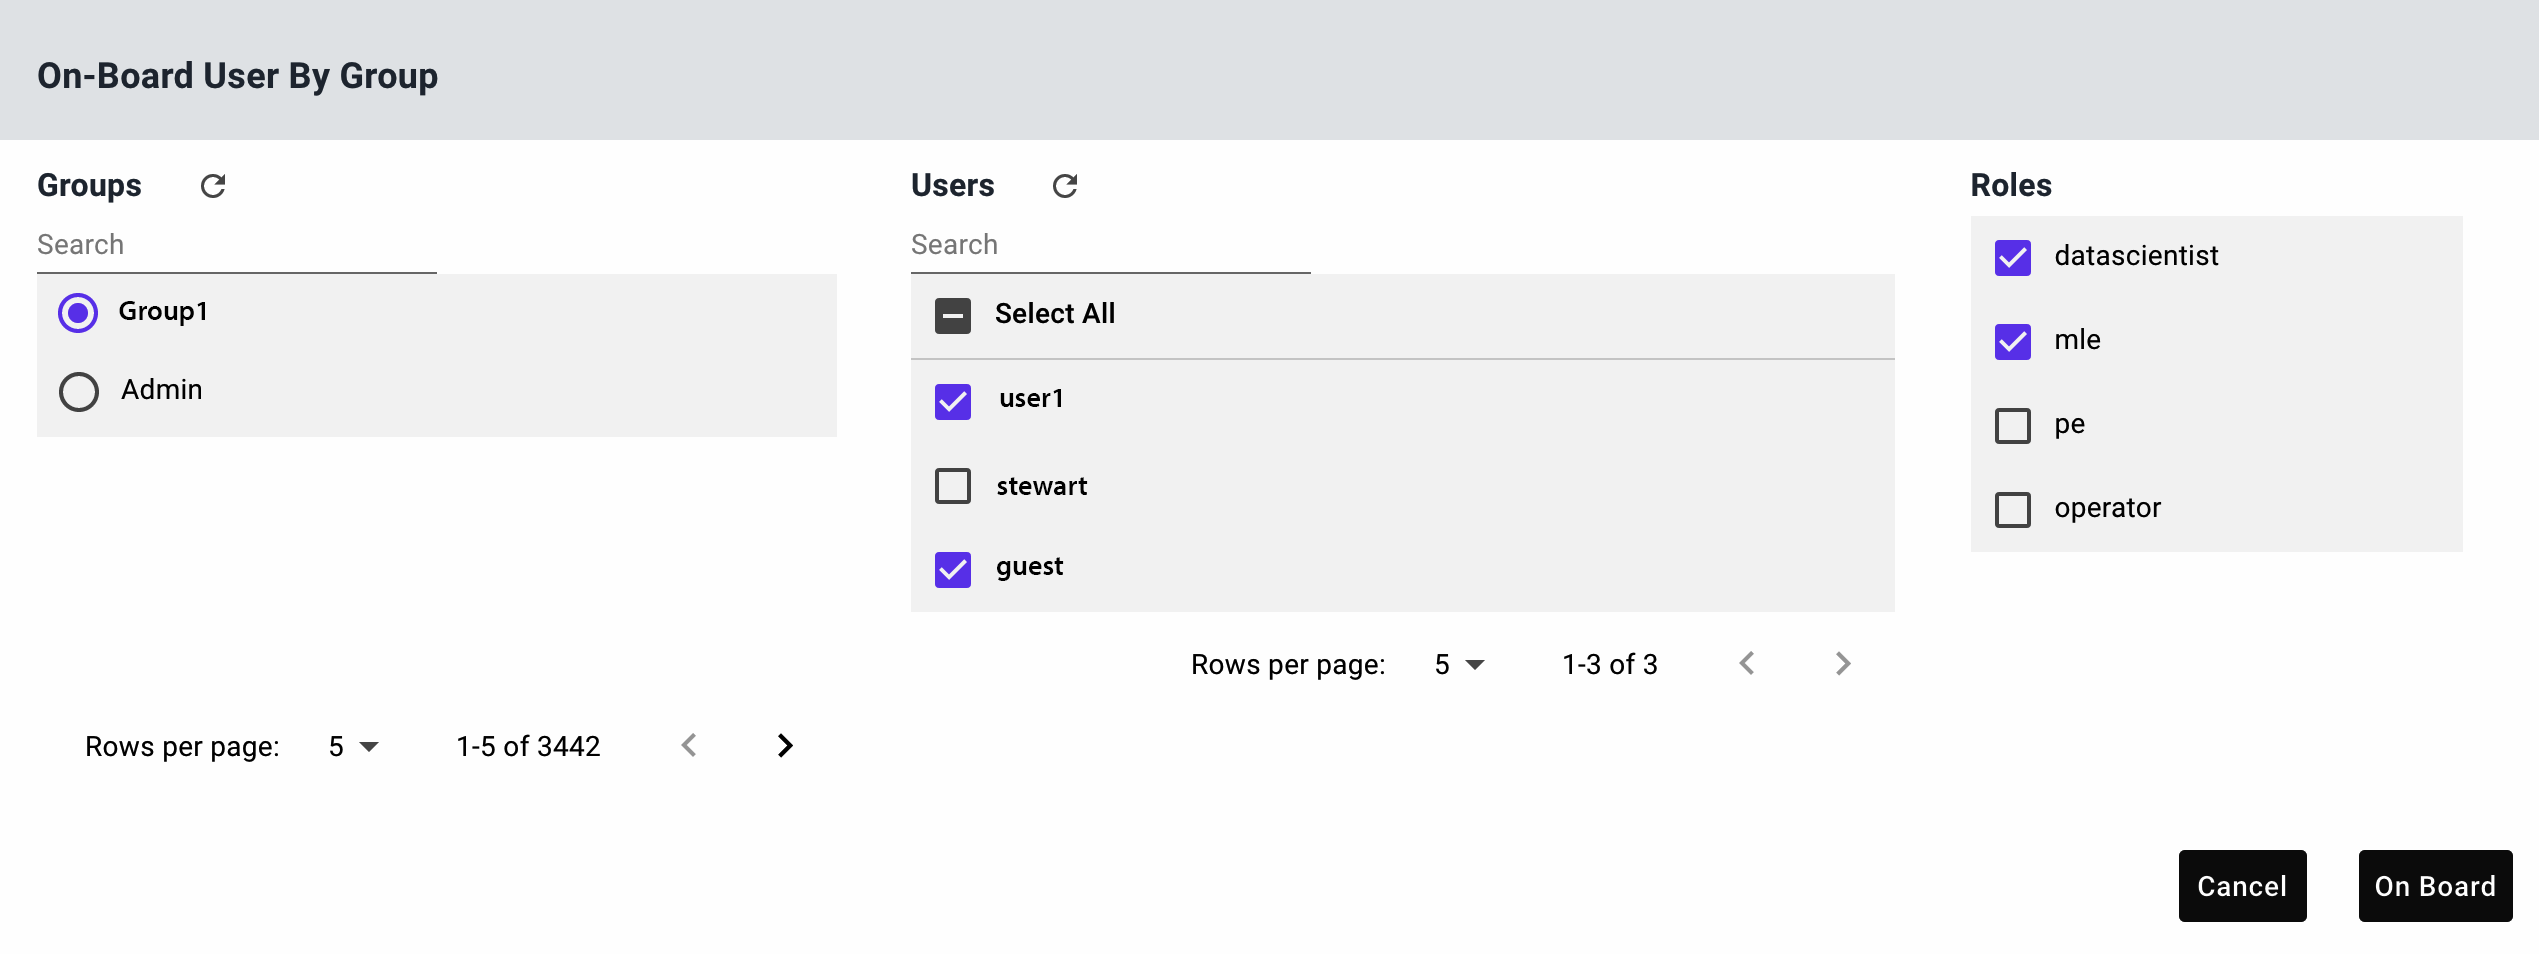
Note
Onboarding users through an LDAP group also creates a DKube group with the same name, and adds the onboarded users to that DKube group
Select User Roles
A User can have any combination of the following roles:
Role |
Function |
|---|---|
Operator (OP) |
Manage the cluster, users, and resources |
Data Scientist (DS) |
Create models |
ML Engineer (ML) |
Optimize and publish models based on specific goals and metrics |
Production Engineer (PE) |
Deploy models for inference serving |
Different Roles have access to different screens and capabilities, based on the workflow described in more detail at DKube Roles & Workflow
The first user that is on-boarded, either after installation (as a local user) or when a backend authorization is chosen (described in Authentication Credentials ), is an Operator. The Operator has access to all of the screens and capabilties.
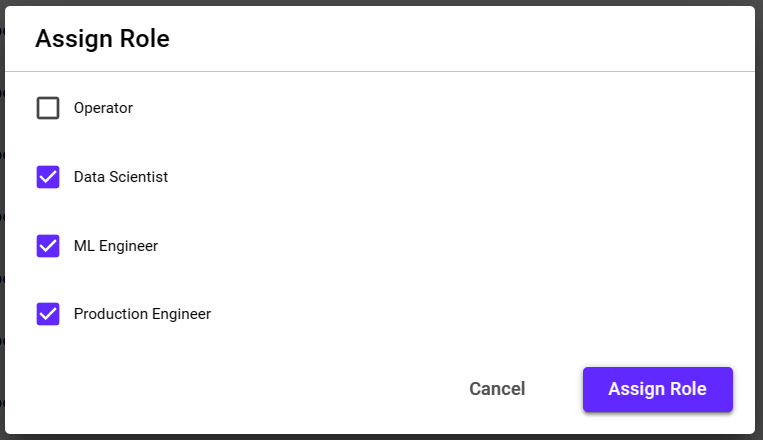
User roles can be assigned from the “Users” Menu by selecting the “Role” Button.
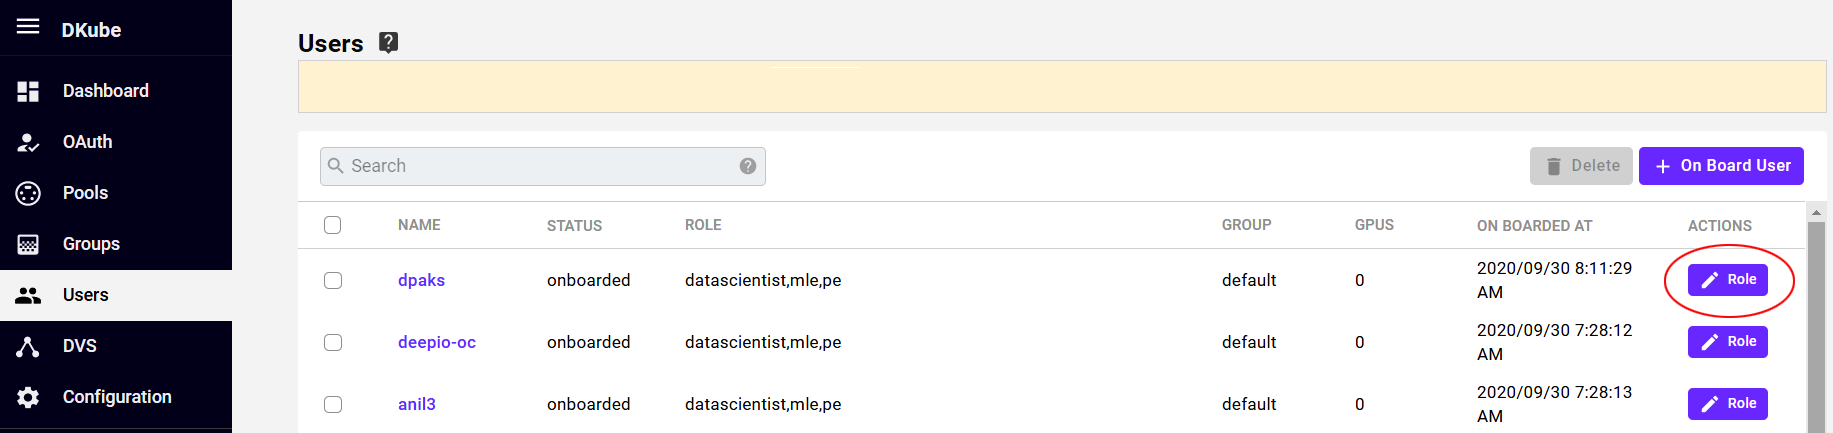
A popup provides a set of check boxes for role assignment.
Delete User
Select the User to be deleted from the left-hand checkbox
Multiple Users can be selected
Select the delete icon on the top right part of the section
A confirmation box will pop up
Accept the confirmation, and the User will be deleted from the DKube environment
Note
If the User has an active job running, it cannot be deleted
DVS
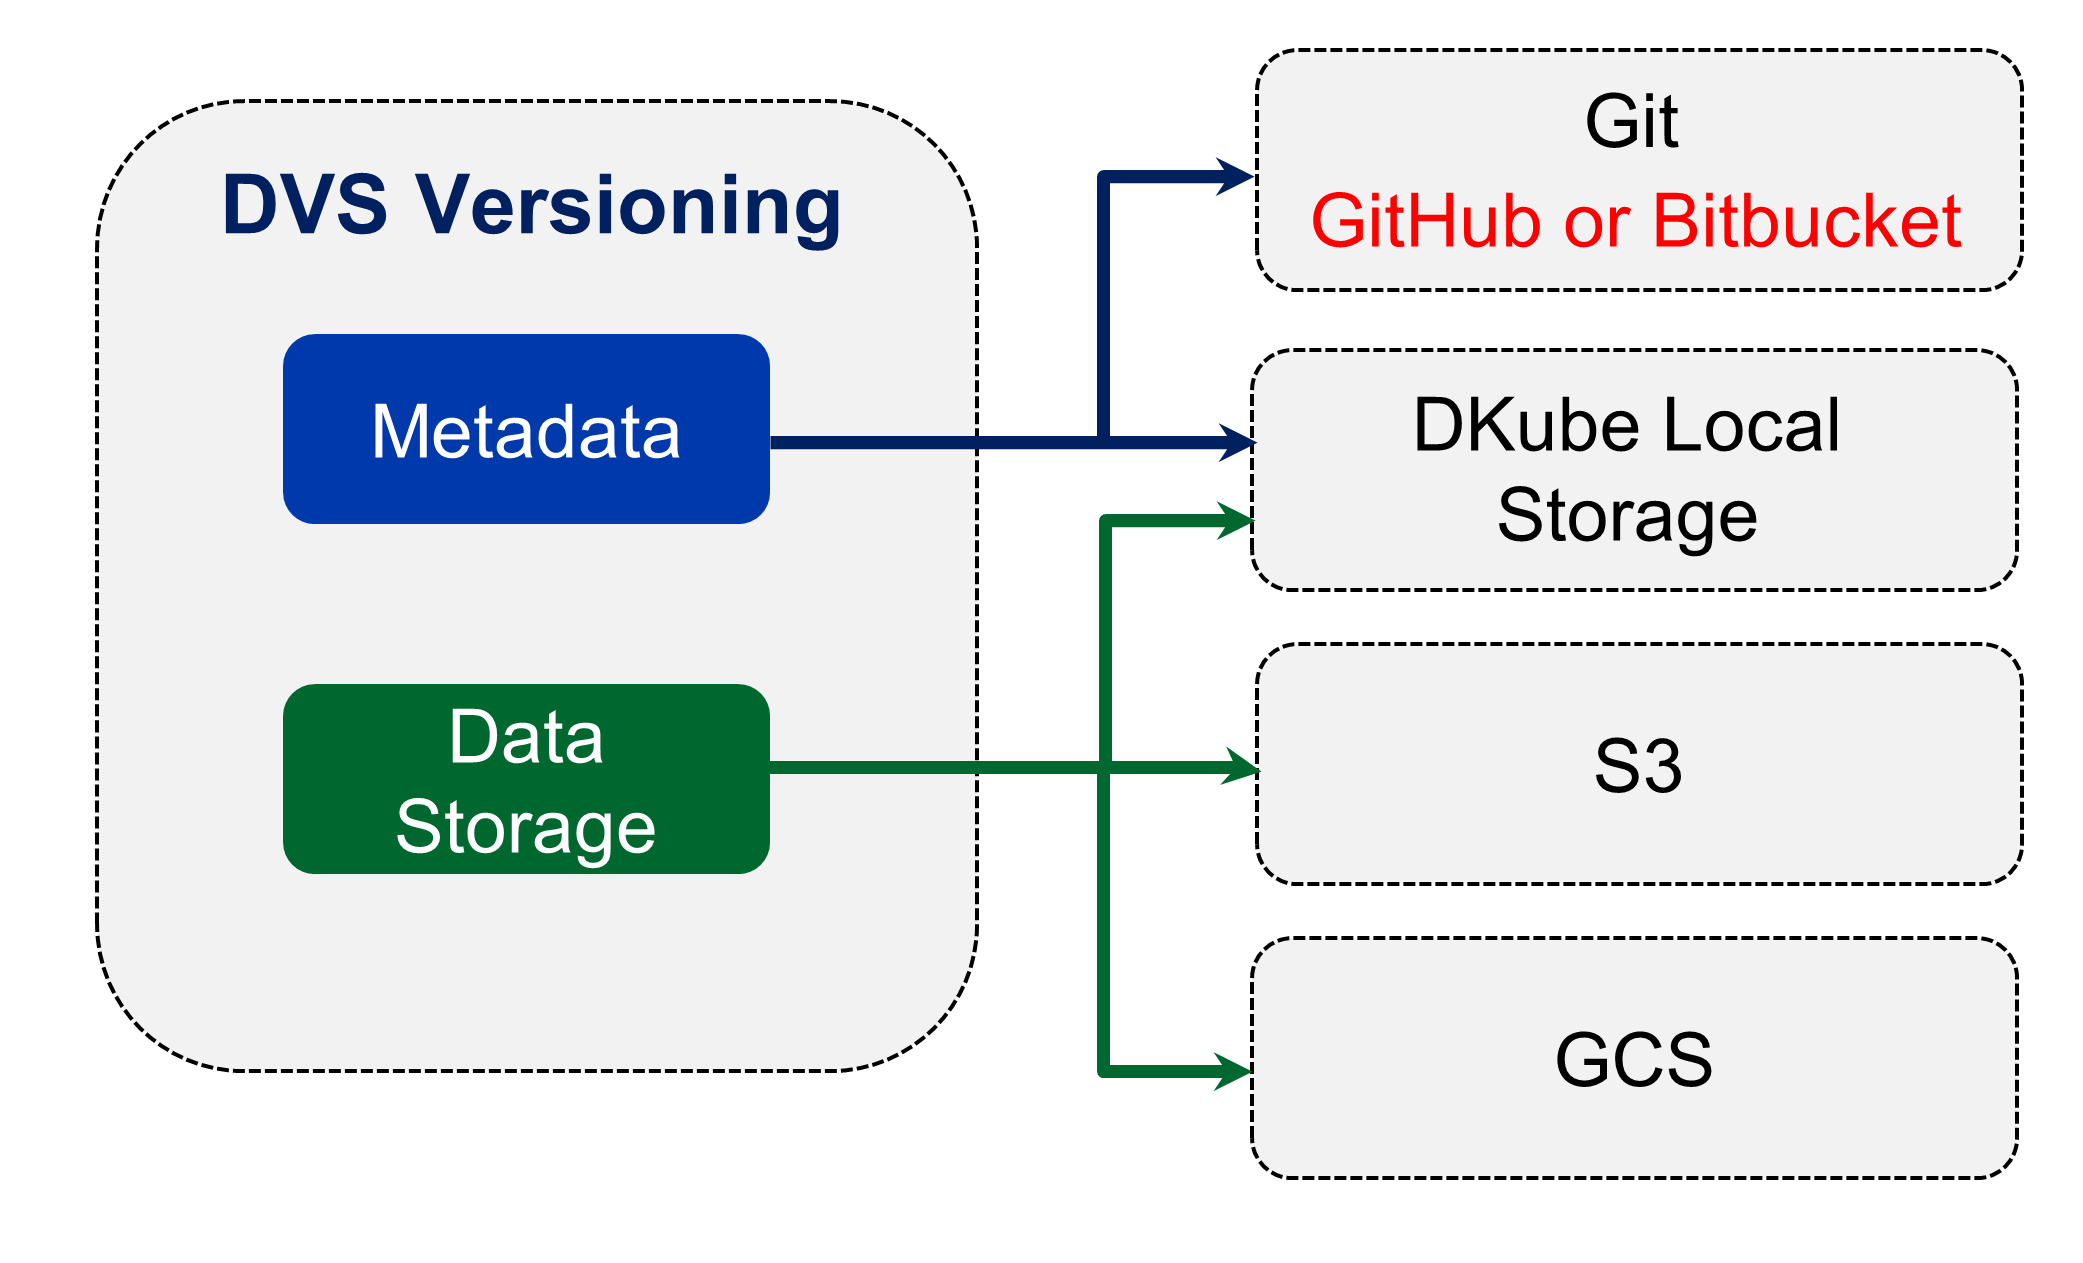
Versioning within DKube is provided through DVS, as described in the section Versioning . In order to use the version control system, the DVS storage locations must first be configured through the DVS Operator screen. The DVS targets are referenced when the Repo is created, as described in the section Repos
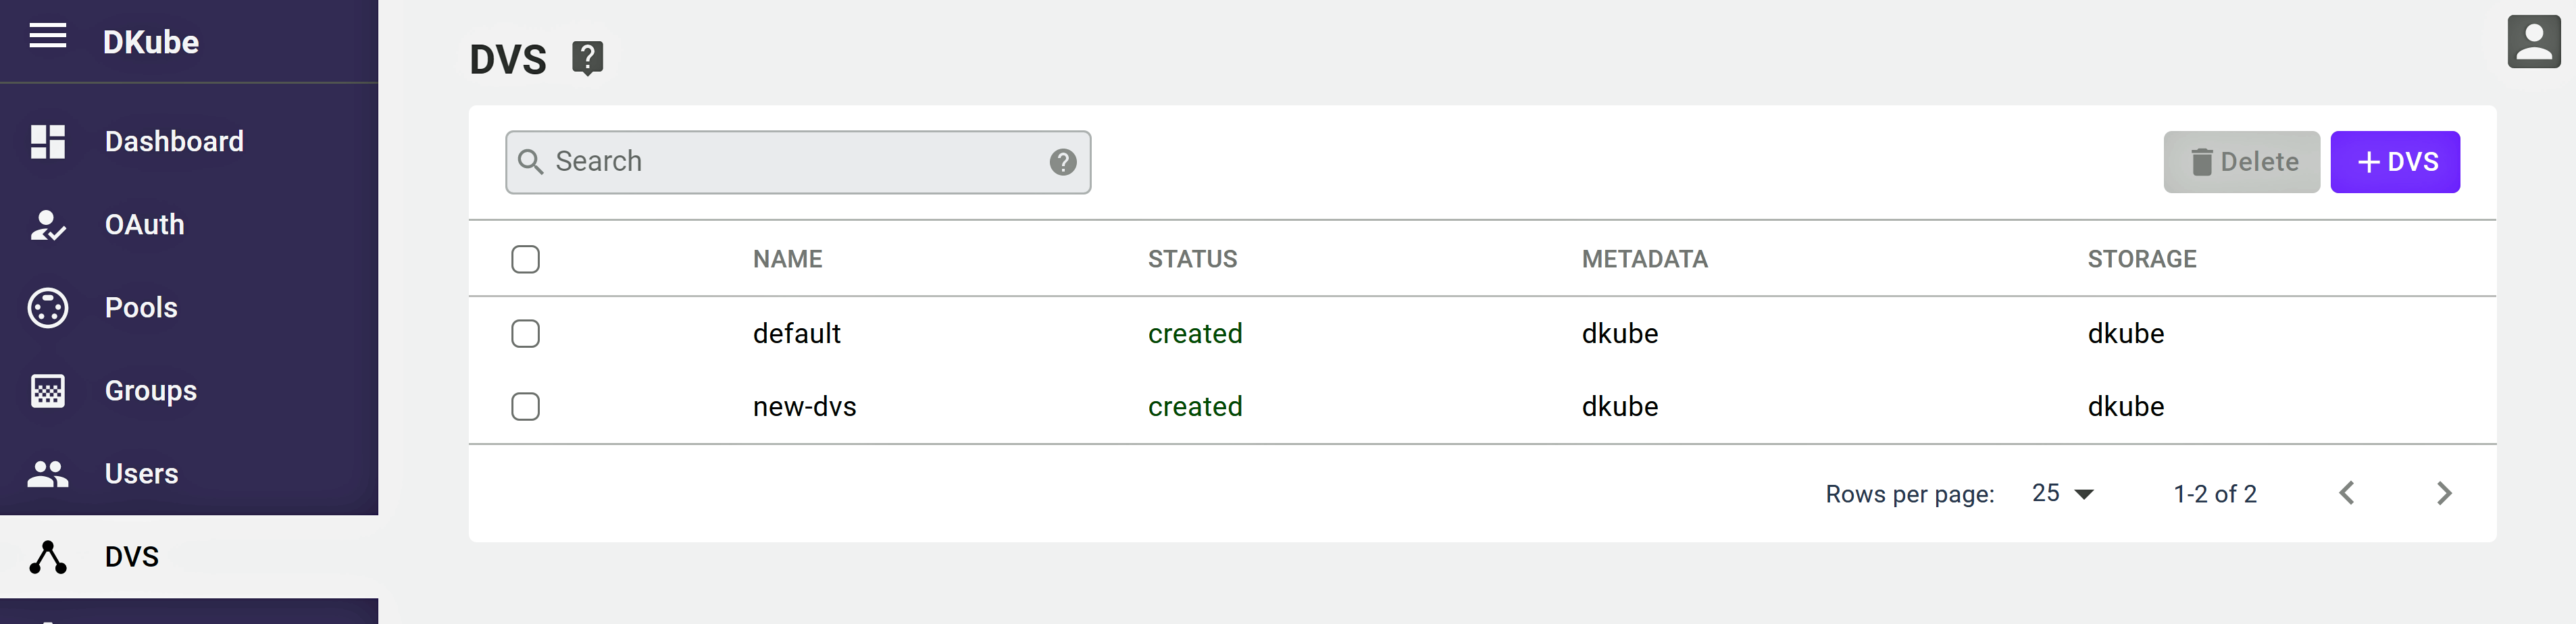
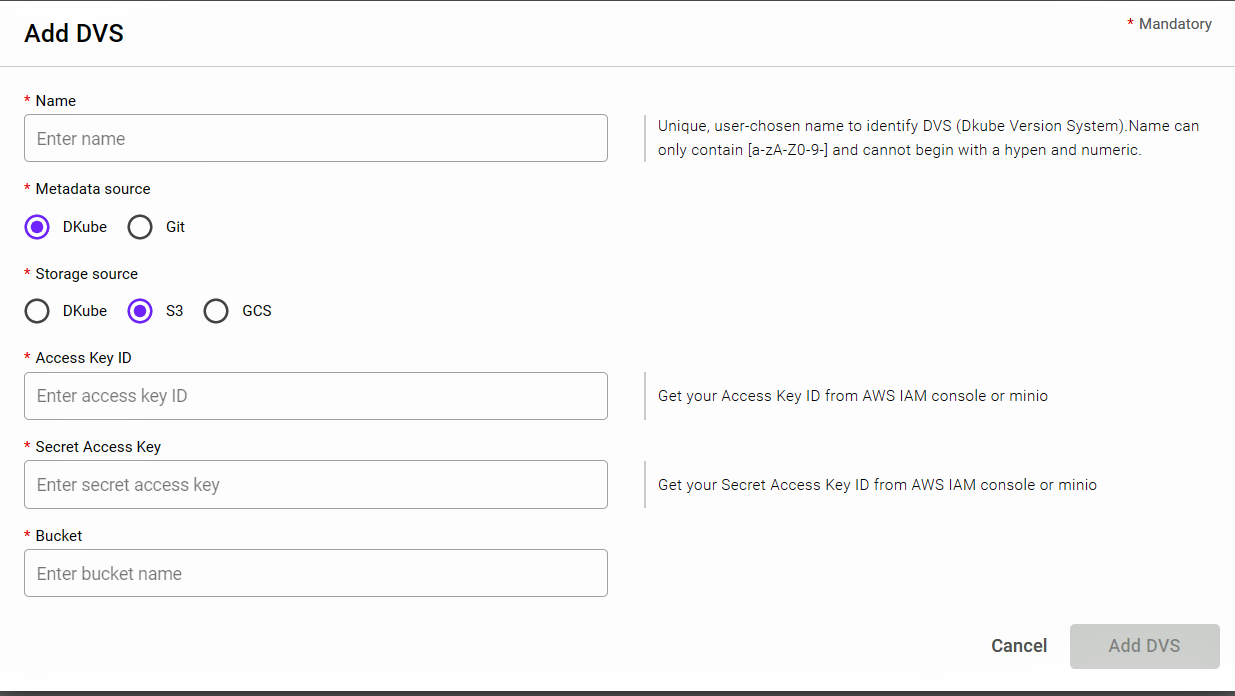
The DVS screen shows the existing DVS targets. A new target can be created by selecing the “+ DVS” button. There are 2 storage areas to configure:
The metadata source
The storage source
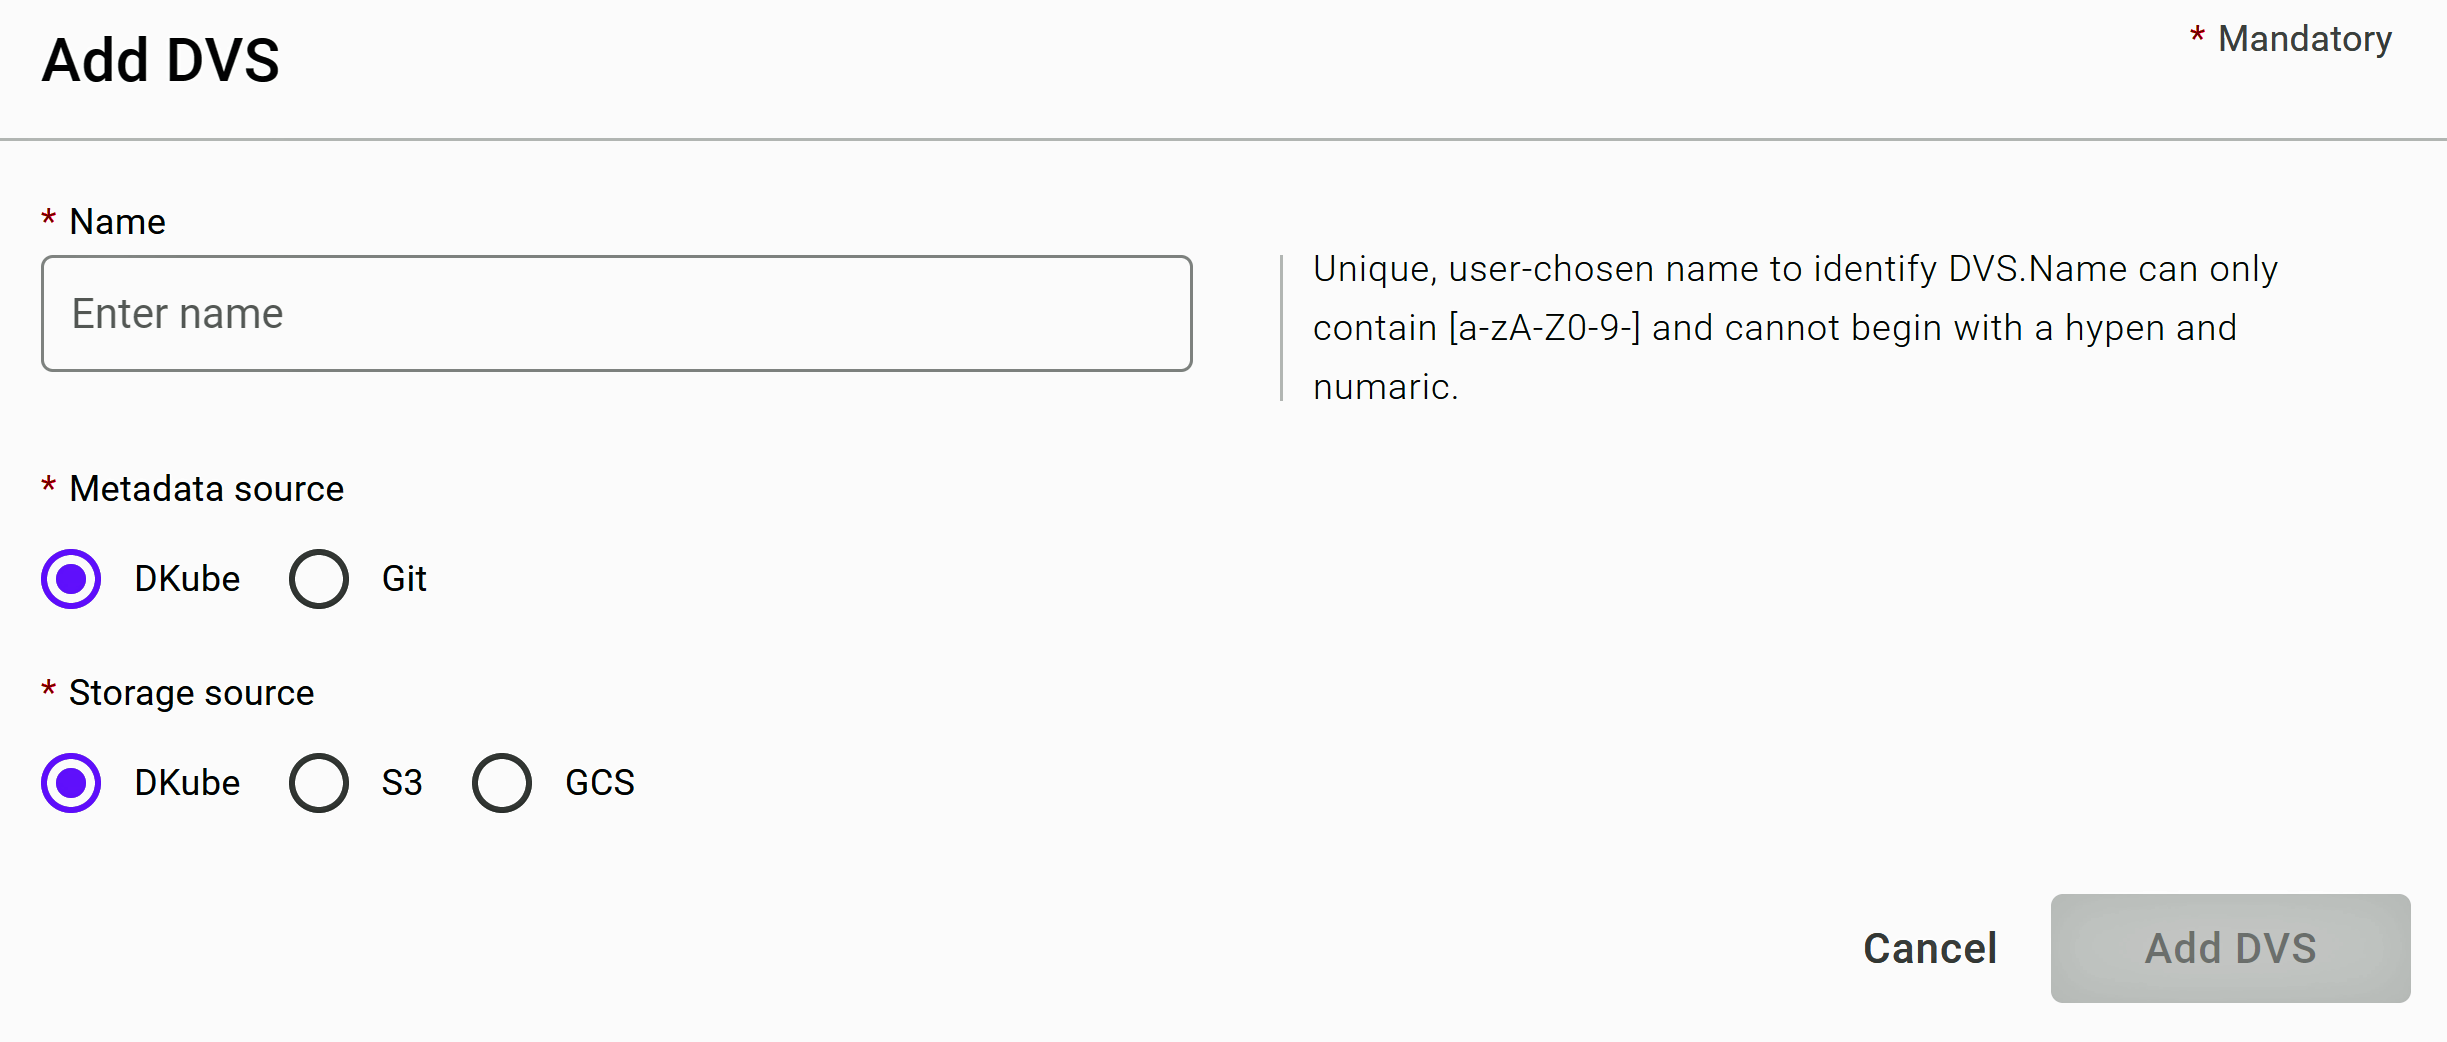
Metadata Source
The metadata, including the version information, can be stored in several places:
Within a DKube folder on the cluster
In a Git repository
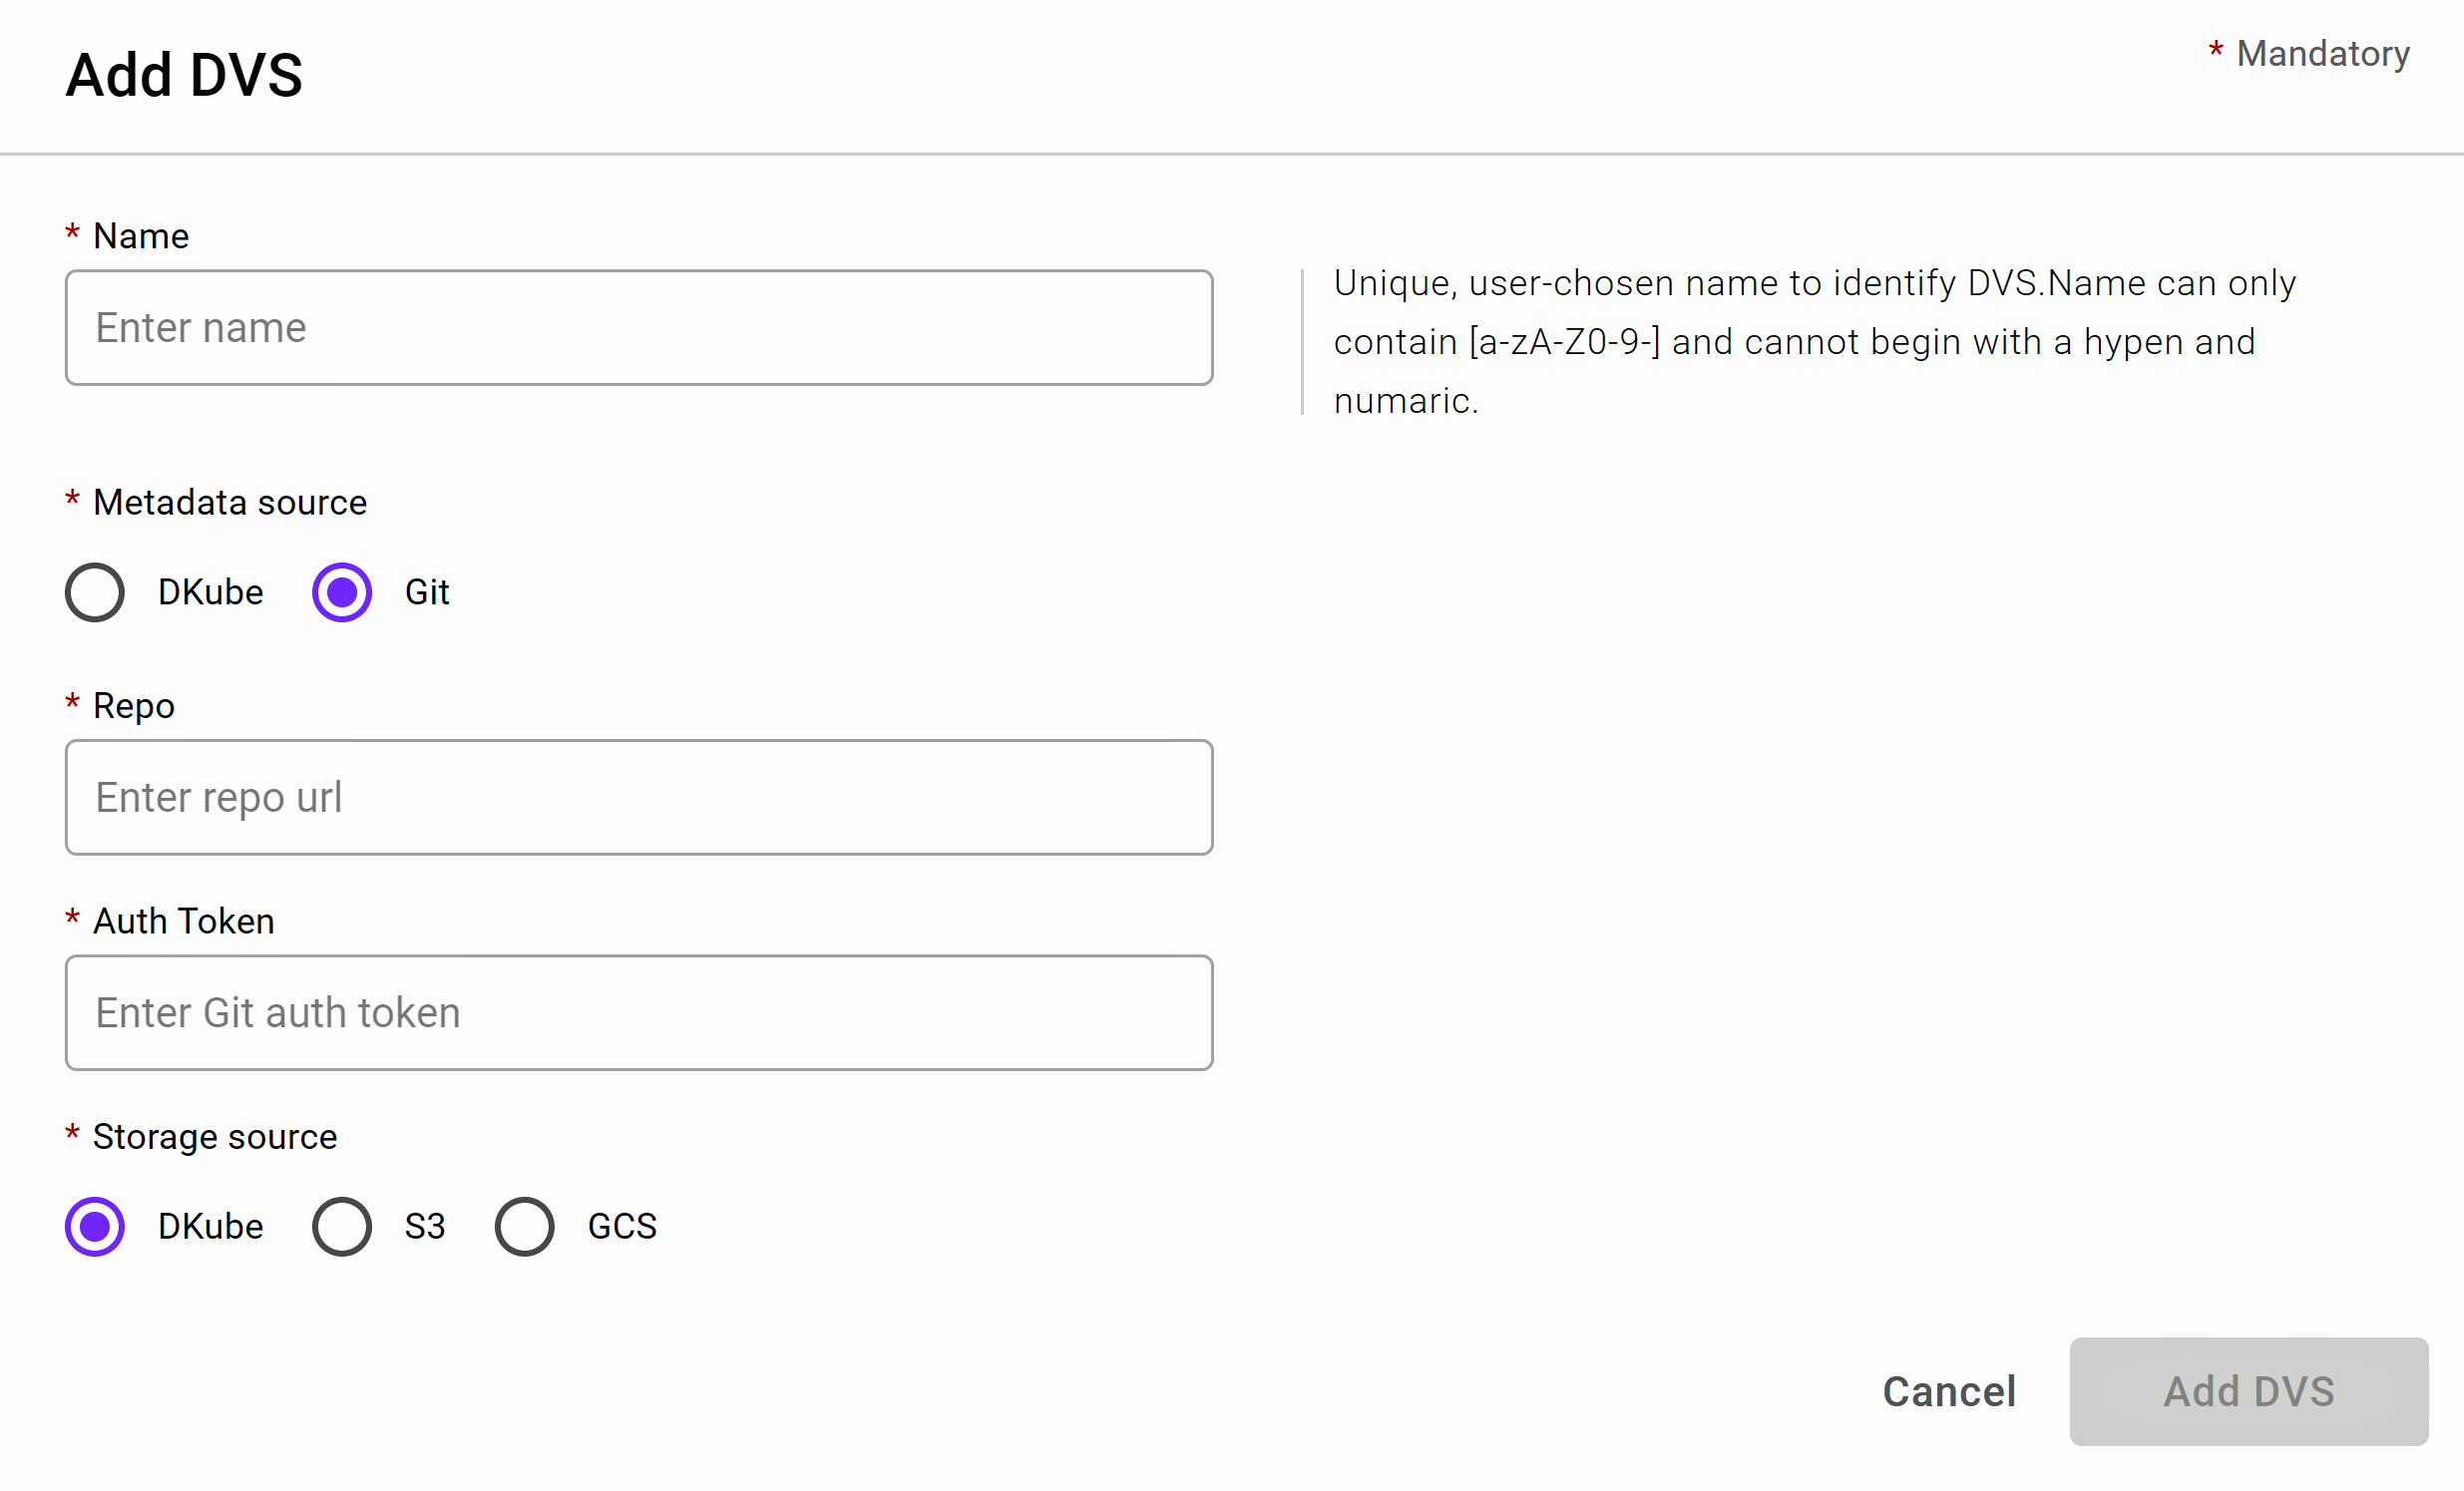
If a Git repository is the target, the following information is required.
Field |
Value |
|---|---|
Repo |
url for the Git repo |
Auth Token |
GitHub access token for the repo (see Create GitHub Token) |
Configuration
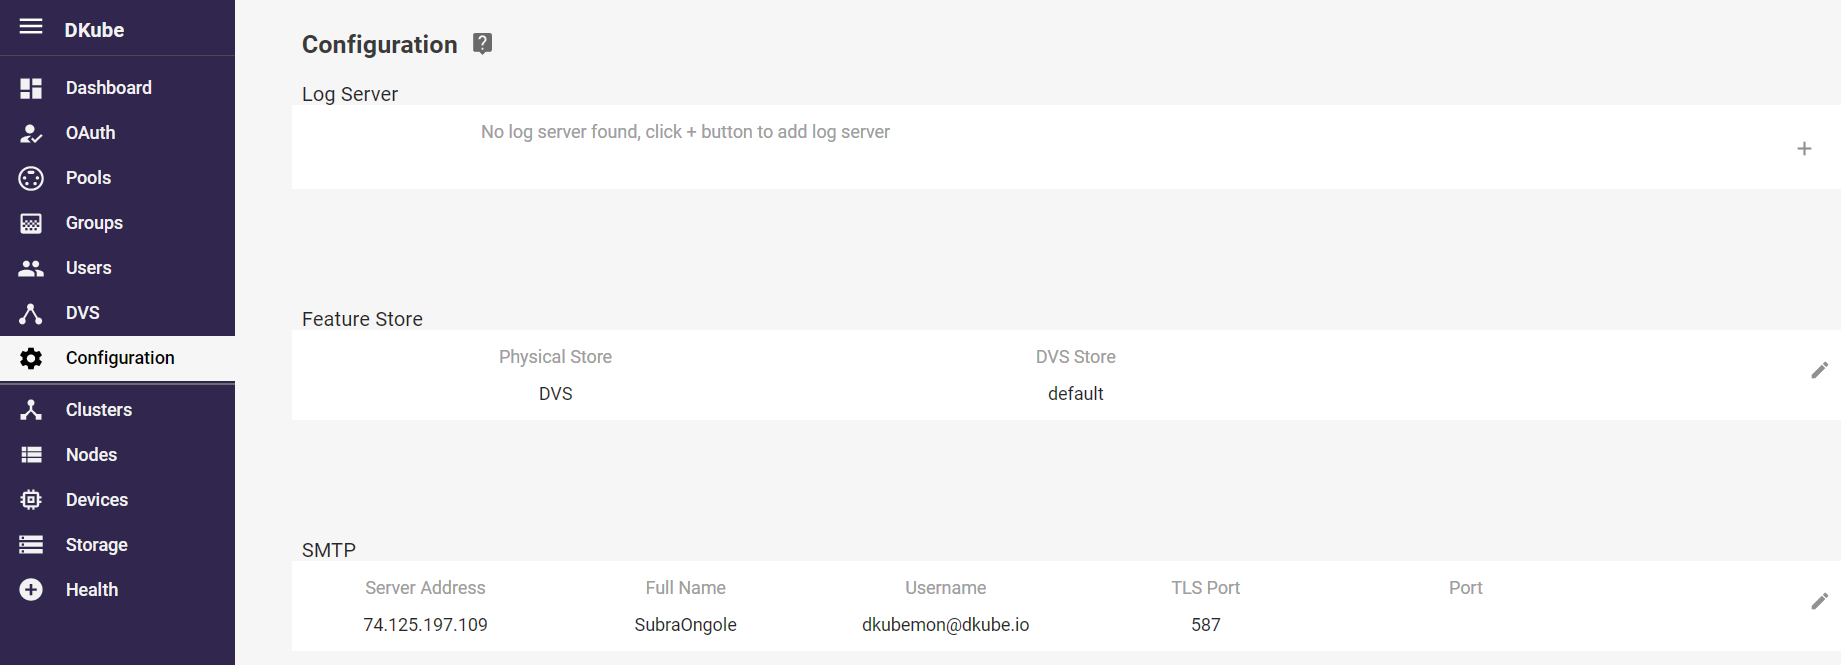
The Configuration menu allows storage sources to be configured.
Feature Store Configuration
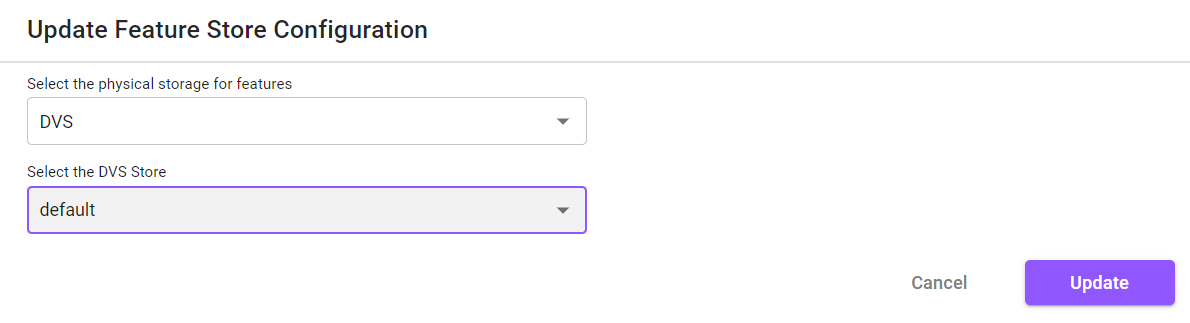
Before use, the Feature Store needs to be configured. This is accomplished by selecting the update icon at the far right of the Feature Store section. This will provide a popup to enable the Feature Store to use the DKube DVS versioning system, as described in DVS . DKube provides an initial default DVS store, but if a different one is required it should be set up prior to configuring it in this section.
Important
The Feature Store backend configuration should not be changed after being used by DKube
Cluster Management
The cluster management function of the Operator is organized through several screens.
Cluster Credentials
Cluster access is managed from the “OAuth” menu selection on the left hand side of the screen.

After installation, the DKube credentials are handled through local authorization. The figure shows a DKube authorized by GitHub. The OAuth menu has 2 functions:
Activate the backend authorization for general DKube use
Update the backend credentials when required
This is discussed in more detail in section Authentication Credentials
DKube Status Information
The rest of the cluster management functions are accessed from the right hand menu.
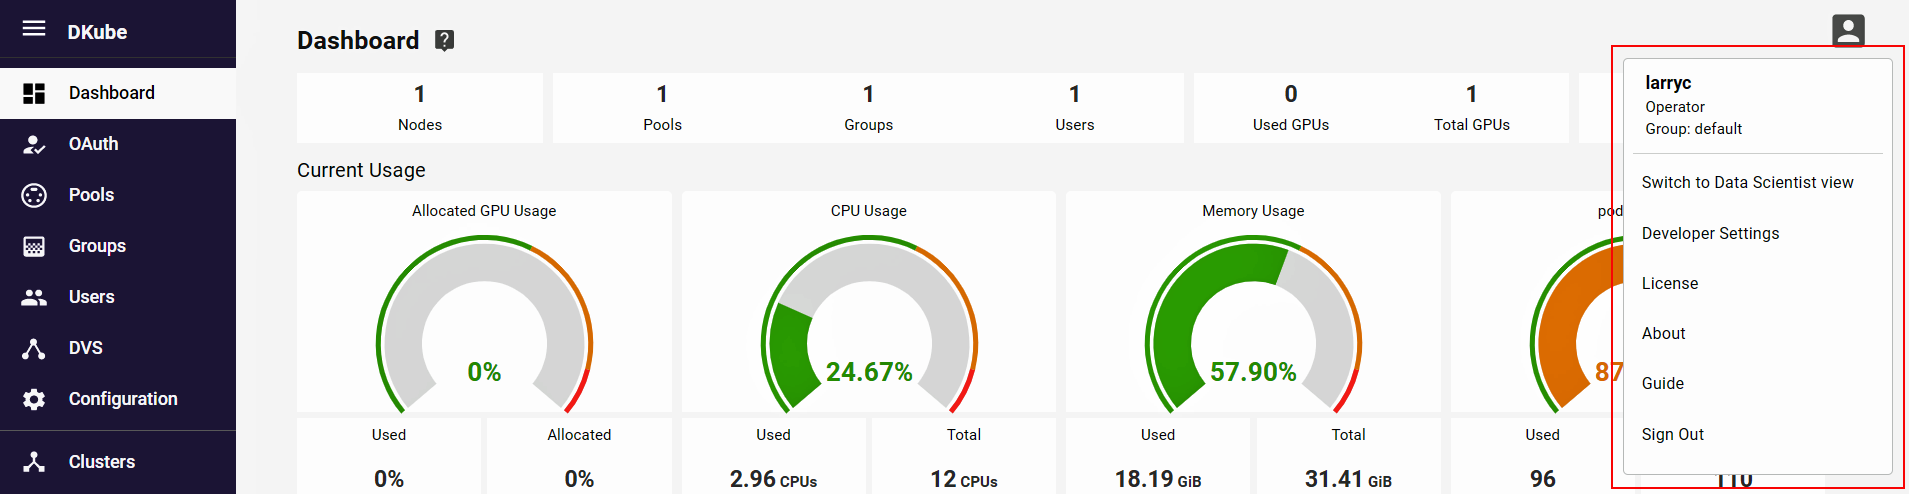
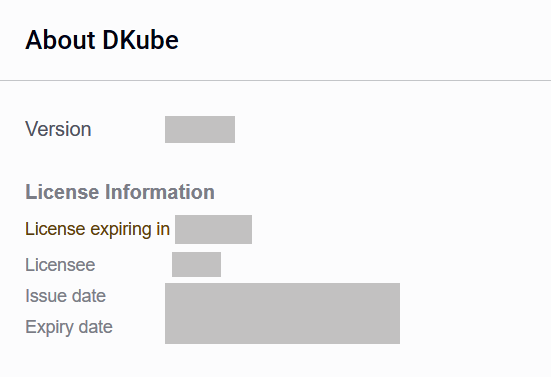
Status information about the DKube installation is available from the “About” menu item.
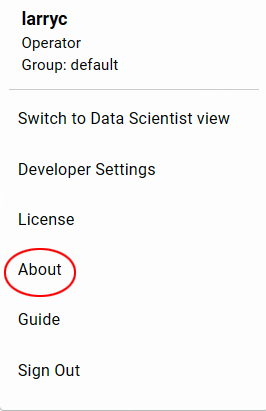
The “About” popup provides information on the DKube installation version, and on the status of the license. If the license shows that it is running out soon, contact your cluster administrator to update.
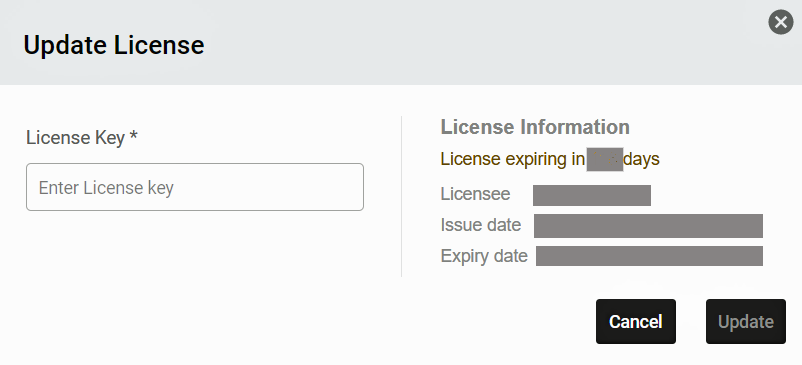
DKube License Update
The Dkube license can be updated by selecting “License”.
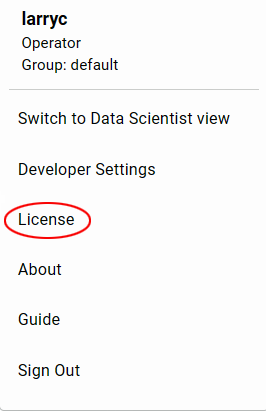
This will provide a popup that shows the current license information, and allows a new license token to be pasted in.
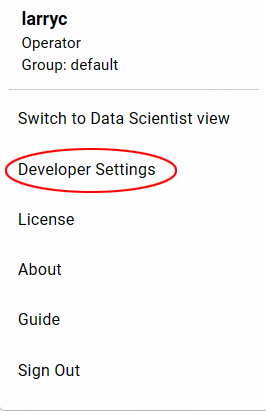
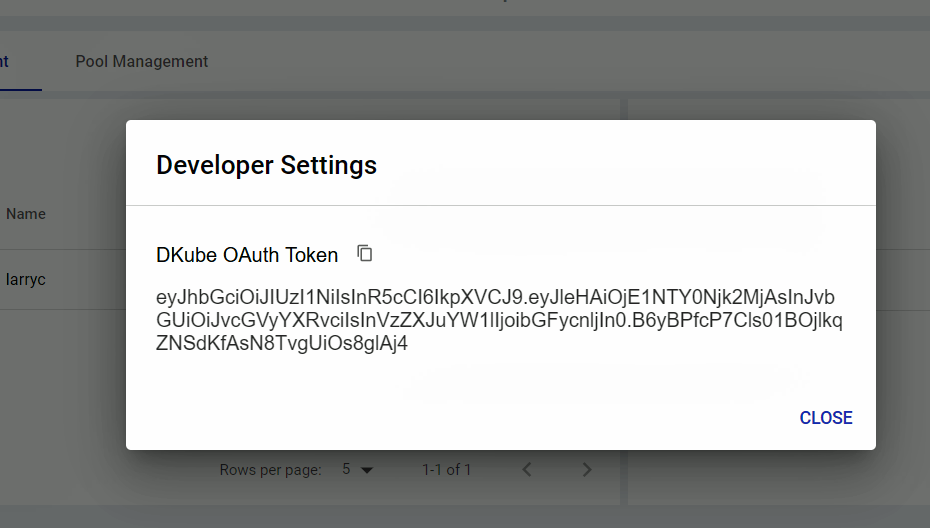
DKube OAuth Token
DKube allows access through the use of an OAuth token. This is used when access is required to the DKube cluster. The token is provided through the “Developer Settings” menu item.
Multicluster Management
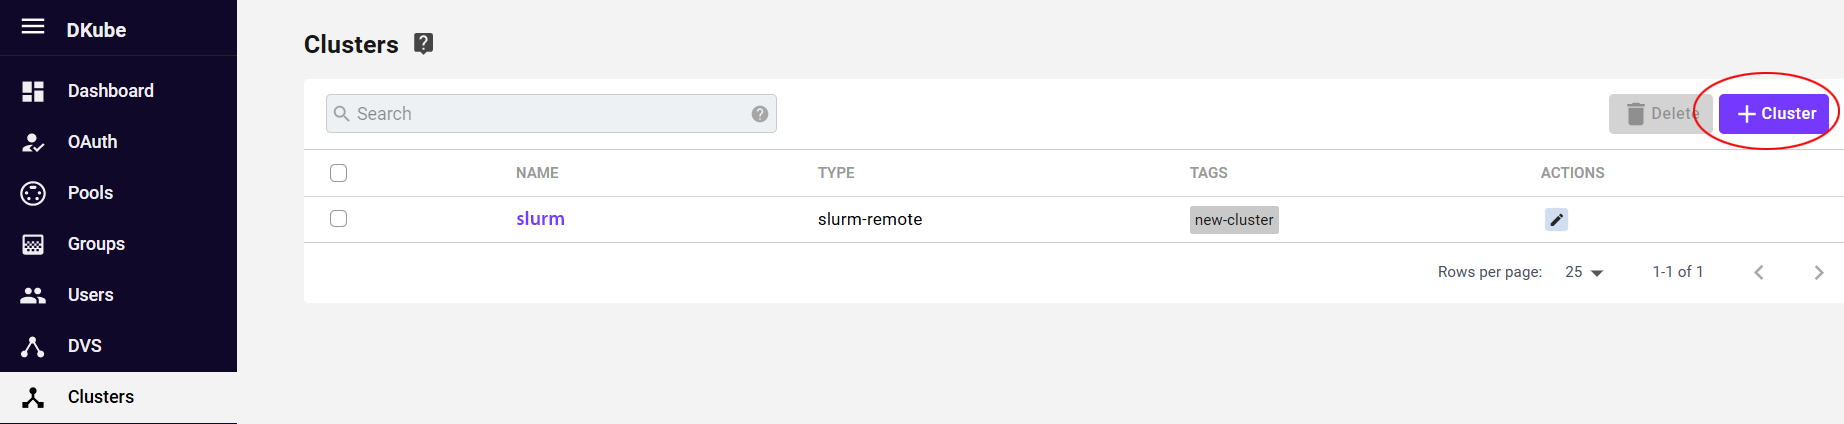
DKube can add remote clusters for Job execution, as described in Multicluster Execution. Before submitting a Run to a remote cluster, it needs to be added to the DKube database. The “Cluster” screen provides a list of the remote clusters that are available for Run submission. The details of the cluster can be viewed by selecting the cluster name.
Add a Remote Cluster
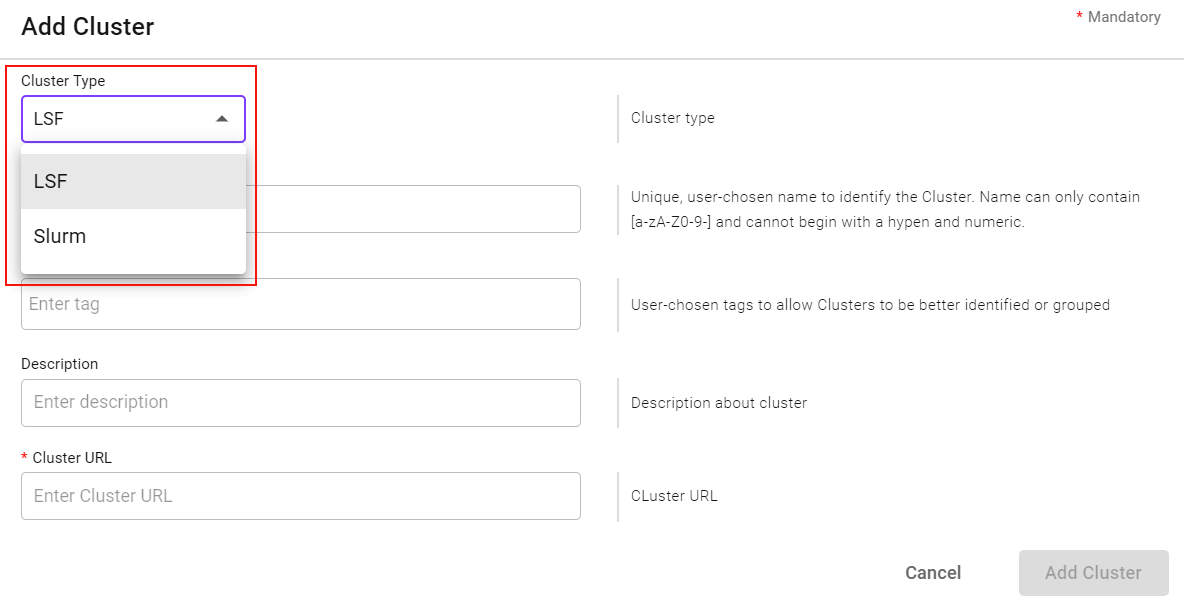
A remote cluster can be added by selecting the “+ Cluster” button on the top right-hand side of the screen. A popup will appear to select the type of cluster and enter the required characteristics.
Edit a Remote Cluster
Cluster characteristics can be modified by using the Edit icon to the right of the cluster.
Remove a Remote Cluster
In order to remove a remote cluster from DKube use, select the cluster name from the check box on the left, and use the “Delete” button.
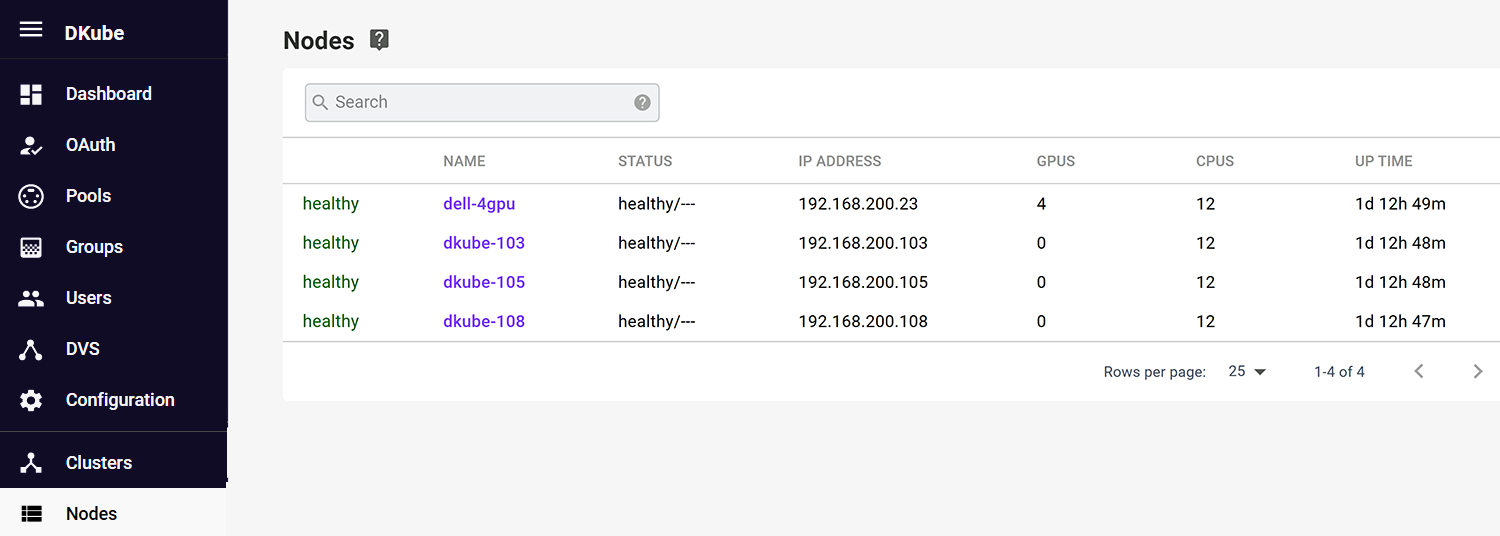
Node & Device Status
The nodes on the cluster can be viewed from the “Nodes” menu selection on the left hand of the screen. Selecting a node provides a list of the devices on each node, their status & utilization.
Details on each Node in the cluster can be viewed through the “Devices” menu selection. This will show the cluster-wide utilization of the device, as well as its health.
