Deploying and Inferencing a ML Model in DKubeX
After training and registering a ML model in DKubeX, you can deploy the model for inferencing using Ray Serve on DKubeX. The following steps will guide you through the process of deploying a trained ML model and performing inferencing.
Prerequisites
You need to have a ML model trained and registered in DKubeX’s MLFlow. To learn how to train and register a ML model in DKubeX, please refer to Training a ML Model in DKubeX / Running Ray Jobs.
You can get the deployment script either from GitHub, or locally from your workspace. For this tutorial, if you are going to use the deployment script locally from your workspace, you need to have the deployment script available on your DKubeX workspace. This script is also available in the dkubex-examples repo that you cloned in the previous Training a ML Model in DKubeX / Running Ray Jobs tutorial. By any chance if it is unavailable or got deleted, use the following steps to download the deployment script for this tutorial.
Note that the inferencing script used in this tutorial is also available in the dkubex-examples repo.
On the My Workspace page of your DKubeX setup, click on the Terminal app to open the Terminal CLI.
In the Terminal CLI, run the following command to download the dkubex-examples repo containing the example files for DKubeX to be used in this user guide:
git clone https://github.com/dkubeio/dkubex-examples.git
Once both of the prerequisites are met, you can proceed with deploying the trained ML model using the following steps:
Deploying a Registered ML Model from MLFlow
Open the Deployments page on your DKubeX workspace. This page lists all the model deployments that are currently running.
To create a new model deployment, click on the “Create Deployment” button (shown as a “+” button on the top left corner of the Deployments page).
Create Deployment Button (+)
On the General page, provide the following details:

General Page – Deployment Creation
On the General section, select
Serveas the type of deployment to be created and provide the following details:Field
Description
Name
Provide a unique name for the model deployment. For this tutorial, provide
mnistdeploy.Description
Provide a brief description of the model deployment (Optional).
On the Framework section, select the type as
Rayas we are going to use Ray Serve for this model deployment. Optionally, you can also select the Publish checkbox to publish this deployment so that other users of the same DKubeX setup can also access and use this deployment.If you want to deploy this model via SkyPilot, in that case select the type as Sky and provide the following details:
Field
Description
Use Spot
Check this box if you want to use spot instances for this deployment.
Provider
Cloud provider on which the sky cluster has to be created.
Accelerator
Type of accelerator (GPU) to be used for this deployment.
Region
Region of the cloud provider in which the sky cluster has to be created.
Setup
Provide the setup command for sky
Command
Enter the command to be executed in sky
Readiness Probe Path
Enter the probe path for deploymenhealth check
Mount
Provide mount details (source and target)
Once done, click on the Next button to proceed to the Configuration page.
On the Configuration page, provide the following details:

Configuration Page – Deployment Creation
On the Source Configuration section, provide the following details:
Field
Description
Registry Type
Model registry from which the model has to be fetched. For this tutorial, select
MLFlowas the registry type.Model
Provide the name of the model which you registered earlier in MLFlow post-training. For this tutorial, provide
mnistmodelModel Version
Provide the version of the model registered in MLFlow to be deployed. For this tutorial, provide
1as the version.Deployment Filepath
Provide the path to the deployment script file that contains the code for model deployment. For this tutorial, provide
fashion_mnist.deployif you want to pull the script from the dkubex-examples repo on GitHub directly. If you want to use the script locally from your workspace, provide the absolute path to the script file in your workspace (make sure to replace the<your-username>part with your DKubeX username), e.g.,/home/<your-username>/dkubex-examples/rayserve/mlflow/fashion_mnist.deployIf you are using GitHub to pull the deployment script, in that case provide the following details in the Github Settings section:
Field
Description
Username
Provide the GitHub username of the owner of the repo from which the deployment script has to be pulled. For this tutorial, provide
dkubeioRepository
Provide the name of the GitHub repo from which the deployment script has to be pulled. For this tutorial, provide
dkubex-examplesBranch
Provide the branch name of the GitHub repo from which the deployment script has to be pulled. For this tutorial, provide
mlflowCommit Id
Provide the commit ID of the GitHub repo from which the deployment script has to be pulled (Optional). For this tutorial, you can leave it blank to pull the latest commit.
Also, click on the Private checkbox if the GitHub repo from which the deployment script has to be pulled is private. For this tutorial, you can leave it unchecked as the dkubex-examples repo is a public repo.
Once done, click on the Next button to proceed to the Advanced page.
On the Advanced page, provide the following details:
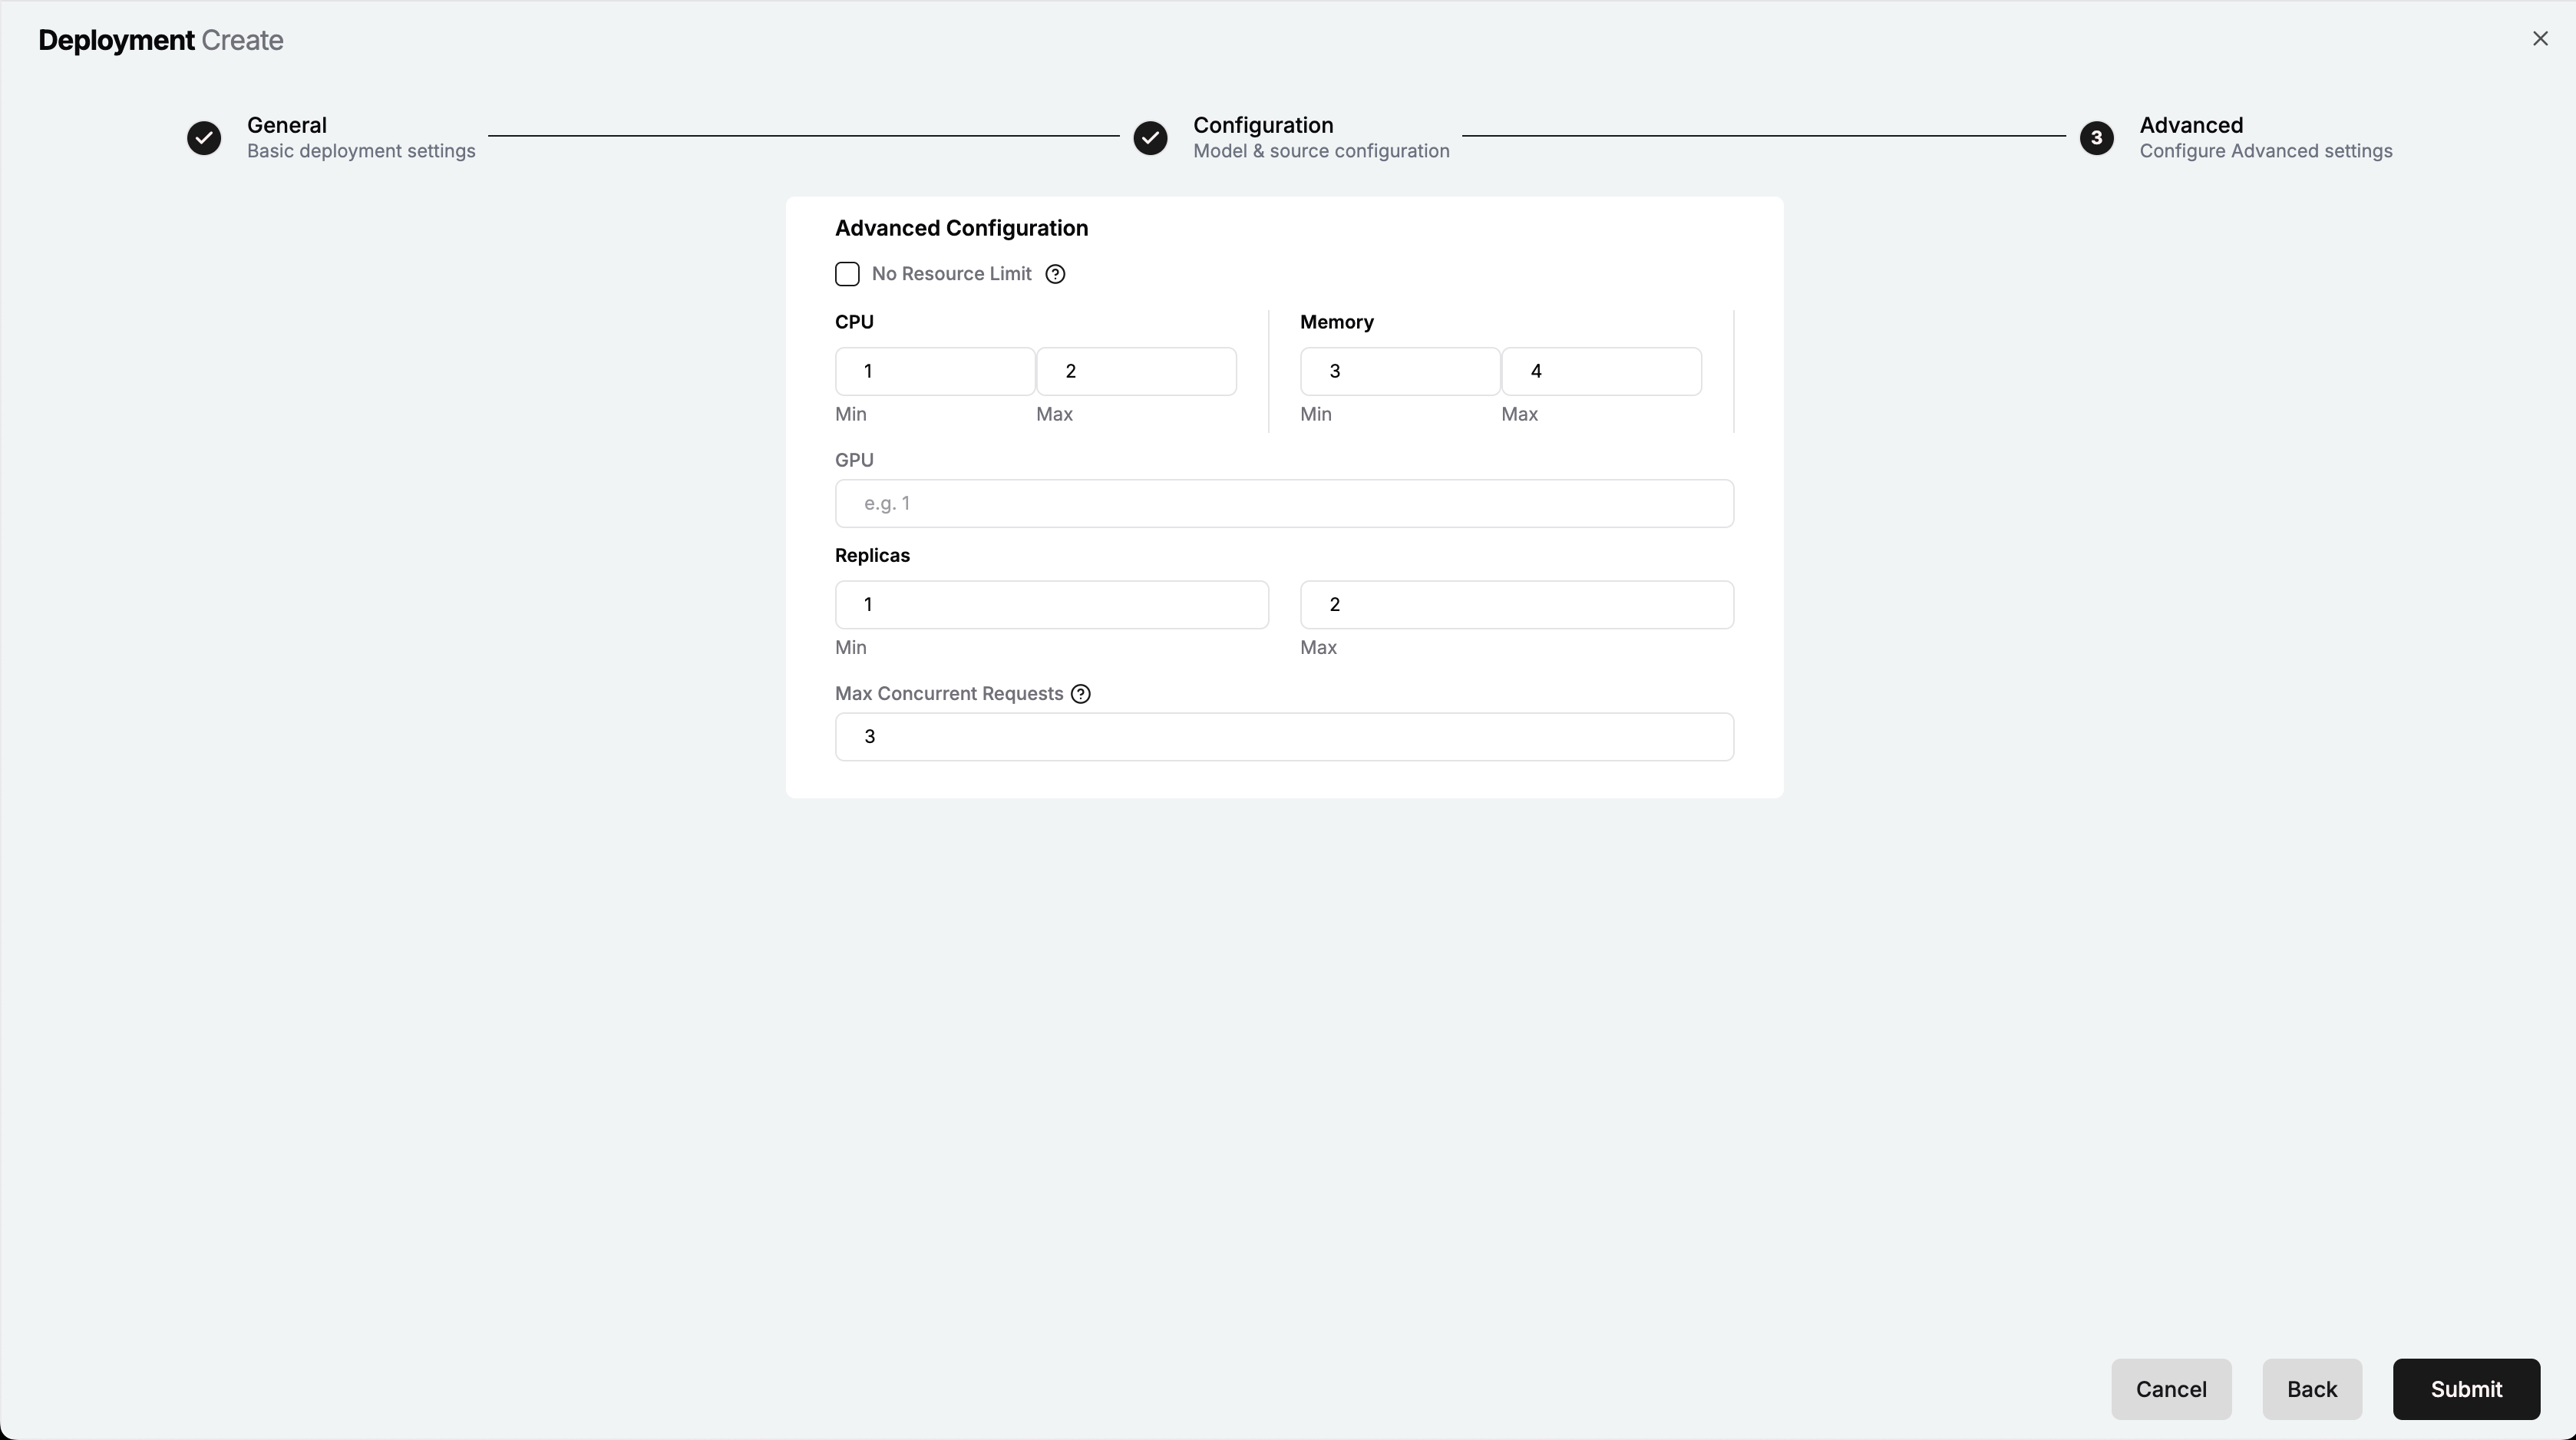
Advanced Page – Deployment Creation
In the Advanced Configuration section, check the No Resource Limit checkbox if you do not want to set a limit for resource usage. For this tutorial, keep this unchecked. If you want to set a limit on the resources used (which we will do in this tutorial), provide the following details:
Field
Description
CPU (Min/Max)
Minimum and maximum number of CPU cores to be allocated to the model deployment. Default:
Min: 1, Max: 2Memory (Min/Max)
Minimum and maximum amount of memory (in GB) to be allocated to the model deployment. Default:
Min: 3, Max: 4GPU
Number of GPUs to be allocated to the model deployment (Optional).
Replicas (Min/Max)
Minimum and maximum number of replicas to be created for the model deployment. Default:
Min: 1, Max: 2Max Concurrent Requests
Maximum number of concurrent requests that can be handled by the model deployment. Default:
3
Once done, click on the Submit button to start the model deployment.
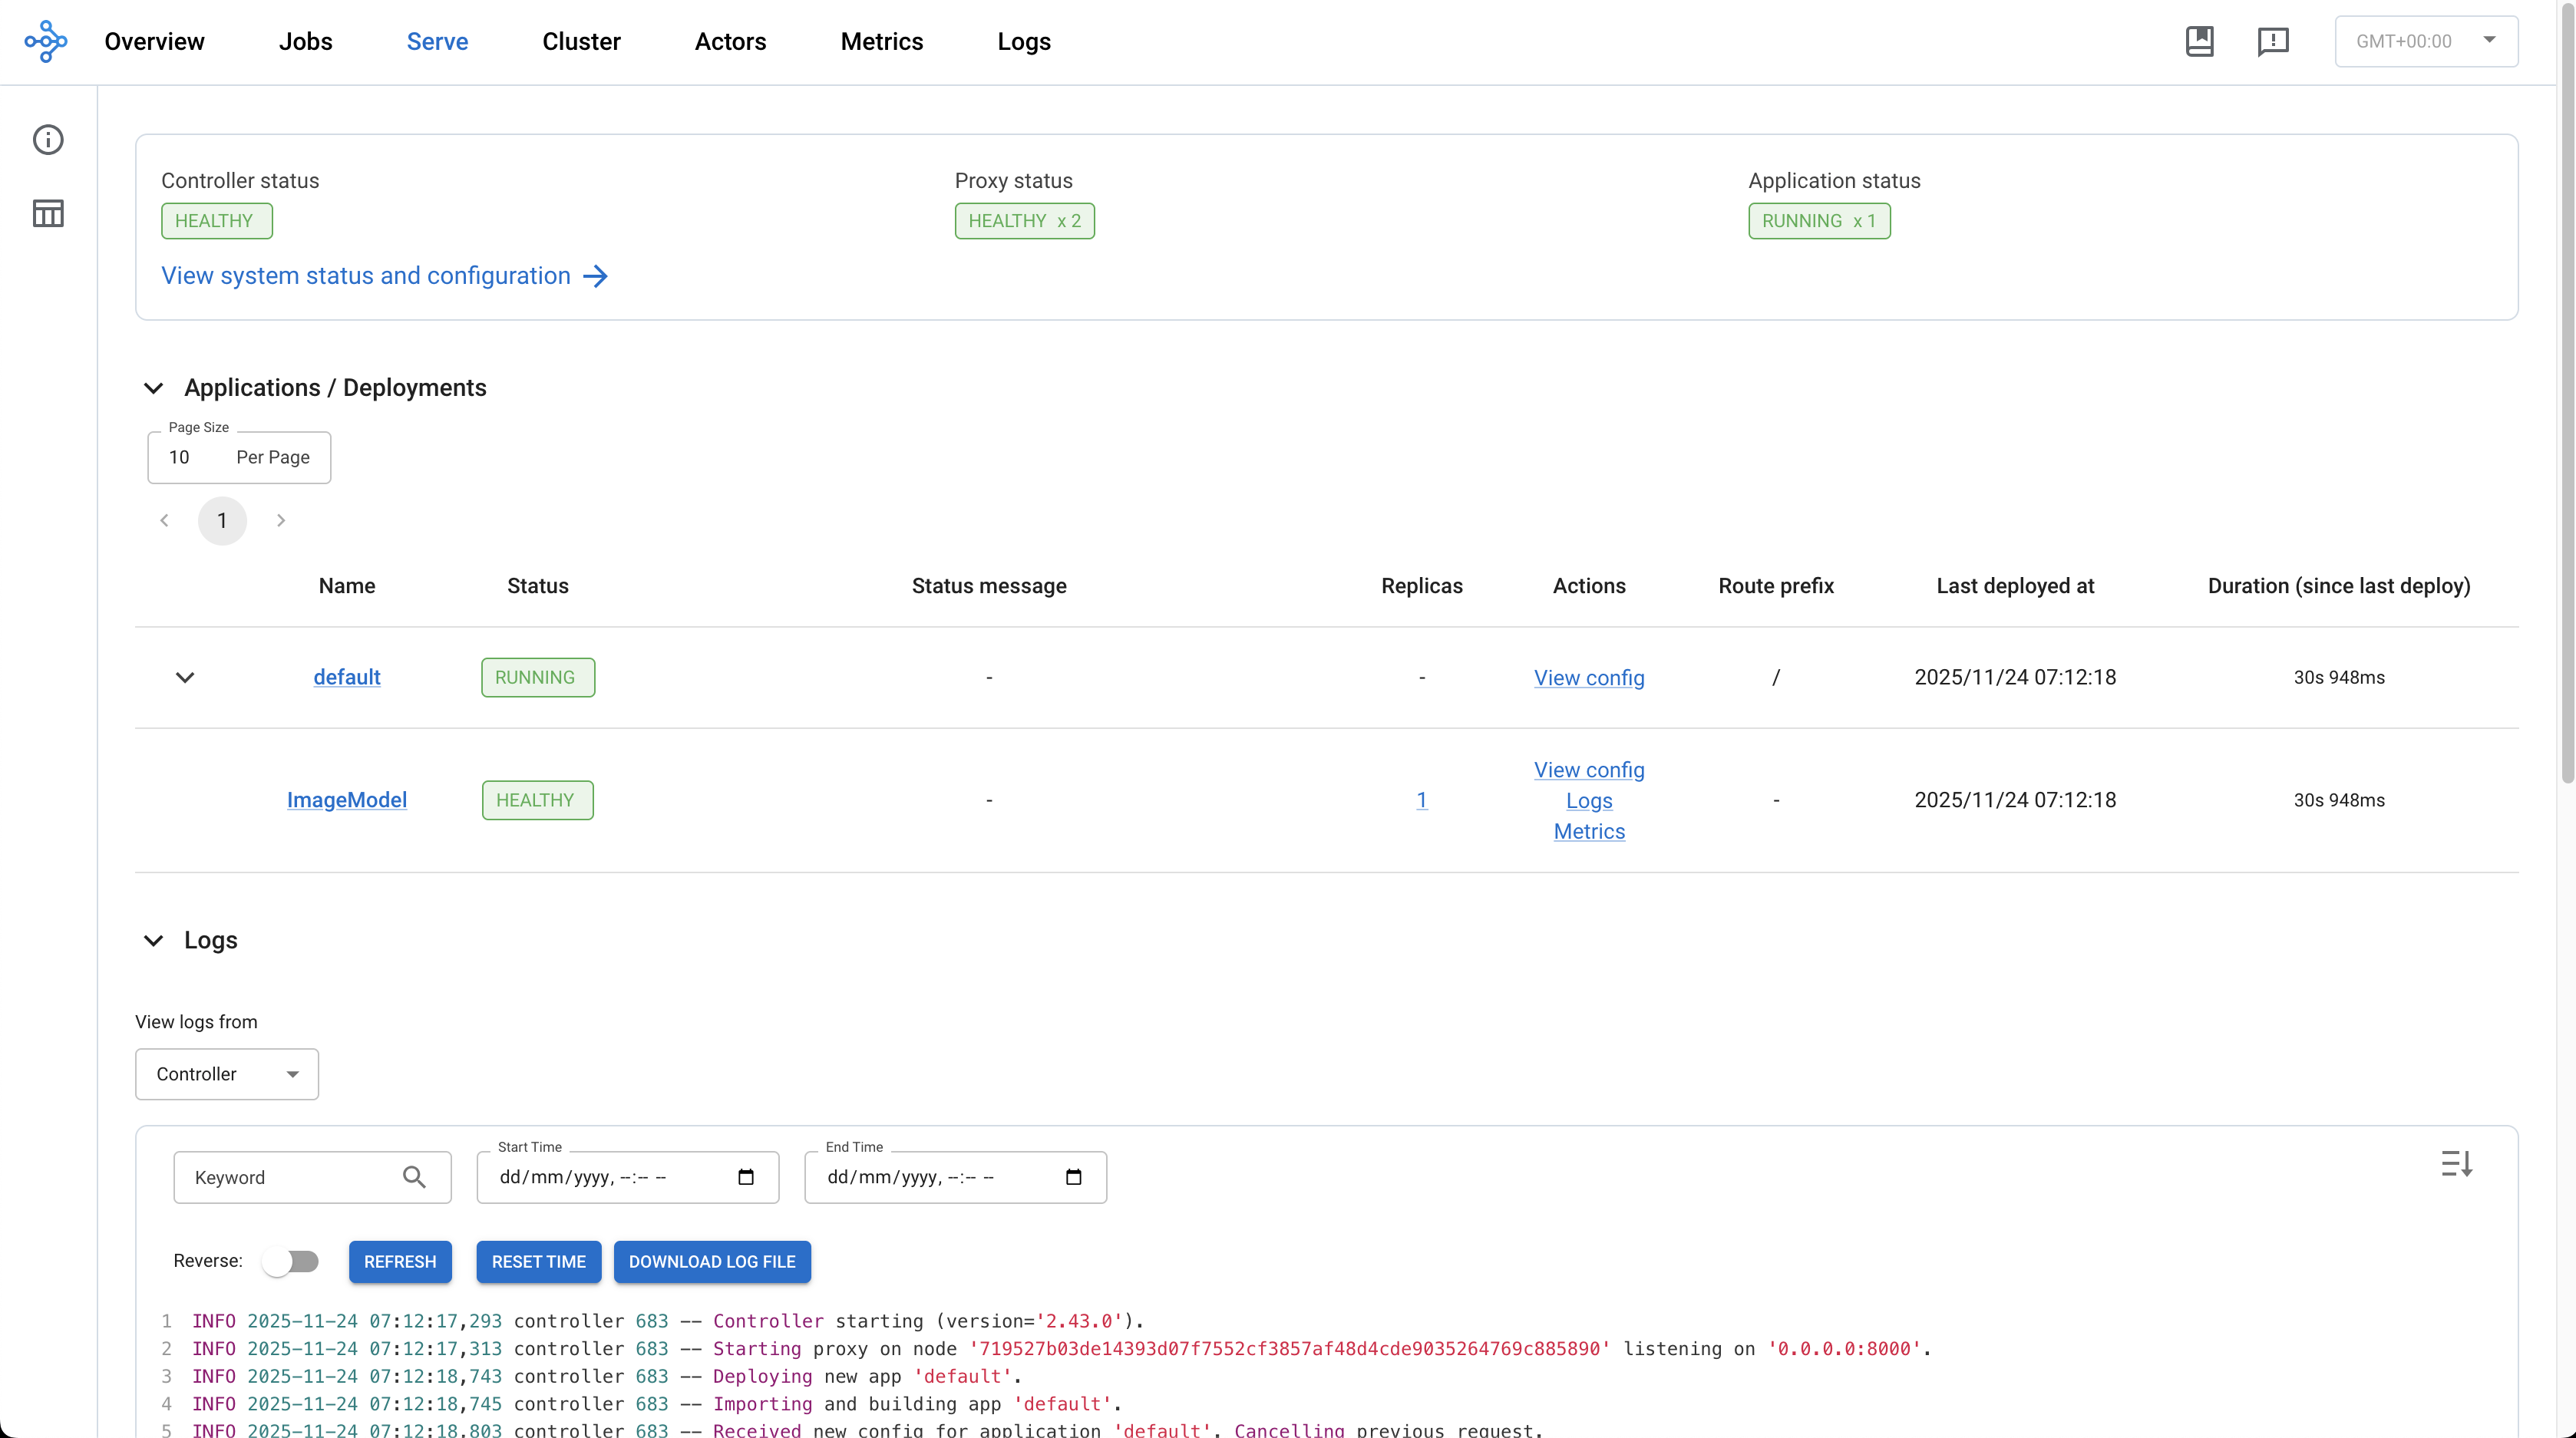
Once the deployment is successful, the status of the deployment will change to
Runningon the Deployments page.
Running Model Deployment

Inferencing using the Deployed ML Model
Once the model deployment is in the Running state, you can proceed to perform inferencing using the deployed model. The following is a short tutorial on performing an inferencing request using the deployed model:
Open the Terminal app from the My Workspace page of your DKubeX setup to open the Terminal CLI.
In the Terminal CLI, run the following command to get the active DKubeX workspace profile name on which you are currently working:
d3x profile listThe profile with asterisk (
*) mark is your active DKubeX workspace profile. note this name down as it will be used in the next step.Run the following command to perform an inferencing request using the deployed model. Make sure to replace the
<profile-name>part with your active DKubeX workspace profile name that you noted down in the previous step.python3 ~/dkubex-examples/rayserve/mlflow/client/fmnist_client.py <profile-name> mnistdeploy ~/dkubex-examples/rayserve/mlflow/client/images/pull-over.pngHere,
mnistdeployis the name of the model deployment created earlier in this tutorial, andpull-over.pngis the sample input image on which inferencing has to be performed in this tutorial.Once the command is executed successfully, you will see the inferencing output in the Terminal CLI as shown below:

Inferencing Output in Terminal CLI