Admin Guide
The DKubeX Admin Page provides administrators with control over an existing DKubeX setup. From the Admin page, you can configure OAuth and license, manage cloud, vectorstore and datasource settings, view user and workspace details, and monitor logs and metrics for clusters, nodes, and the DKubeX setup.
Accessing DKubeX Admin Page
To access the DKubeX Admin page, add
/adminat the end of your DKubeX setup URL.https://<DKubeX-URL>/adminhttps://dkubex.example.com/adminProvide your DKubeX admin username and password and click on the Login button.
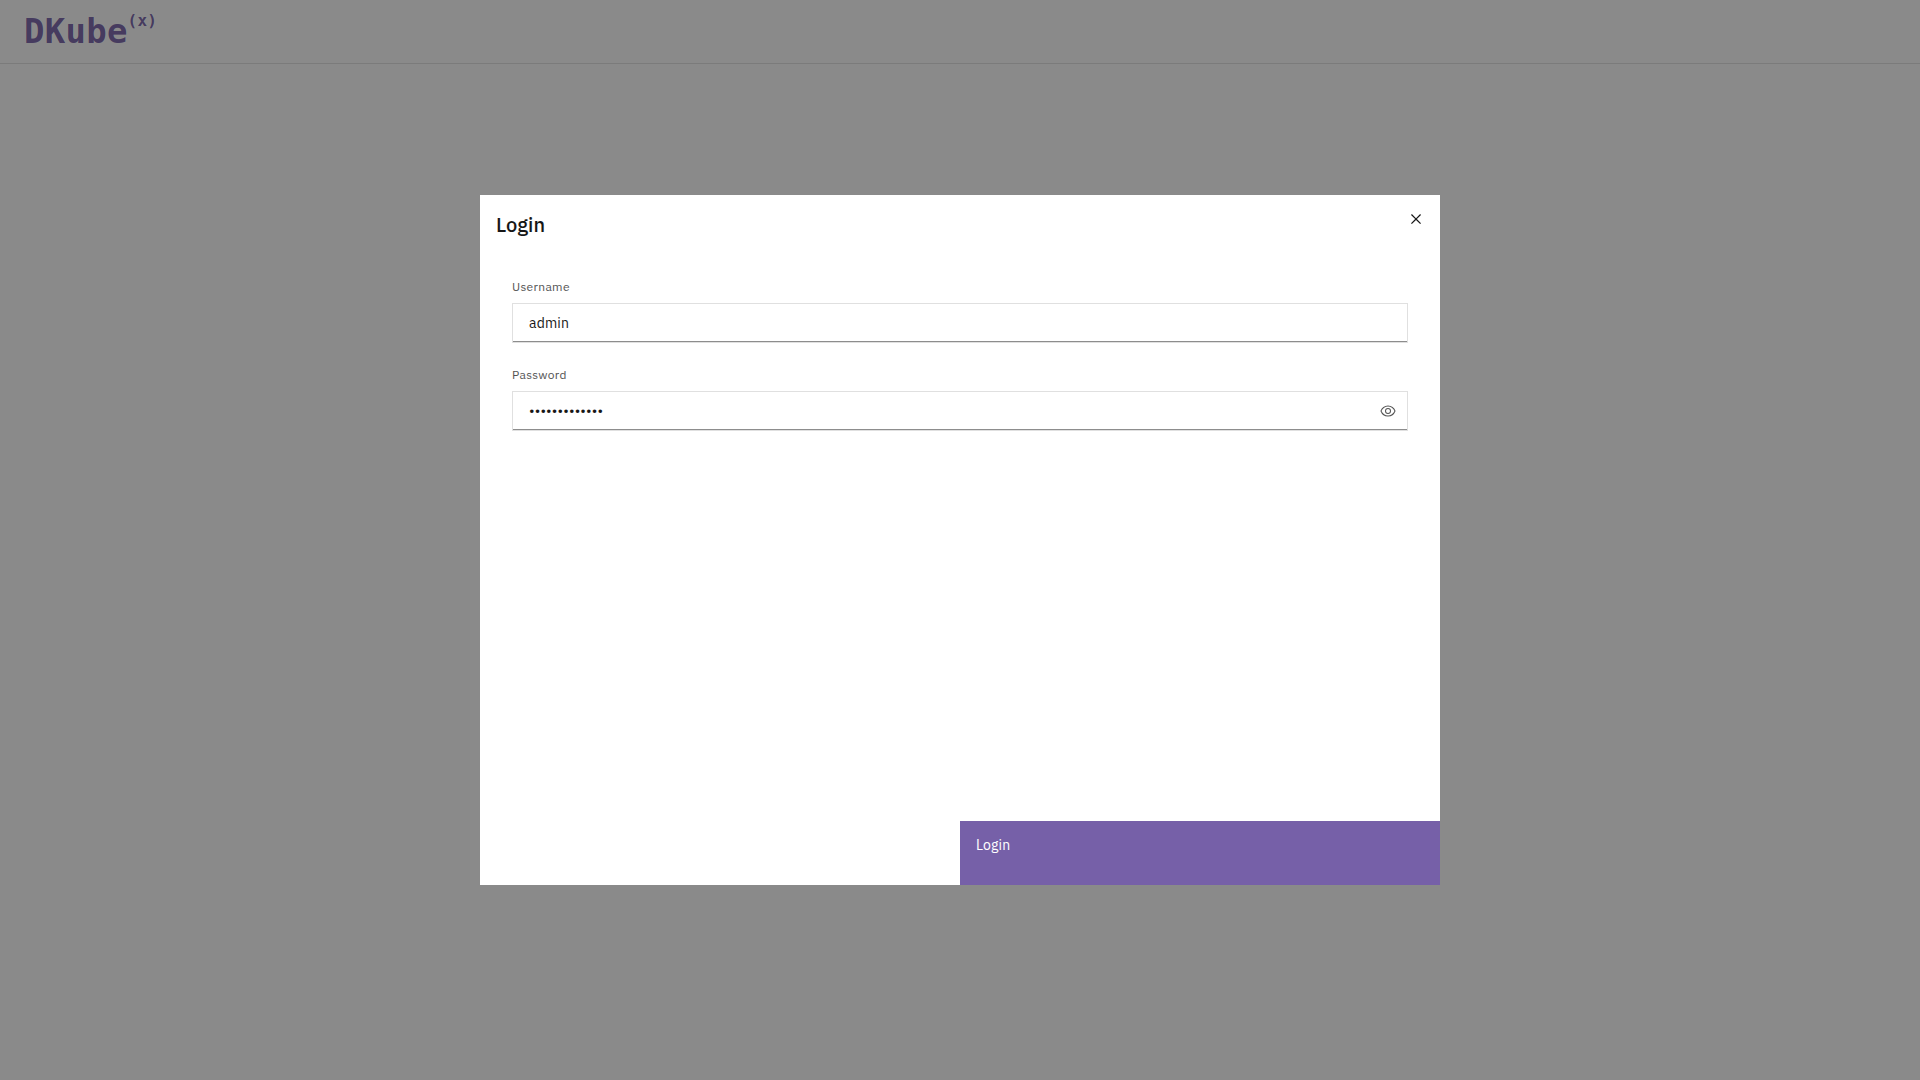
Admin page login screen
Components
The Admin page consists of the following components:
Configure OAuth settings for DKubeX.
Configure workspace, SMTP, cloud and vectorstore settings.
View, configure and control user-specific details, roles and workspace configurations.
Create app images and compute resource templates for workspaces.
Configure and manage AWS S3 bucket mounts.
Monitor node-specific details.
Configure and update DKubeX license settings.
Monitor DKubeX setup and cluster statistics.
Monitor DKubeX controller logs.
Auth
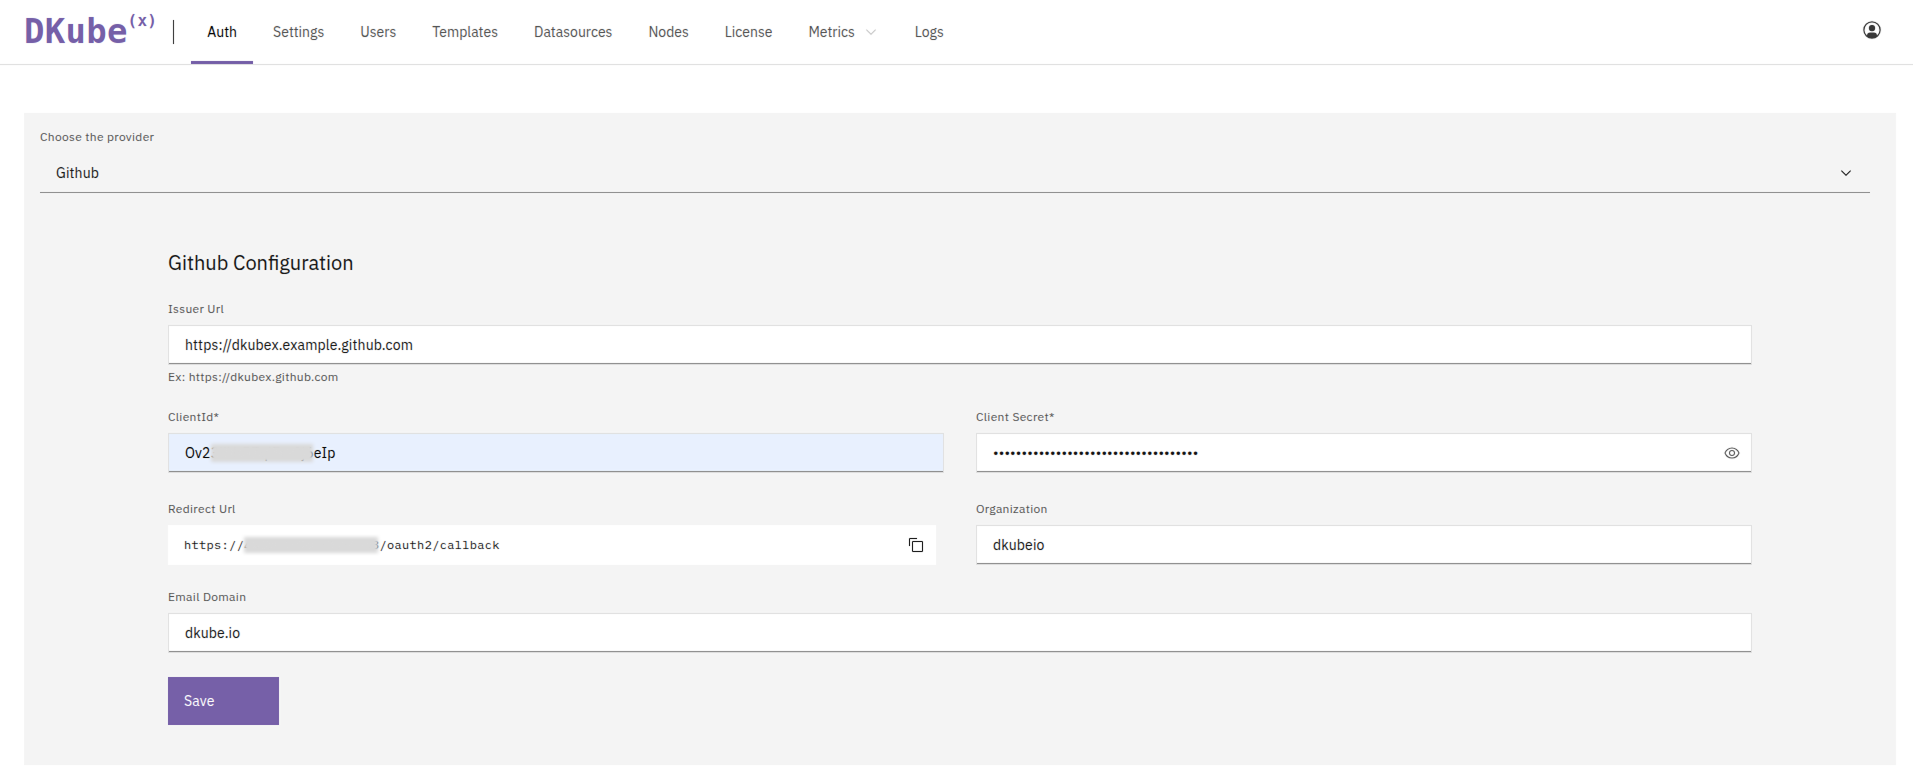
OAuth settings
In the Auth tab, you can configure OAuth settings for DKubeX. DKubeX currently supports 6 OAuth providers: ADFS, Azure, GitHub, Google, Keycloak, and Okta.
For detailed information regarding setting up OAuth, refer to the following page:
Learn how to set up OAuth for DKubeX.
Settings
The Settings tab in the Admin page allows you to configure workspace, SMTP, cloud provider and vectorstore settings. Click on the appropriate tab below to know more about these settings.
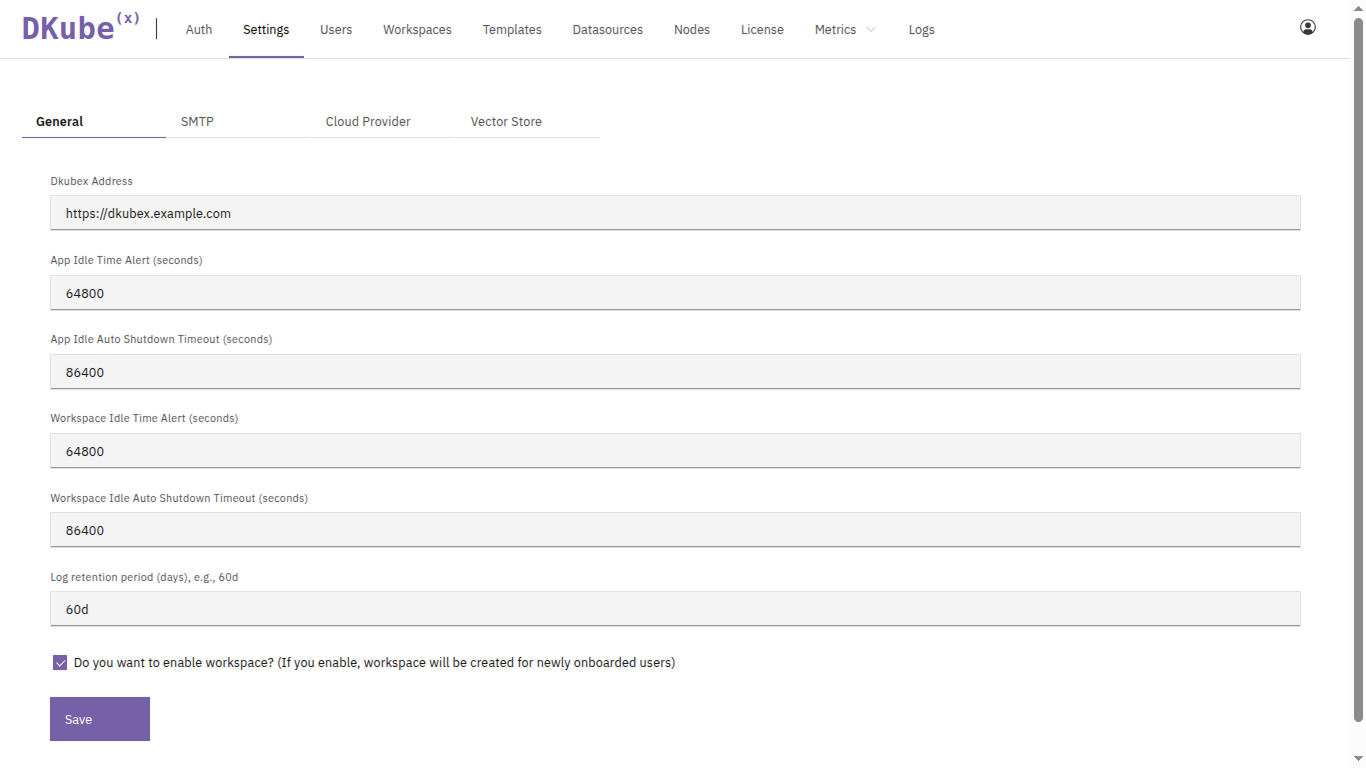
General Workspace Settings
In the General tab, you can configure settings regarding DKubeX address, workspace and app timeouts, and workspace log retention limit.
Field |
Description |
|---|---|
|
Your DKubeX URL. This address will be used by SkyPilot jobs to contact your DKubeX cluster from remote Sky cluster. |
|
The time in seconds after which the user will be alerted if the app is idle. |
|
The time in seconds after which the app will be automatically shut down if it is idle. |
|
The time in seconds after which the user will be alerted if the workspace is idle. |
|
The time in seconds after which the workspace will be automatically shut down if it is idle. |
|
The number of days for which the logs will be retained. |
Additionally, you can also enable workspace creation for newly onboarded users by checking the Do you want to enable workspace? checkbox.
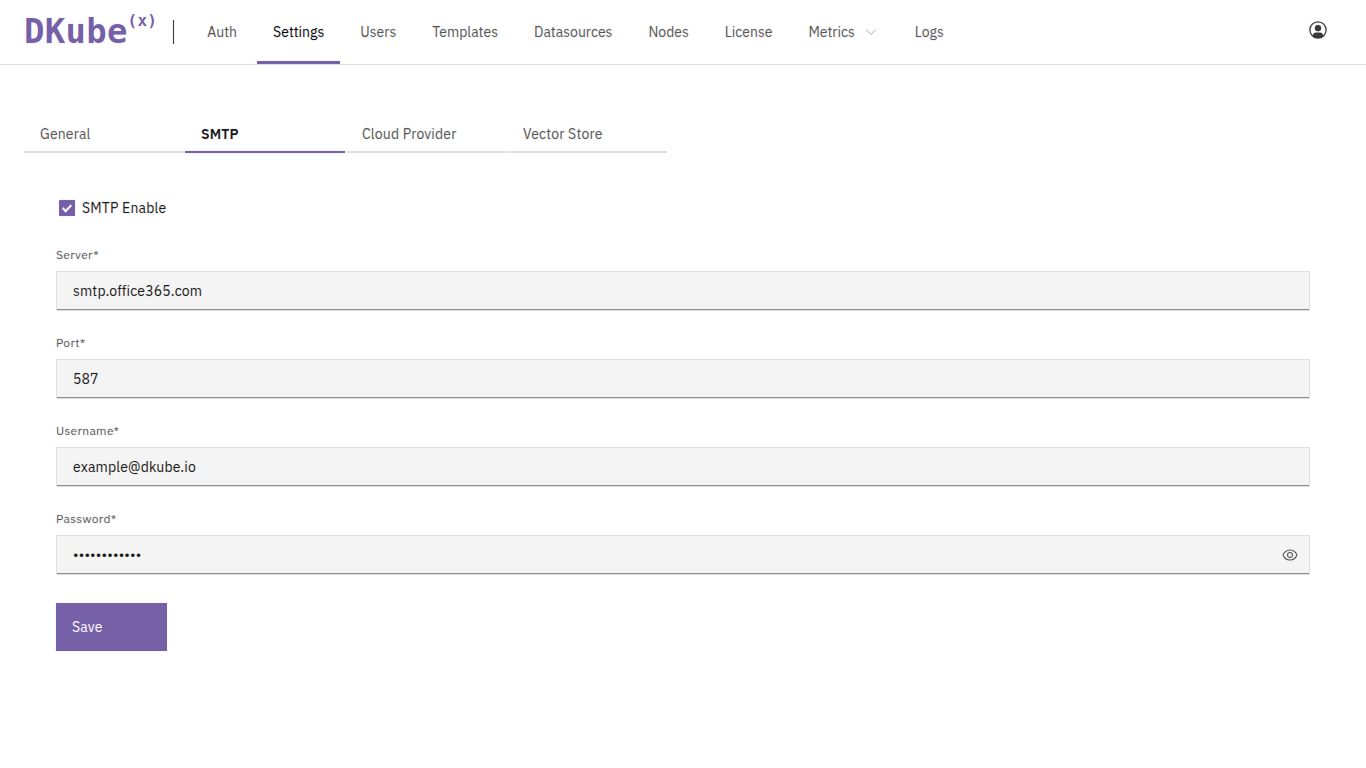
SMTP Settings
In the SMTP tab, you can configure the SMTP settings for DKubeX. This will enable sending emails to users regarding apps or workspace idle status or auto shutdown.
Check the SMTP Enable checkbox to enable SMTP settings, and provide the following details.
Field |
Description |
|---|---|
|
SMTP server address. |
|
SMTP server port. |
|
SMTP server username. |
|
SMTP server password. |
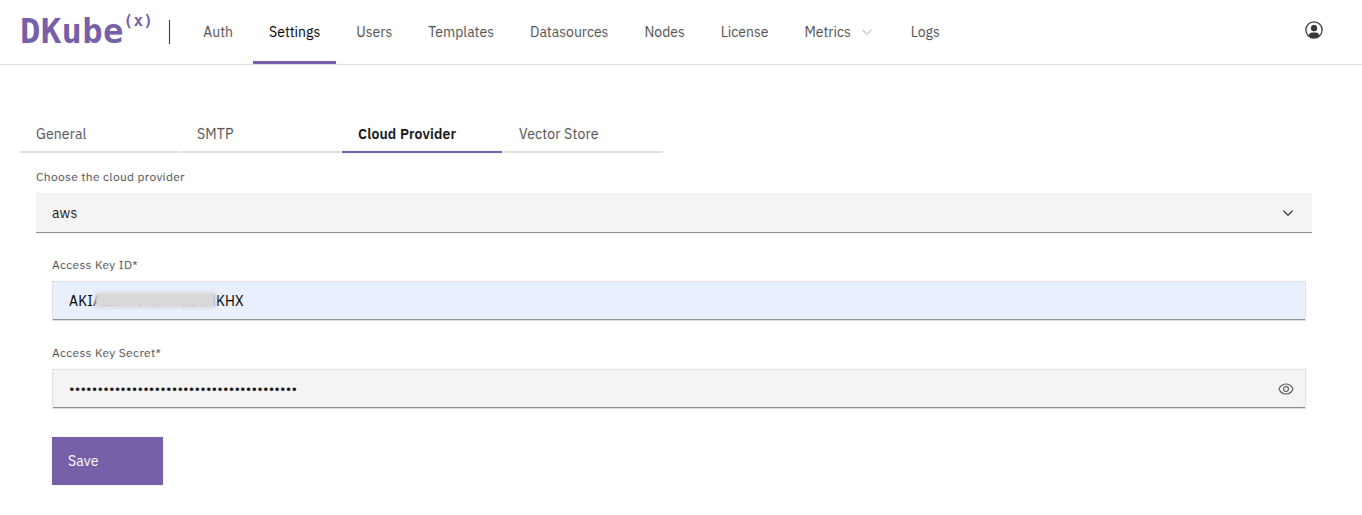
Cloud Provider Settings
In the Cloud Provider tab, you can configure the cloud provider settings for DKubeX. This will enable users to run SkyPilot workflows.
Field |
Description |
|---|---|
|
Cloud provider name (currently AWS is only configurable here). |
|
Cloud provider access key. |
|
Cloud provider secret key. |
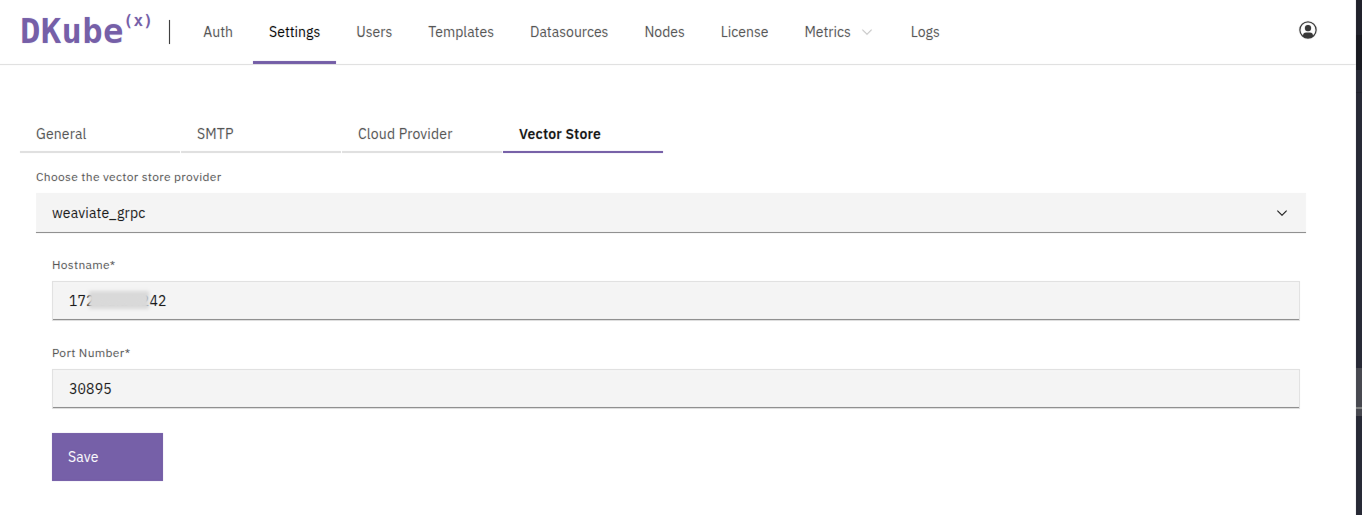
Vectorstore Settings
In the Vectorstore tab, you can configure the vectorstore settings for DKubeX.
Field |
Description |
|---|---|
|
Vectorstore provider name (currently |
|
Vectorstore host IP. |
|
Vectorstore host port. |
Users
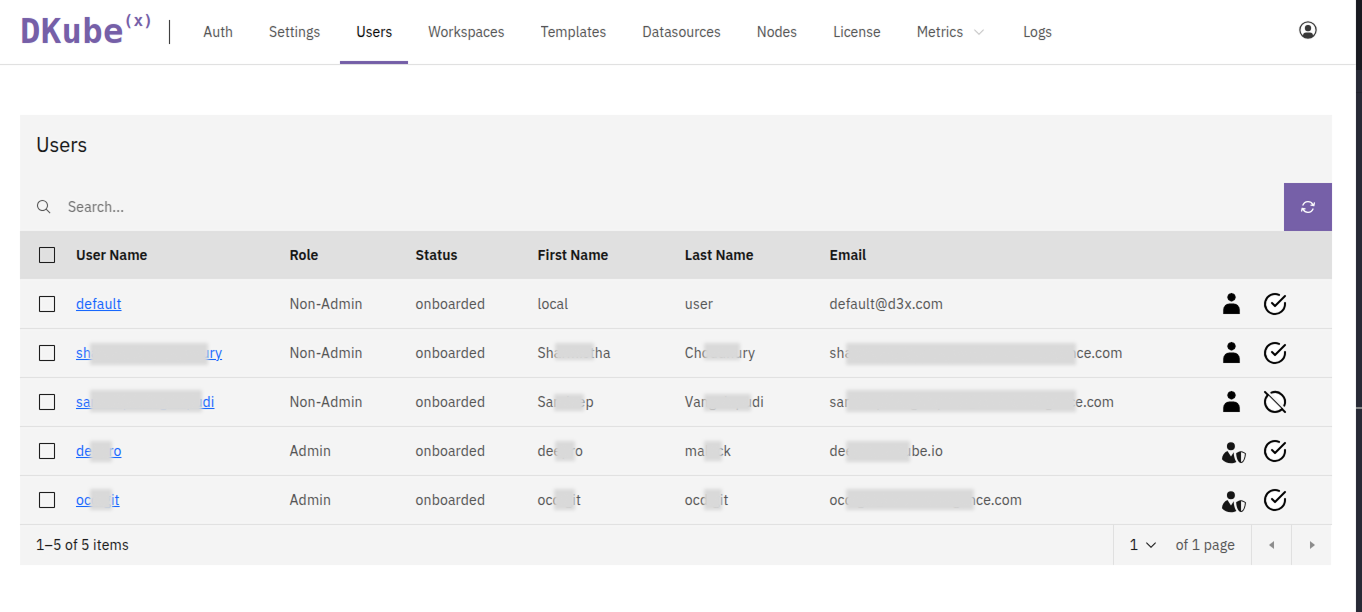
User Settings
In this tab, you can view details regarding all users who have logged in to DKubeX. The following details are displayed:
Field |
Description |
|---|---|
|
DKubeX username of the user. |
|
Whether the user has been assigned admin role. |
|
Whether the user has been onboarded on or being deboarded from DKubeX, or whether ownership has been transferred. |
|
First and last name of the user. |
|
Email address of the user. |
Along with these details, the following options are available on the right side of the page for each user:
Additional User Options¶ Field
Description
Add Admin RoleUser is non-admin. Assign admin role to user by clicking on this option. Users with admin access can delete and archive MLFlow experiments and models.
Remove Admin RoleUser is admin. Remove admin role from the user by clicking on this option.
Workspace EnabledWorkspace is currently enabled for the user. Disable workspace for the user by clicking on this option.
Workspace DisabledWorkspace is currently disabled for the user. Enable workspace for the user by clicking on this option.

Additional User Options
You can offboard users from DKubeX by selecting them on the left checkboxes and clicking on the Offboard User button on the top right corner.
Clicking on the username opens a pop-up window containing the workspace details for that respective user. You can select the workspace to access options to either stop or delete the workspace.

User Workspace Details
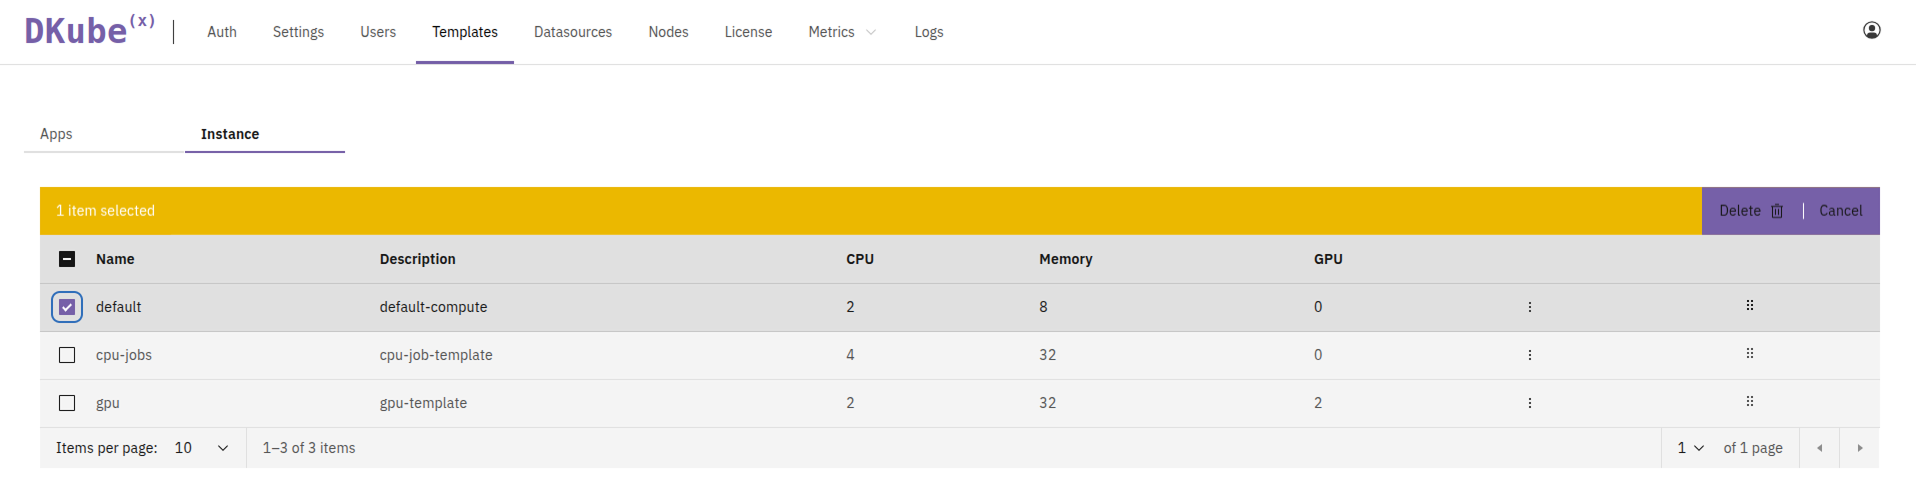
Templates
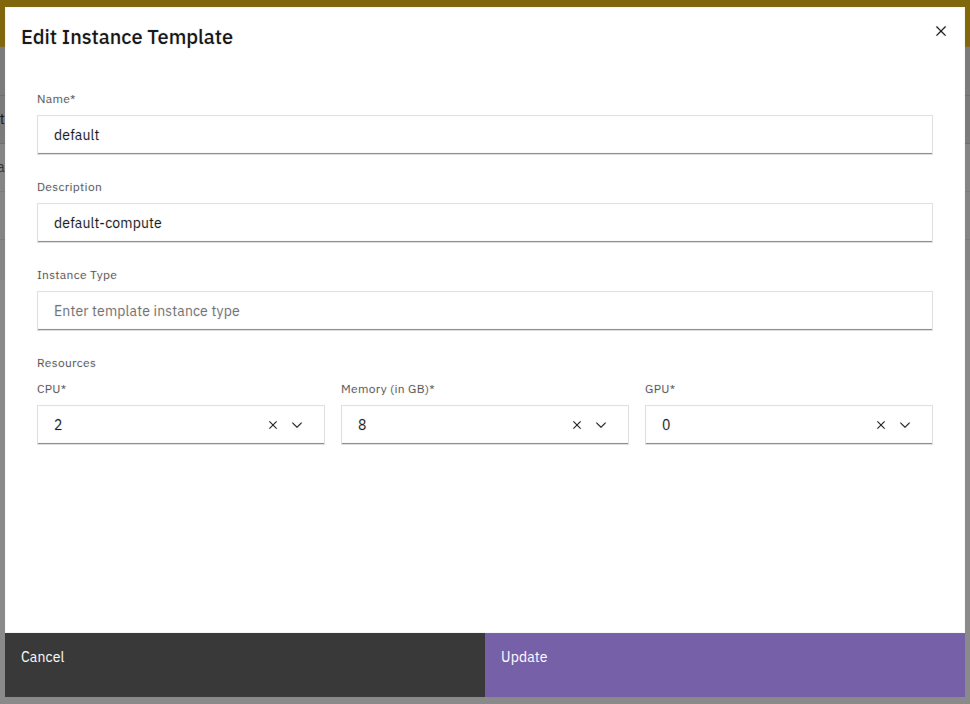
The templates tab allows you to create app images that can be used by users to launch different workspaces as well as create a template to compute resources to be used by a workspace from the Apps and Instance tabs respectively.


Datasources
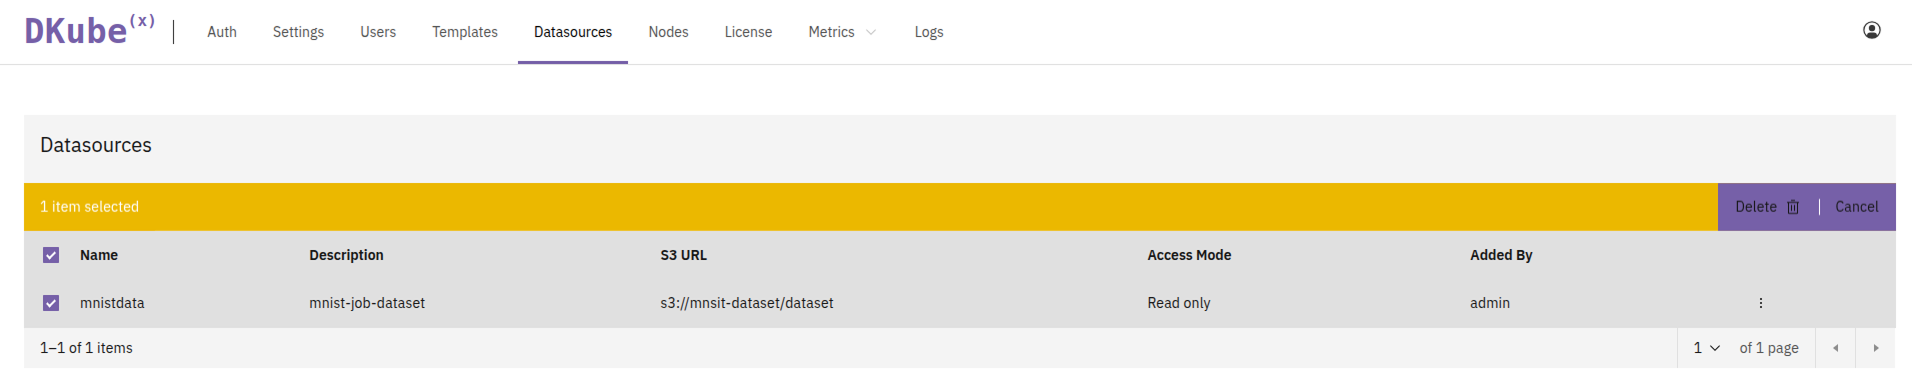
Datasources Tab
The Datasources tab will allow you to mount any pre-existing S3 bucket, from which data can be extracted and used in DKubeX workflows.
Field |
Description |
|---|---|
|
The name of the S3 bucket. |
|
Displays the description of the bucket (if any). |
|
The URL of the S3 bucket. |
|
Displays whether the given user has Read only or Read and Write access to the mounted S3 bucket. |
|
Displays name of the user that has added the S3 bucket. |
By clicking on the + at the top right corner, you can mount any pre-existing S3 bucket.
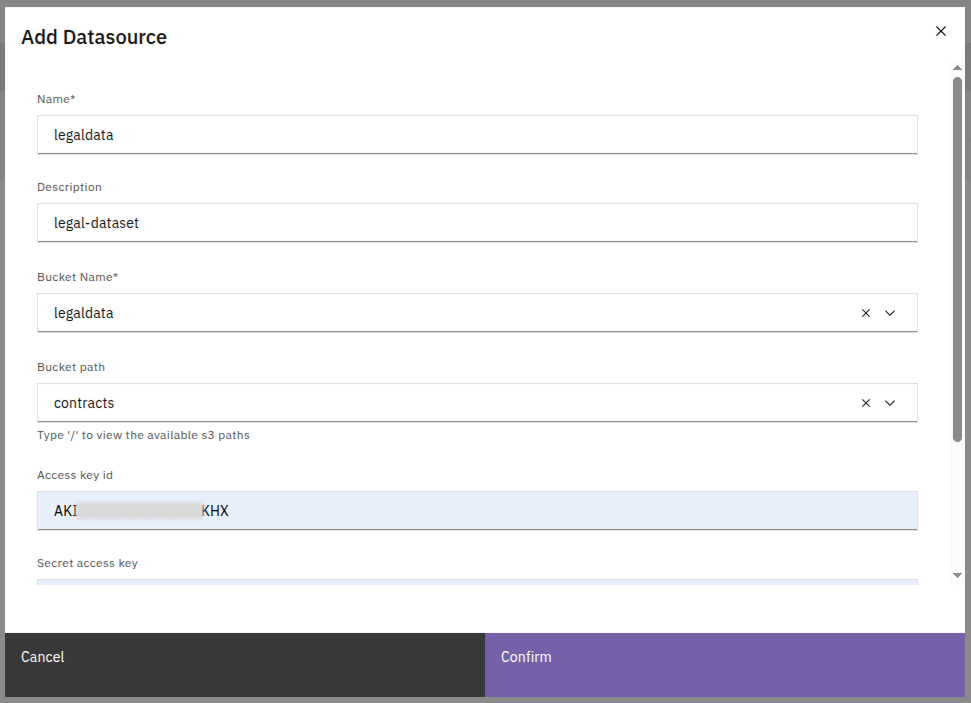
Datasource Mounting Details
Field |
Description |
|---|---|
|
The name of the S3 bucket. |
|
The description of the S3 bucket. |
|
The name of the S3 bucket. |
|
The path to the S3 bucket. |
|
Your AWS access key id. |
|
Your AWS secret access key. |
|
Displays whether the given user has Read only or Read and Write access to the mounted S3 bucket. |
Nodes

Nodes Tab
The Nodes tab contains the list of all nodes & your details, such as:
Field |
Description |
|---|---|
|
The name of the node. |
|
The duration of time that has passed since the node’s creation. |
|
Whether the node is Ready or not. |
|
Number of Workspaces on the Node. |
|
CPU cores of the node. |
|
The Memory used by each node. |
|
The Disk space used by each node. |
You can view more details regarding a particular node by clicking on the node’s name. In the popup window, you can also view the workspaces on the node along with their status & ages.
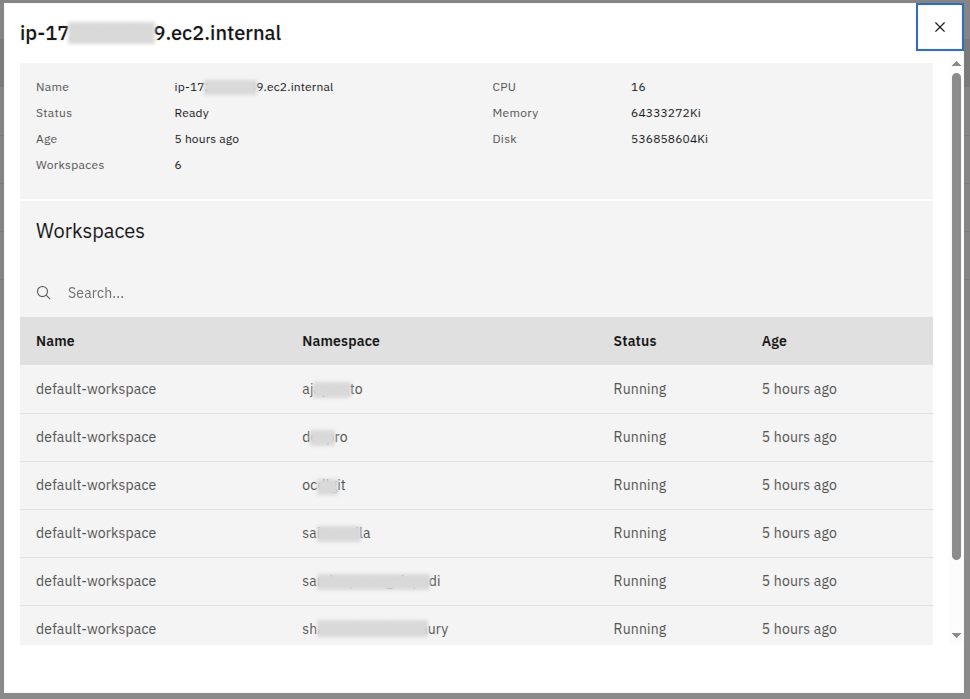
Node Details
License
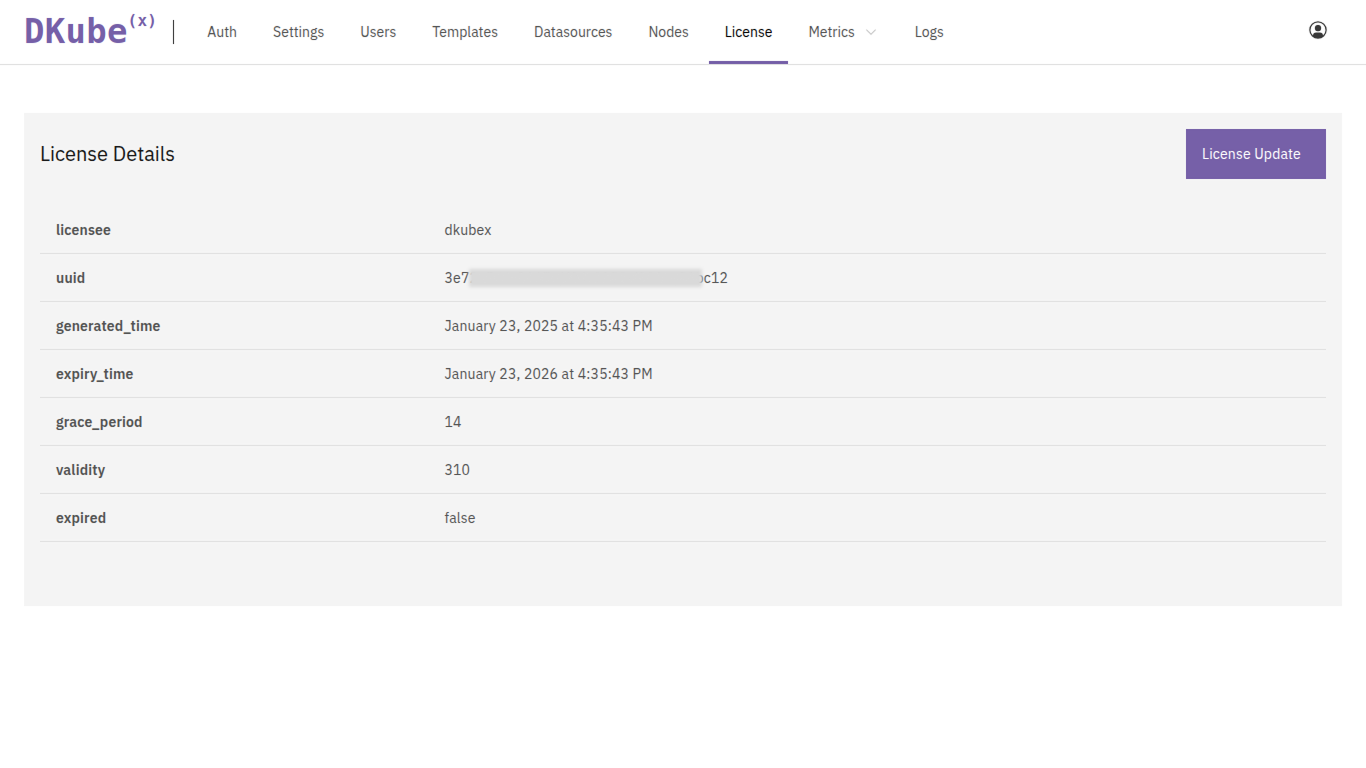
License Tab
The License tab allows you to view and update the current DKubeX license settings. For more information regarding DKubeX license settings, refer to the following page: Step 1: Provide DKubeX License.
Metrics
In the Metrics tab, you can monitor the DKubeX stats & Cluster stats of every user at any given time.
You can monitor the DKubeX stats such as App Usage, Active Workspaces, etc. at any given time. Furthermore, by clicking on any point on the graphs, you can get a more detailed view of any individual user’s data at that time on the graph.
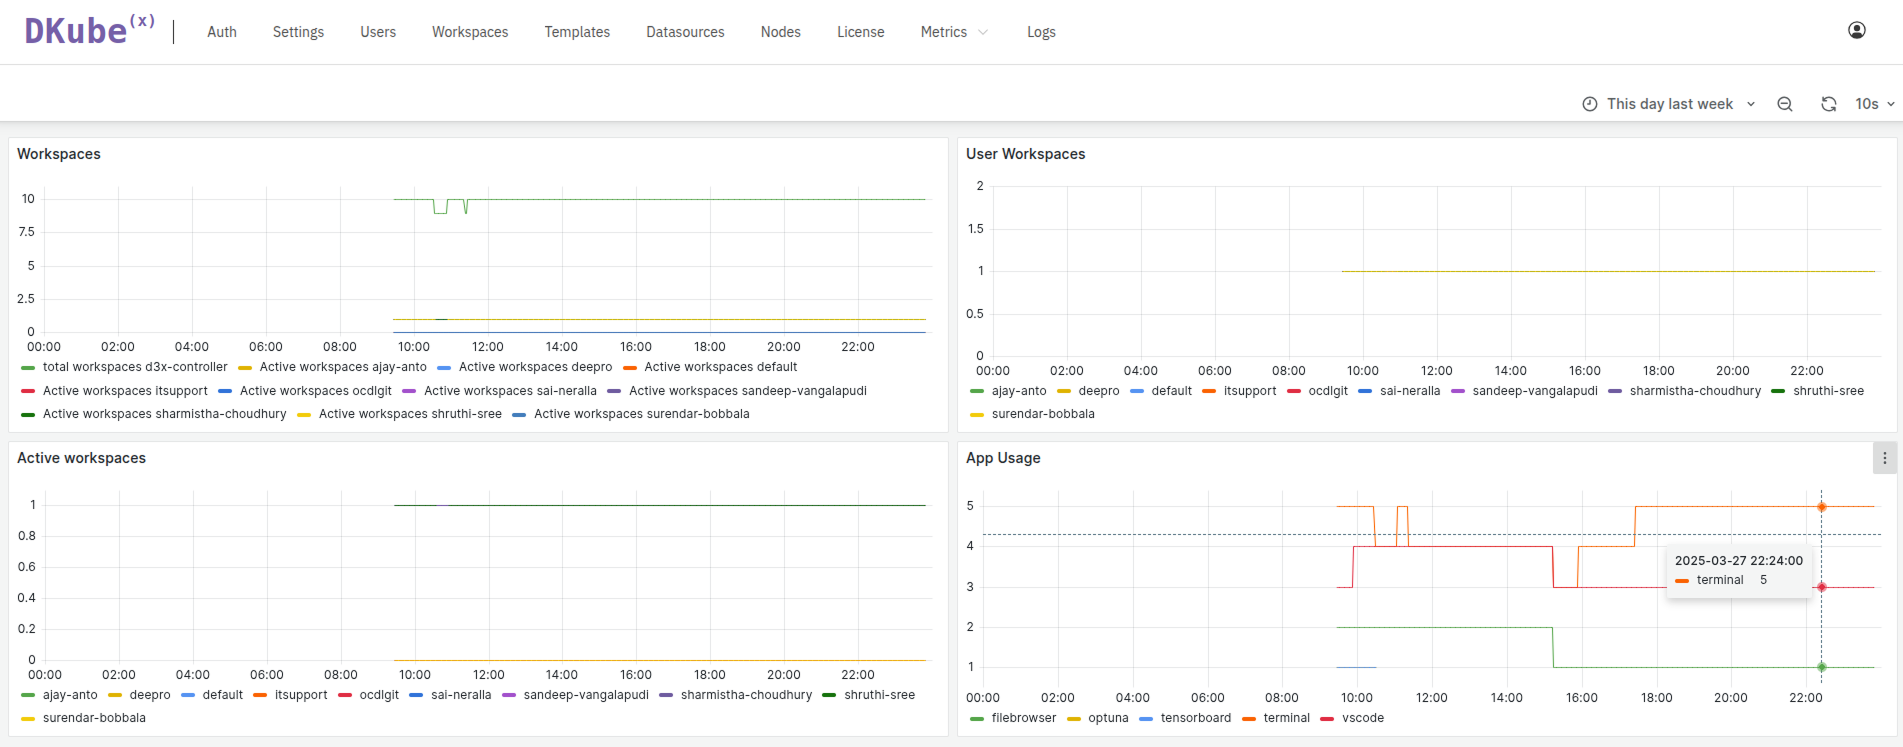
DKubeX Metrics
You can monitor the Cluster stats such as CPU utilization, Memory usage, etc. of all of the users at any given time. By selecting any point on the graphs, you can view more detailed information about that user’s stats at that particular time.
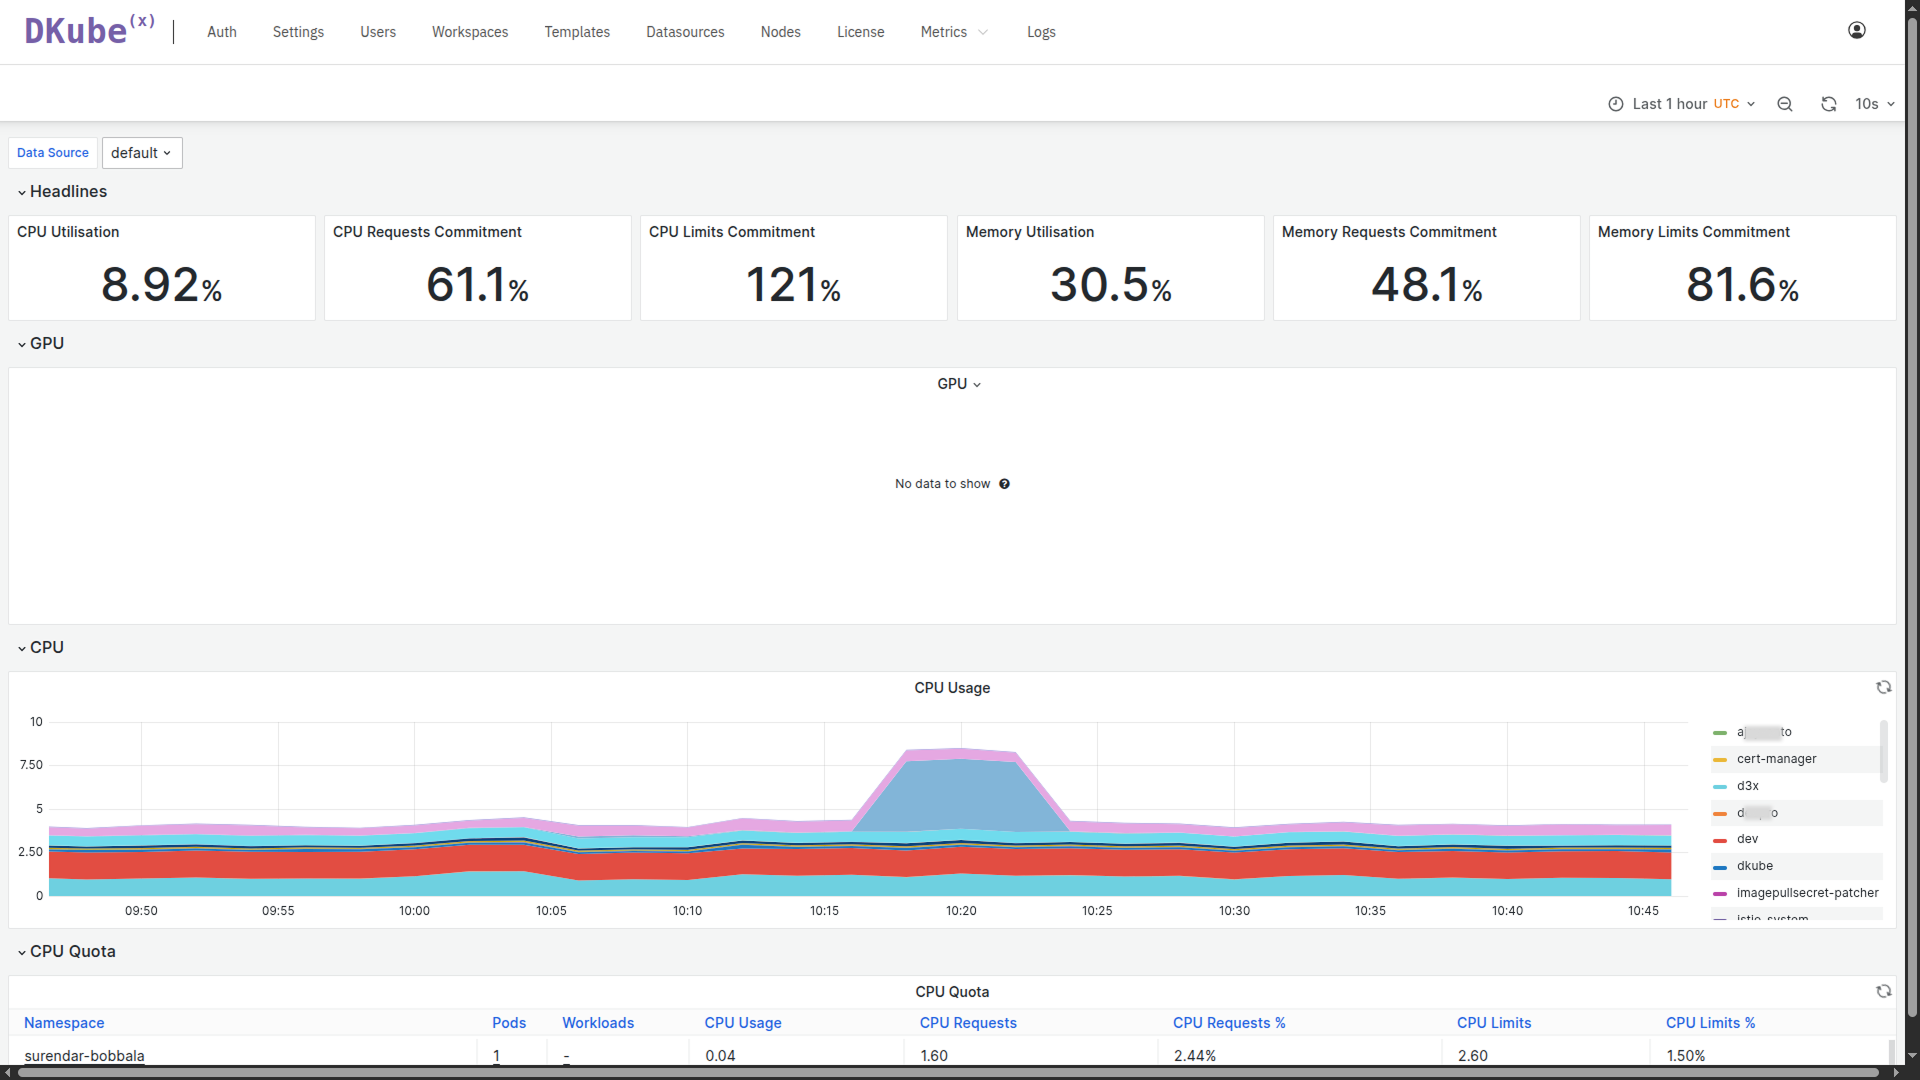
Cluster Metrics
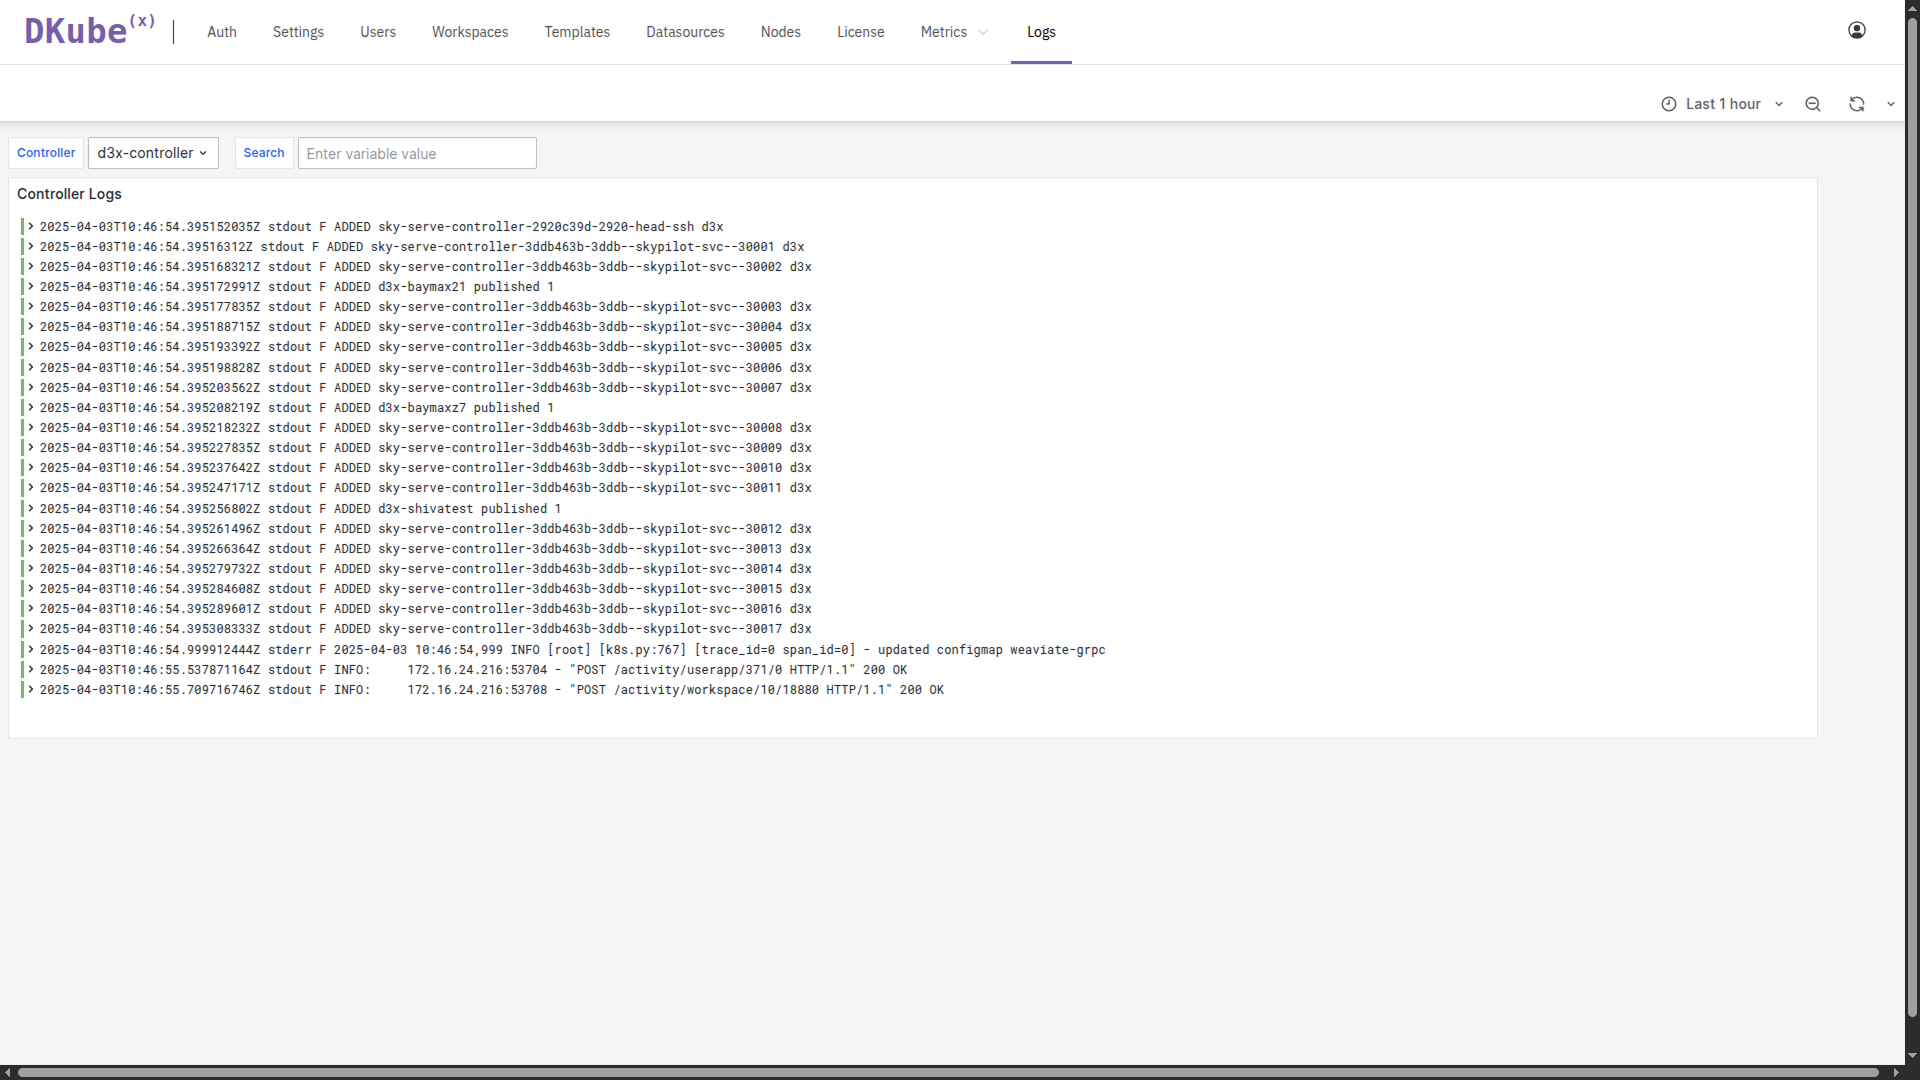
Logs
You can view the controller pod logs on this page.
Click on the drop down option at the start of each log to view all the details of the log.
Logs Tab
Logging Out
Click on the profile icon on the top right corner and choose the option Logout to log out of the admin page.