Managing DKube
DKube can be managed from the $HOME/.dkube directory on the master node.
Upgrading DKube
DKube can be upgraded through Helm. The flow is:
Get the current values from the installation
Upgrade with the same values, but with a new DKube version
The commands are:
Note
The Release Name is the same name that was used during installation. The complete list of Helm installation Release Names can be obtained using the helm list -a command.
Uninstalling DKube
DKube can be uninstalled using the following command:
Note
The Release Name is the same name that was used during installation. The complete list of Helm installation Release Names can be obtained using the helm list -a command.
The following command for this should be run from the $HOME/.dkube folder.
sudo ./dkubeadm node cleanup
DKube can be uninstalled using the following command:
Note
The Release Name is the same name that was used during installation. The complete list of Helm installation Release Names can be obtained using the helm list -a command.
DKube can be uninstalled using the following command:
Note
The Release Name is the same name that was used during installation. The complete list of Helm installation Release Names can be obtained using the helm list -a command.
Reinstalling DKube
Uninstall DKube, including the node cleanup ( Uninstalling DKube )
Set up the nodes in the cluster ( Node Setup )
Perform a new installation ( Helm-Based DKube Installation )
Uninstall DKube ( Uninstalling DKube )
Perform a new installation ( Helm-Based DKube Installation )
Uninstall DKube ( Uninstalling DKube )
Perform a new installation ( Helm-Based DKube Installation )
Backup and Restore
The DKube database can be backed up and restored from the installation/management node. This function is performed from the $HOME/.dkube directory. Both functions rely on a backup.ini file for configuration, and use the same k8s.ini and dkube.ini files that were edited as part of the installation.
Important
There are some portions of the DKube database that are not backed up. These are explained in the following section.
Backup Exclusions
The following items are not backed up through the DKube backup feature:
Any System packages installed from a command line
Any files added to folders outside the workdir
Important
In order to save the complete image, it should be pushed to Docker
Editing the backup.ini File
The backup.ini file provides the target for the backup, the backup options, and the credentials where necessary.
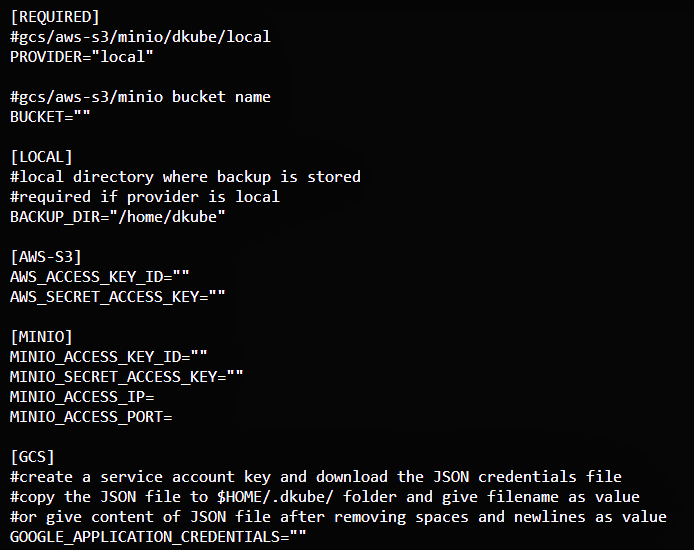
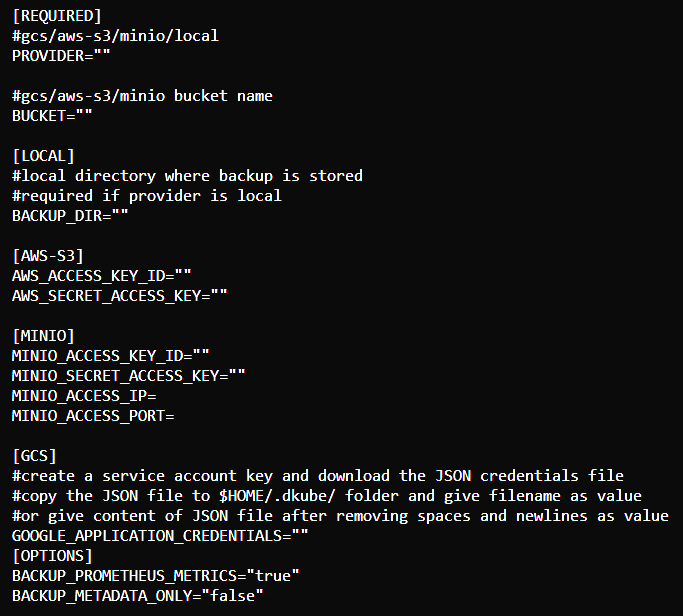
When the option BACKUP_METADATA_ONLY is set to true, the files in the Code, Dataset, and Model repos within DKube storage are not backed up. These files should be backed up through another method by the DKube system operator. The following metadata is backed up:
Onboarded user information
Code, Dataset and Model Repos metadata
Run tracking and lineage information
Pipelines metadata, including pipeline definitions and pipeline Runs
Model Deployments
CI/CD build information
System metrics
User ML metrics for DKube and Pipeline Runs
Important
The input fields must be enclosed in quotes, as shown in the figure
The “local” backup option will save the snapshot to a folder on the local cluster. Only the following sections should be filled in.
Field |
Value |
|---|---|
PROVIDER |
local |
BACKUP_DIR |
Target folder on local cluster |
The AWS backup option will save the snapshot to an AWS-S3 cloud. Only the following sections should be filled in.
Field |
Value |
|---|---|
PROVIDER |
aws-s3 |
BUCKET |
Storage bucket in cloud |
AWS_ACCESS_KEY_ID |
https://docs.aws.amazon.com/general/latest/gr/aws-sec-cred-types.html |
AWS_SECRET_ACCESS_KEY |
https://docs.aws.amazon.com/general/latest/gr/aws-sec-cred-types.html |
The MinIO backup option will save the snapshot to a MinIO server. Only the following sections should be filled in.
Field |
Value |
|---|---|
PROVIDER |
minio |
BUCKET |
Storage bucket in cloud |
MINIO_ACCESS_KEY_ID |
https://docs.aws.amazon.com/general/latest/gr/aws-sec-cred-types.html |
MINIO_SECRET_ACCESS_KEY |
https://docs.aws.amazon.com/general/latest/gr/aws-sec-cred-types.html |
MINIO_ACCESS_IP |
url of the MinIO server |
MINIO_ACCESS_PORT |
Port number of the MinIO server |
The GCS backup option will save the snapshot to Google Cloud Services. Only the following sections should be filled in.
Field |
Value |
|---|---|
PROVIDER |
gcs |
BUCKET |
Storage bucket in cloud |
GOOGLE_APPLICATION_CREDENTIALS |
JSON file containing the GCP private key |
Backup
DKube backup takes a snapshot of the database and saves it on the target provider. The backup snapshots can be listed, and restored to a DKube cluster.
Important
There are some items that are not backed up by this process. These are explained in the section Backup Exclusions
Note
For DKube version R2.x only, DKube must be stopped before initiating the backup. The following command is used to stop DKube.
The backup is initiated by the following command. A backup name must be provided.
List of Snapshots
To see a list of backup snapshots on the current provider, and to identify the ID for each one, the following command is used.
An output similar to the figure below will be shown.

Delete Backup Snapshot
A backup snapshot can be removed from the current storage location. This is accomplished by using the ID listed in the backup list.
Restore
The DKube restore function will take a DKube database and install it on the cluster.
Important
Restoring the database will overwrite the current database on that cluster
The restore function uses a backup ID to identify which backup to choose. The restore function is initiated by the following command, using the ID from the backup list. It will copy the database to the cluster and start DKube.
Restore Failure
If the restore fails, the user will be given the option of reverting to the DKube database that was on the cluster prior to the restore.
DKube Migration
The DKube database (Runs, Notebooks, Inferences, Models, Pipelines, etc) can be migrated from one cluster to another. This function is performed from the $HOME/.dkube/cli directory.
Important
The entities must all be in the Stopped state to initiate migration
Editing the Migration.ini File
In order to provide the source and destination information, the migration.ini file must be edited. An example ini file is provided below.
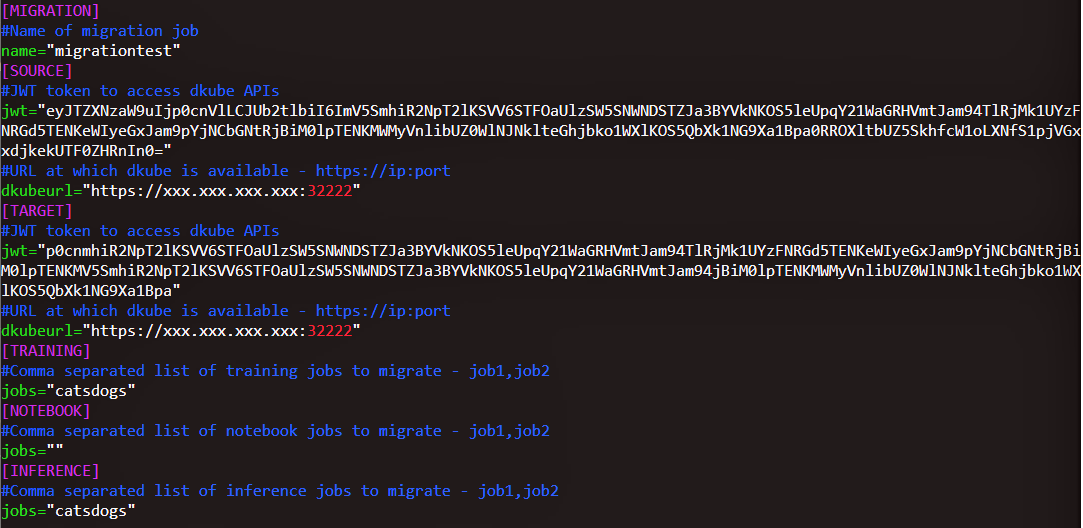
Important
The fields in the migration.ini files must be enclosed in quotes, as shown in the example
Field |
Value |
|---|---|
Name |
User-generated name to use for migration tracking |
JWT |
Authorization token as described below |
dkubeurl |
IP address of the DKube instance |
jobs |
List of entities to migrate |
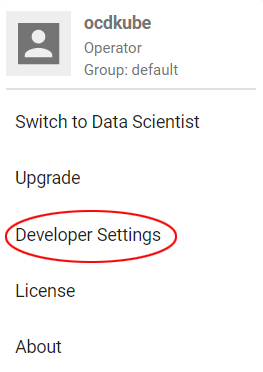
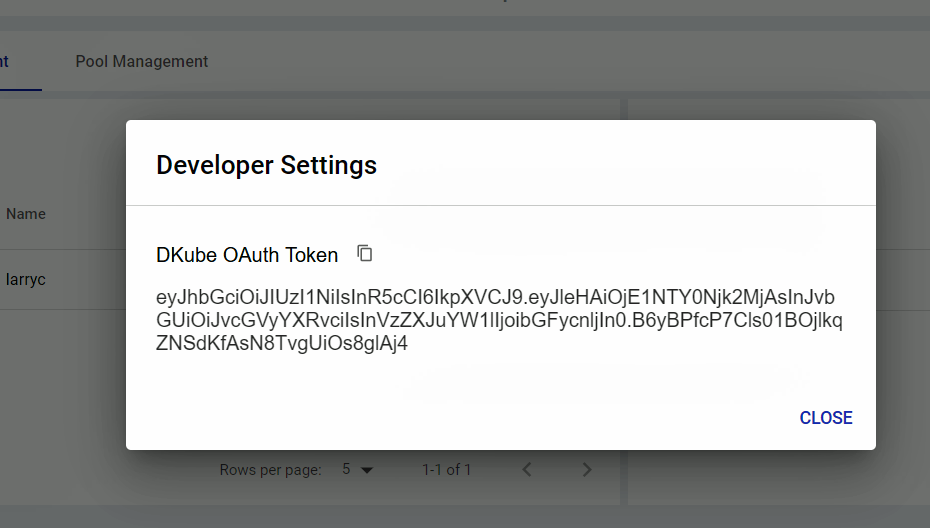
Getting the Access Token
The JWT token in the migration.ini file is available from the DKube Operator screen.
Executing the Migration
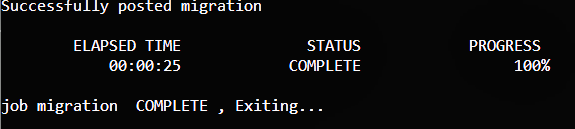
After the migration ini file has been filled in, the command to initate the migration is shown.
The migration will begin, and when the status shows 100% complete the app exits.
If the user wants to execute the migration more than once, one of the following steps must be taken:
Edit the migration.ini file to use another name
Delete the existing name using the following command.
Stop and Start DKube
If DKube needs to be stopped and restarted, the following commands can be used.
Stopping DKube
The following command will stop all activity in DKube:
Starting DKube
The following command will restart DKube after the cluster is brought back up:
Restarting DKube After Cluster Restart
When the cluster is restarted after a shutdown, DKube will restart automatically. In order to determine if DKube is operational again, the following command will provide the current status.
Docker Status
If DKube does not respond after a few minutes, it is possible that Docker has not restarted properly after the cluster was brought back up. The following command will provide the current status of Docker:
If Docker is not active, the following command will restart it:
Managing the Kubernetes Cluster
Adding A100 GPUs to the Cluster
For nodes that include NVIDIA A100 GPUs on them, additional setup needs to be performed for DKube to correctly use them in MIG mode. MIG mode is described in detail at Introduction to MIG
Enable MIG Devices
In order to enable MIG mode for the A100 GPUs, run the following command:
Note
If the above command asks for a reboot, then reboot the system using the “sudo reboot” command, and rerun the command when the system has restarted
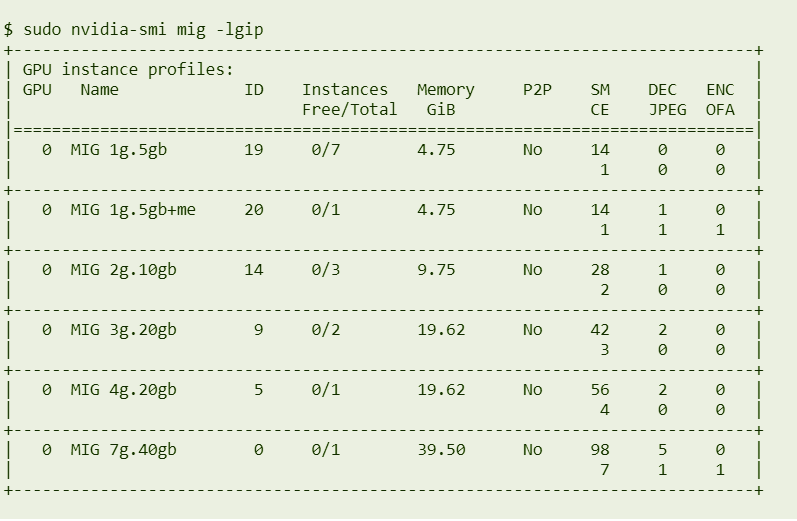
List GPU Instance Profiles
Get a list of the GPU instance profiles by running the following command:
This will bring up the information in a form similar to the image below.
Create MIG Devices
MIG devices are created using a command of the form:
For example, the following command will create:
3 instances with the MIG profile 1g.5gb, and
2 instances with the MIP profile 2g.10gb
Delete MIG Instances
MIG Instances can be deleted by the following command:
Changing Nodes or GPUs
Changing nodes or GPUs on the cluster is done through the specific managed k8s platform. The only requirement is that the necessary software drivers be installed on the new node if the platform requires it. This is accomplished based on the k8s platform used.
For changes in nodes
Edit the $HOME/.dkube/k8s.ini file to add the new nodes as described in this section
The other fields should not be changed
Ensure that the new node is accessible passwordlessly from the installation node as described in Cluster Access from the Installation Node
For either node or GPU changes
Run the node setup command as described in Node Setup to install prepare the new nodes
DKube will automatically recognize the new nodes after the setup command.
No DKube-related setup is required.
For changes in nodes
Edit the $HOME/.dkube/k8s.ini file to add the new nodes as described in this section
The other fields should not be changed
Ensure that the new node is accessible passwordlessly from the installation node as described in Cluster Access from the Installation Node
For either node or GPU changes
Run the node setup command as described in Node Setup to install prepare the new nodes
DKube will automatically recognize the new nodes after the setup command.